
How to Export a Policy
Follow these steps to export a policy from the system:Any filters applied on the Policies page will carry over to the export. Make sure to apply your desired filters before exporting.
Step 1: Filter Policies
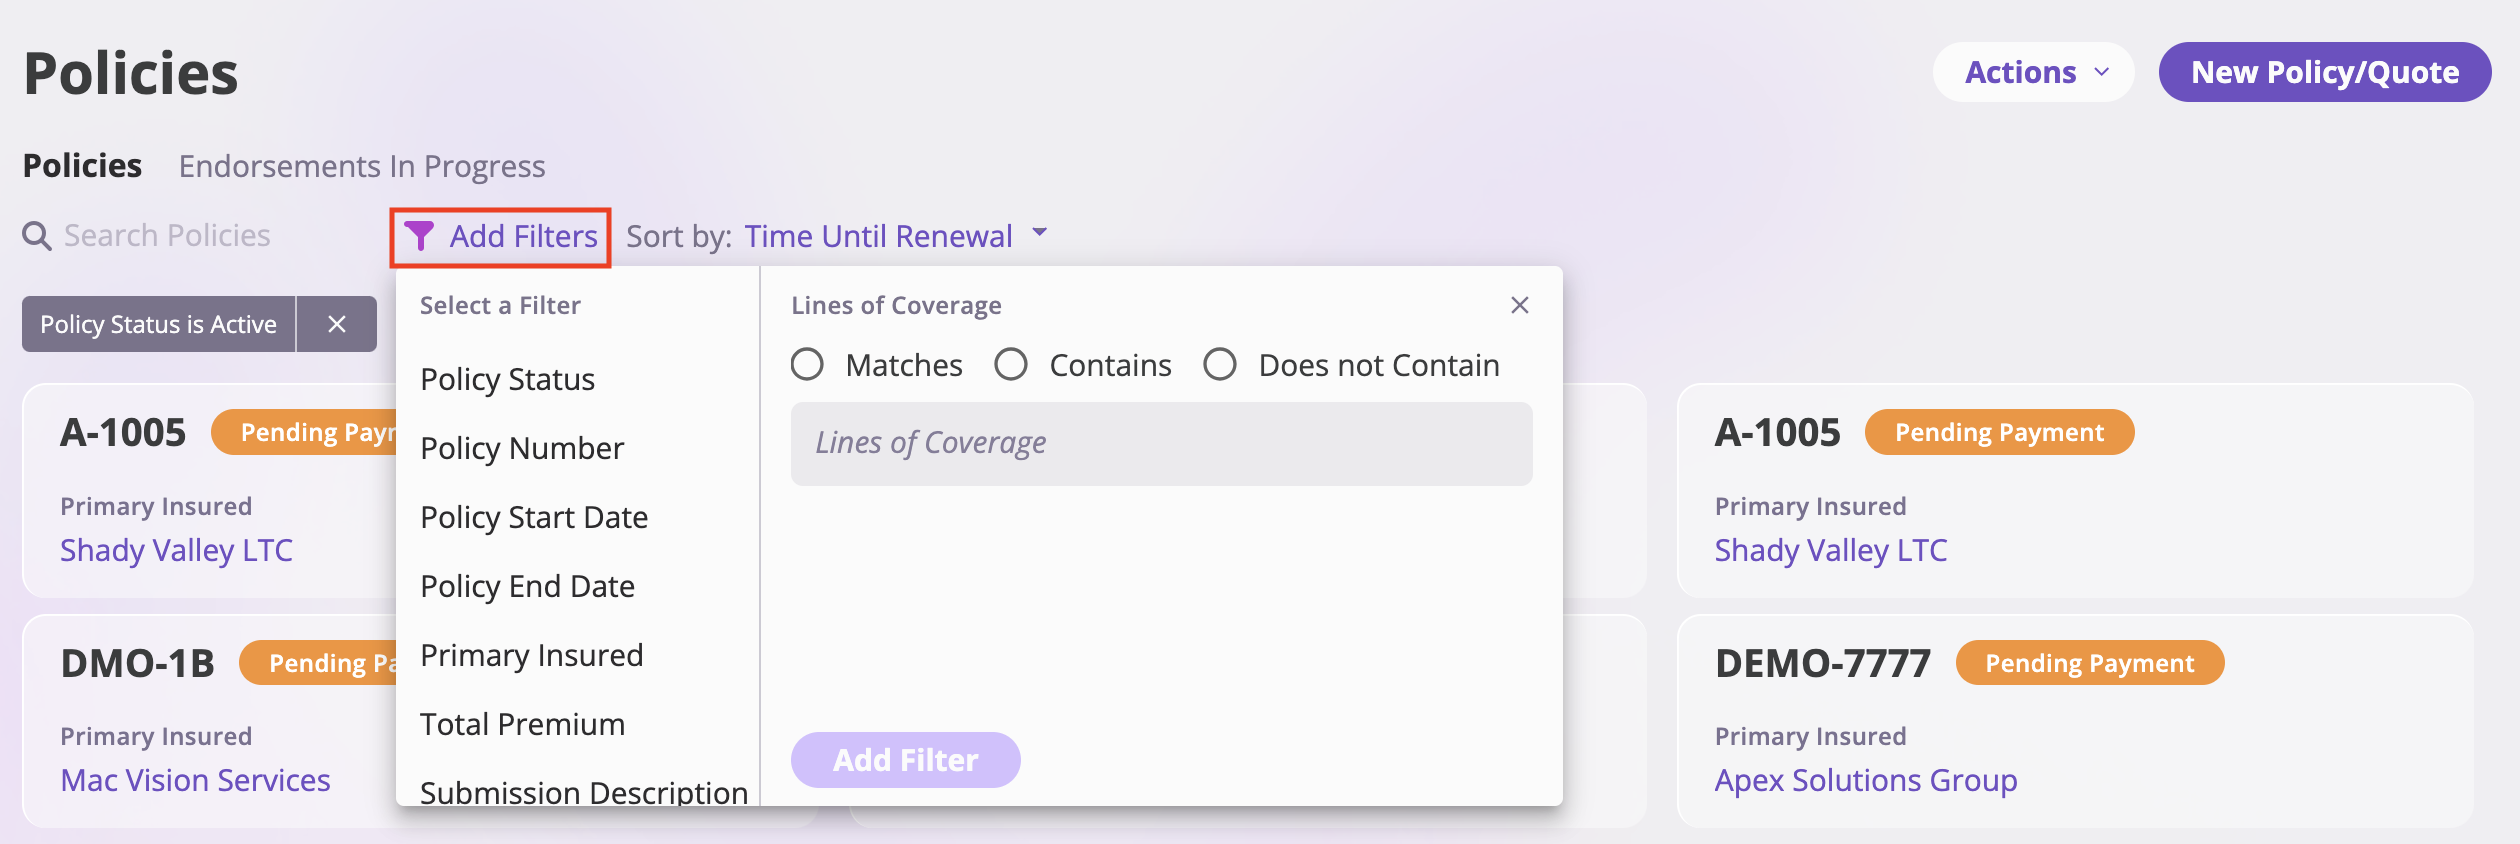
- Select the Policies tab from the sidebar
- Click the Add Filters button to open the filter menu
- Select your desired filter criteria from the available options
- Click Add Filter to apply your selected criteria
- The filtered results will display only the policies matching your criteria
Step 2: Access Export Options
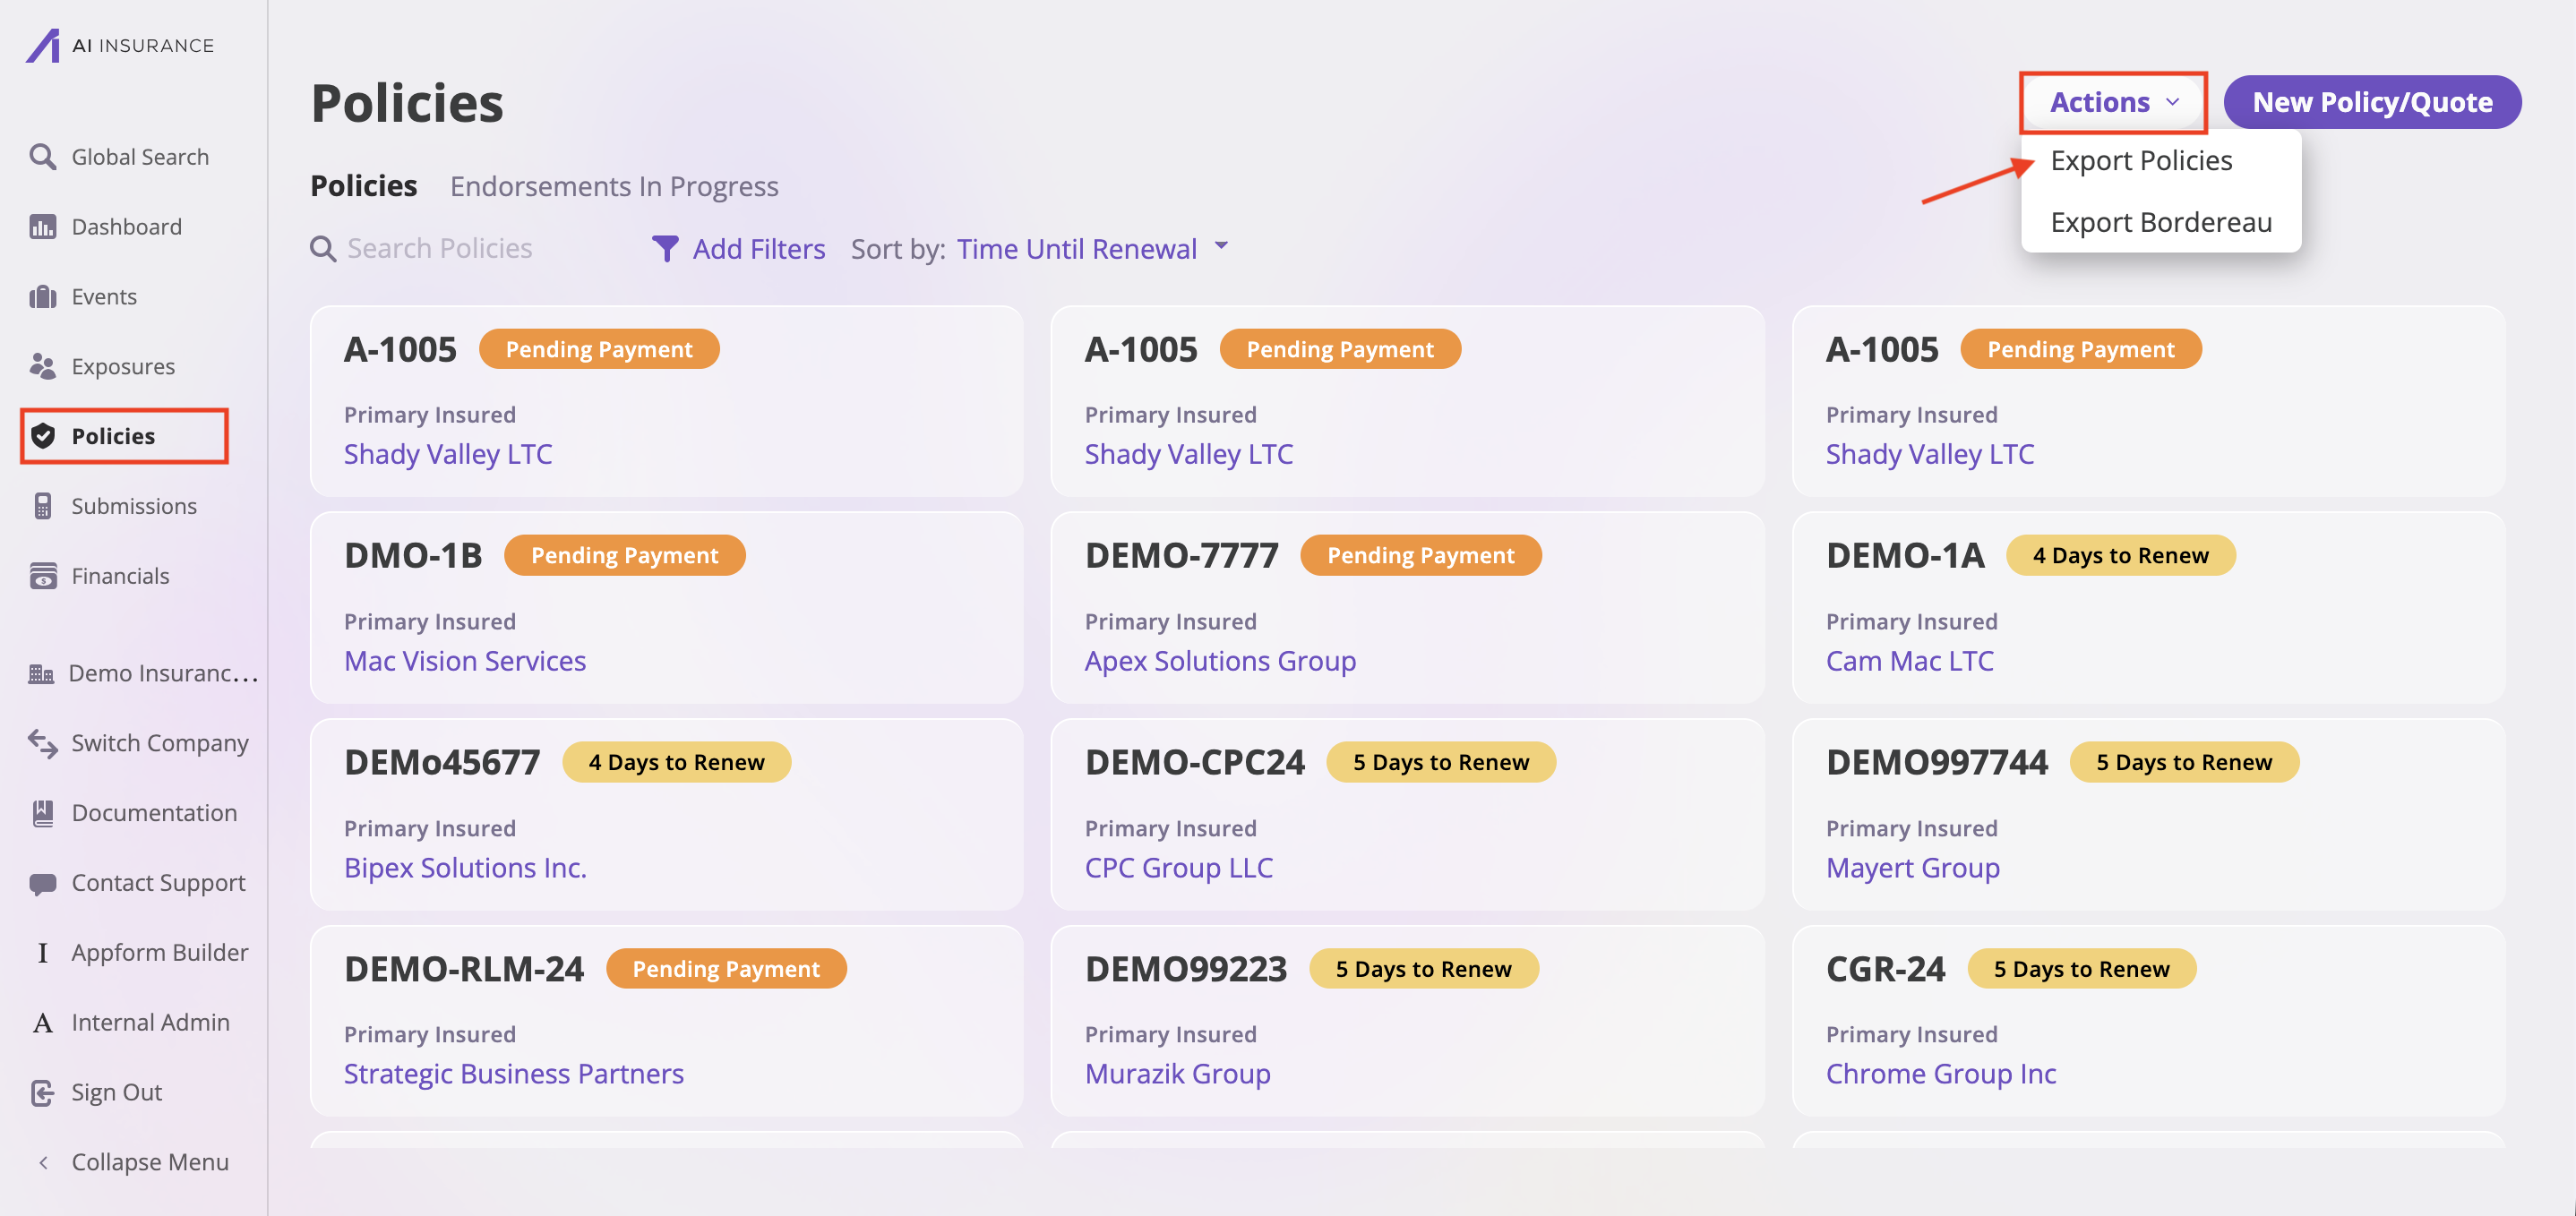
- Click the Actions dropdown in the top right corner
- Select Export Policies from the dropdown menu
Step 3: Configure Export Settings
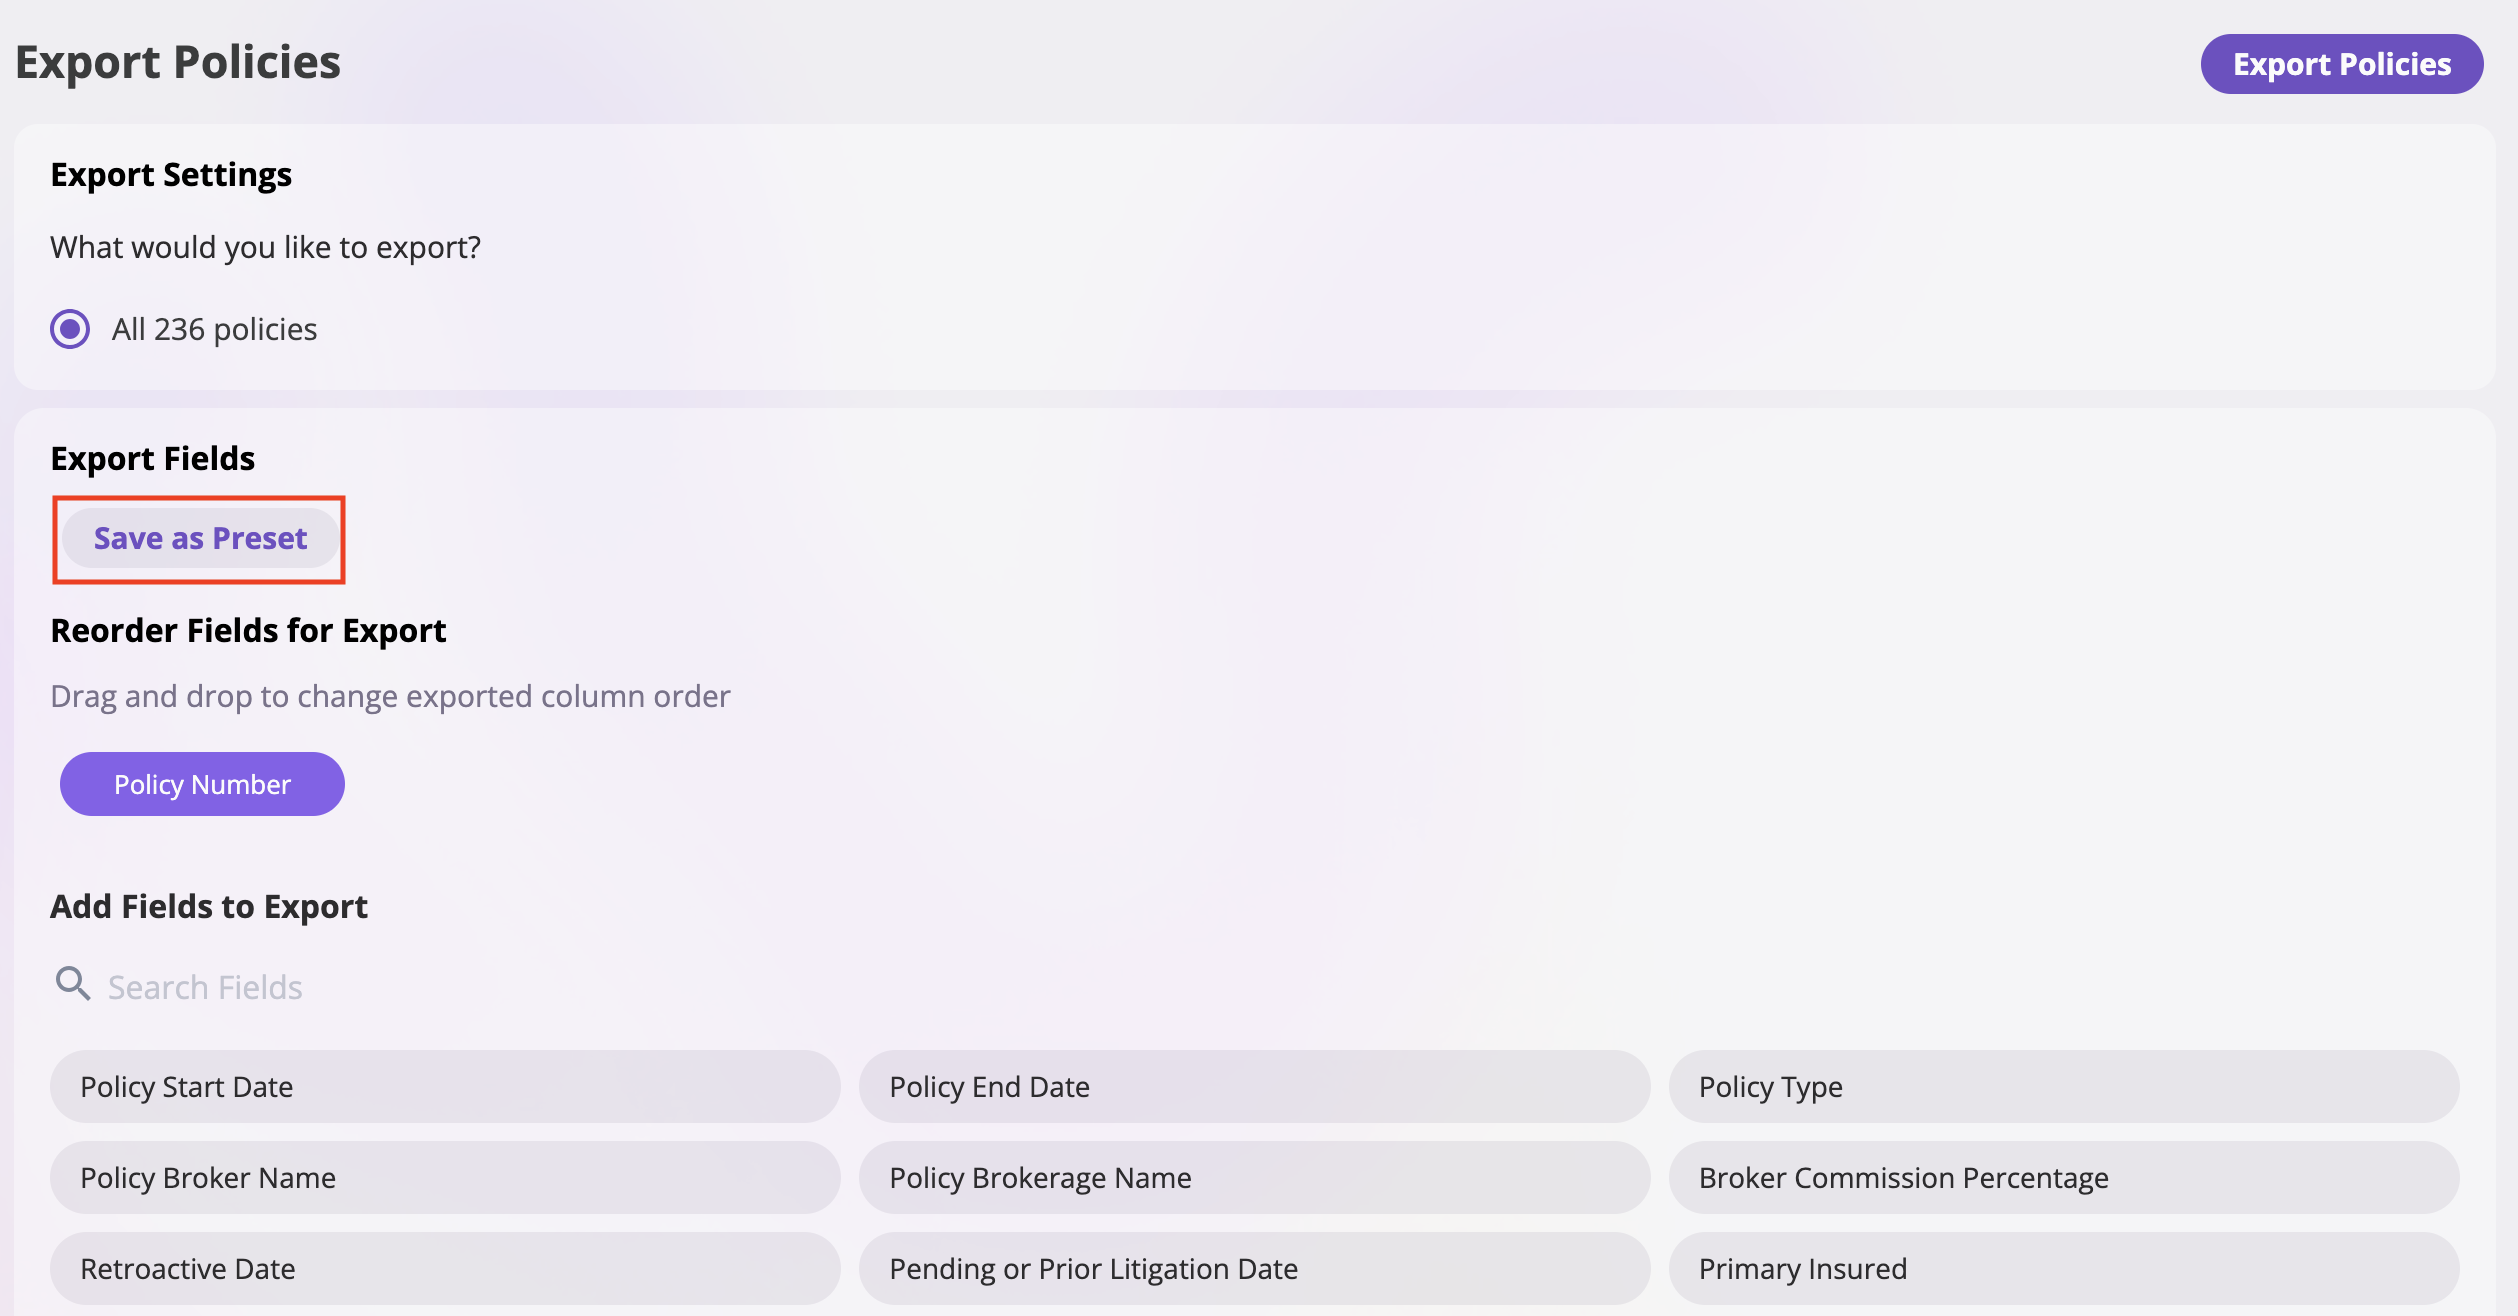
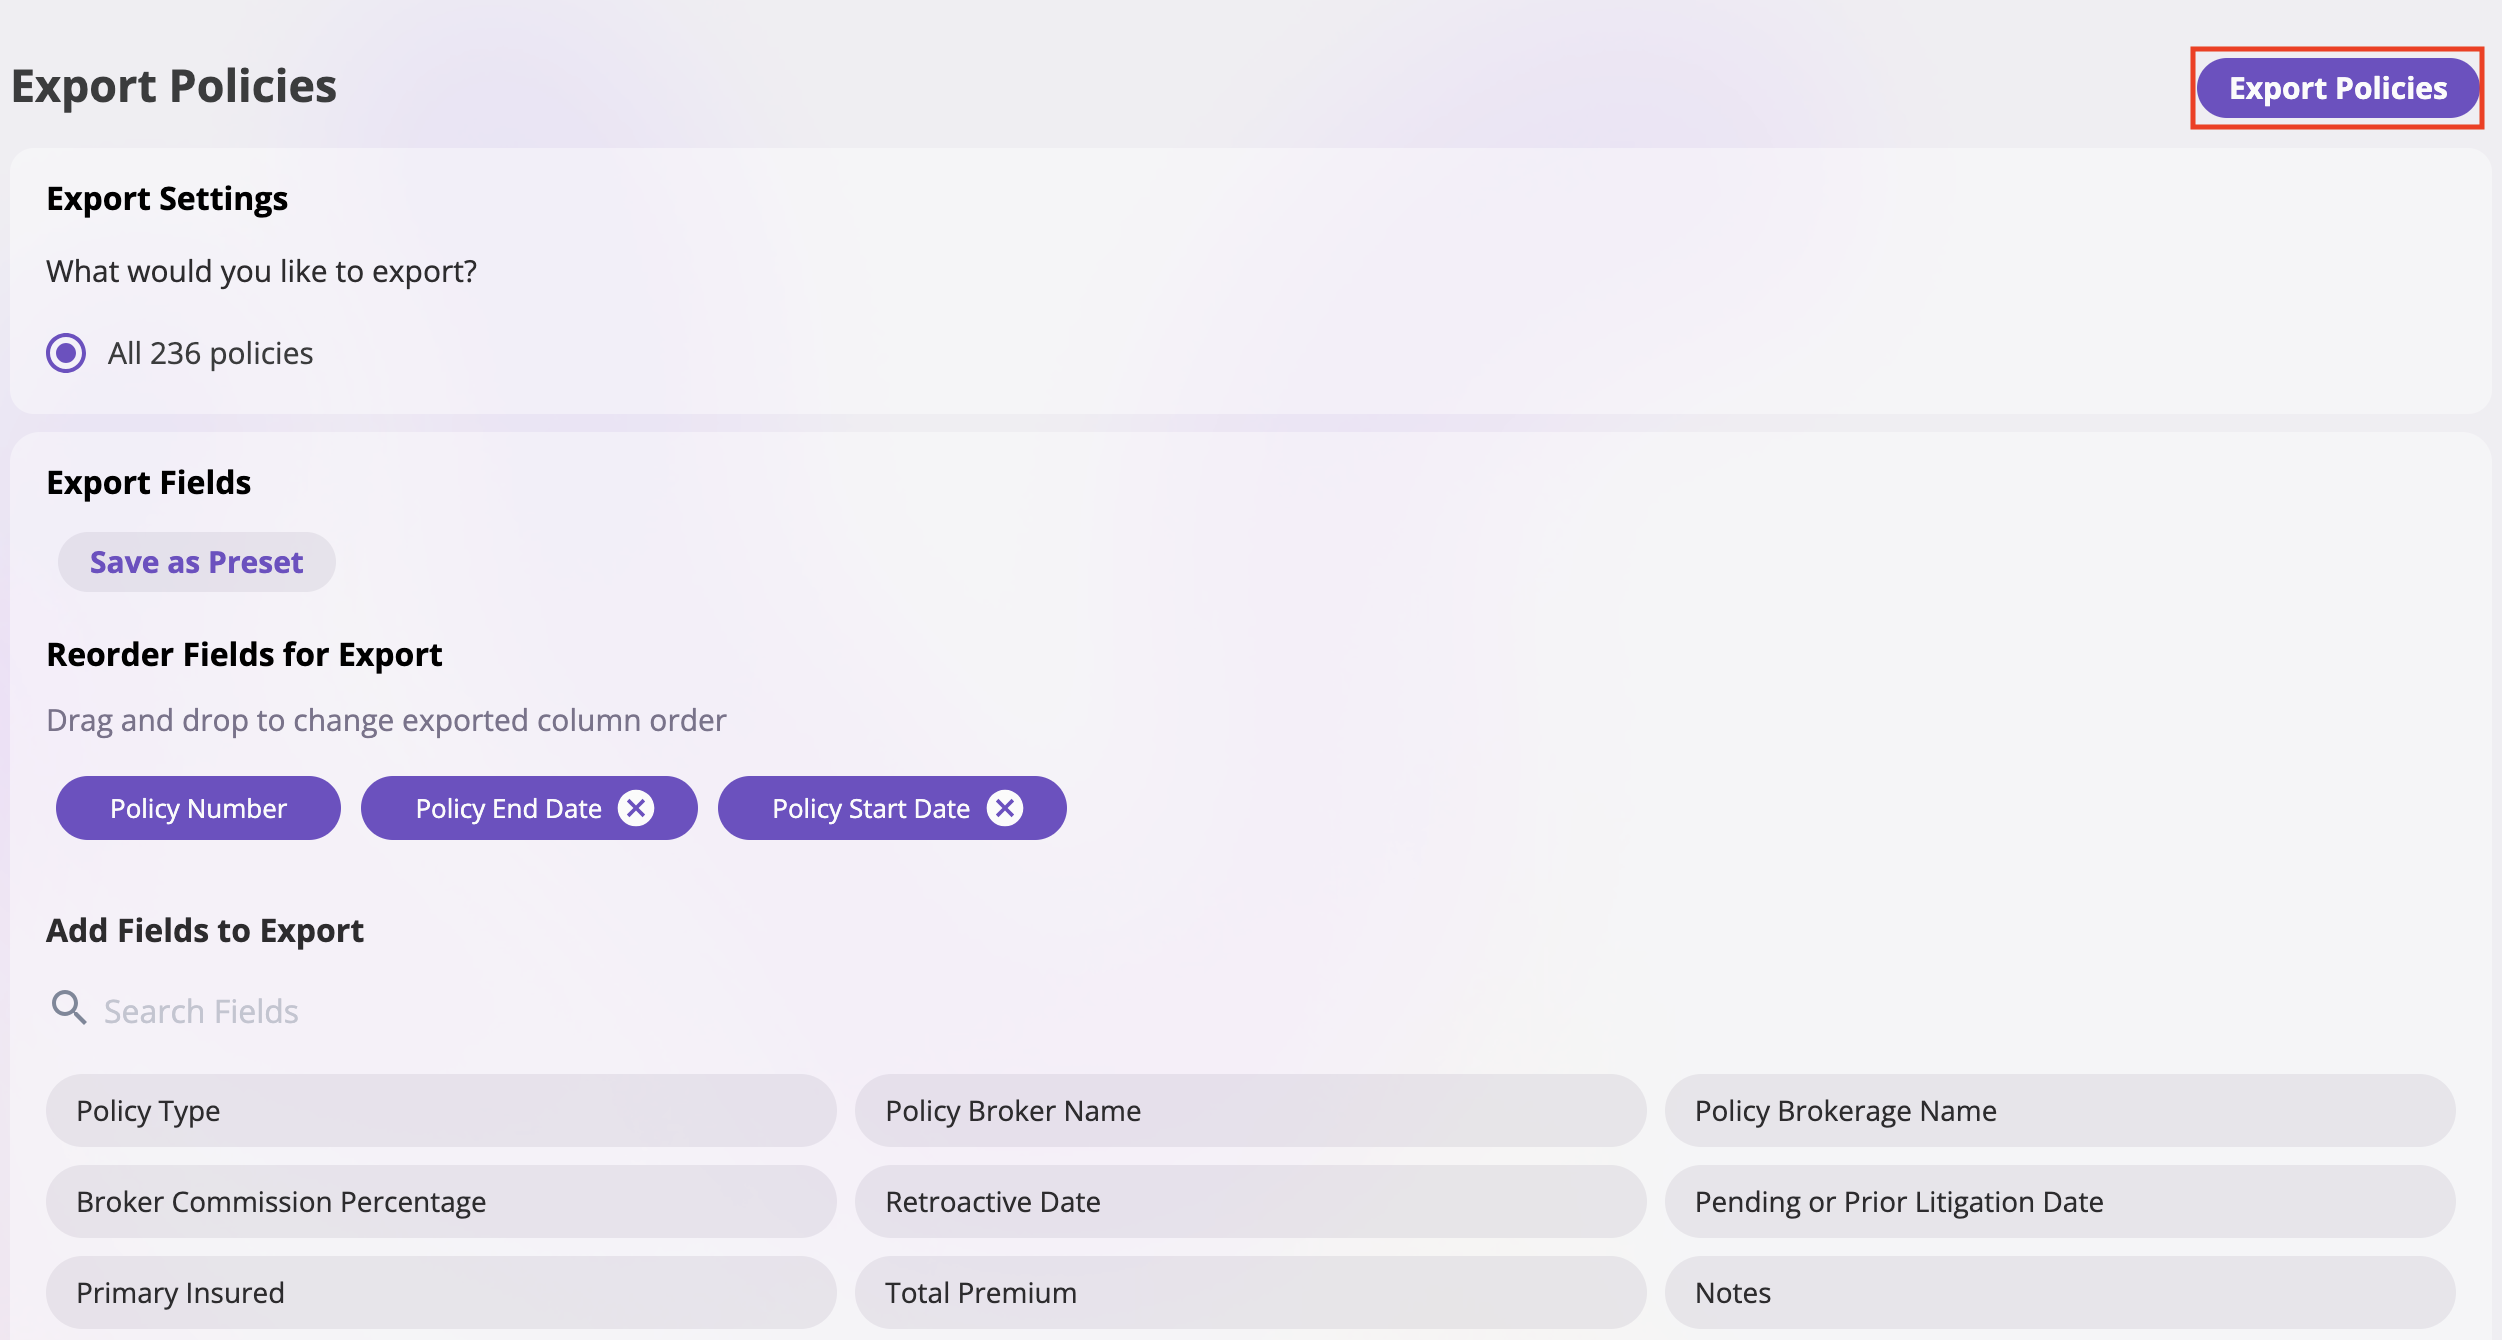
- Verify that the policies you want to export are selected (you can see “All 236 policies” or your filtered selection)
- Save as Preset (Optional):
- Click the Save as Preset button to save your current field configuration
- Enter a name for your preset in the popup dialog
- Click Save to save the preset or Cancel to close without saving

- Click the Save as Preset button to save your current field configuration
- Add Fields to Export: Click on any field tags in the “Add Fields to Export” section to include them in your export
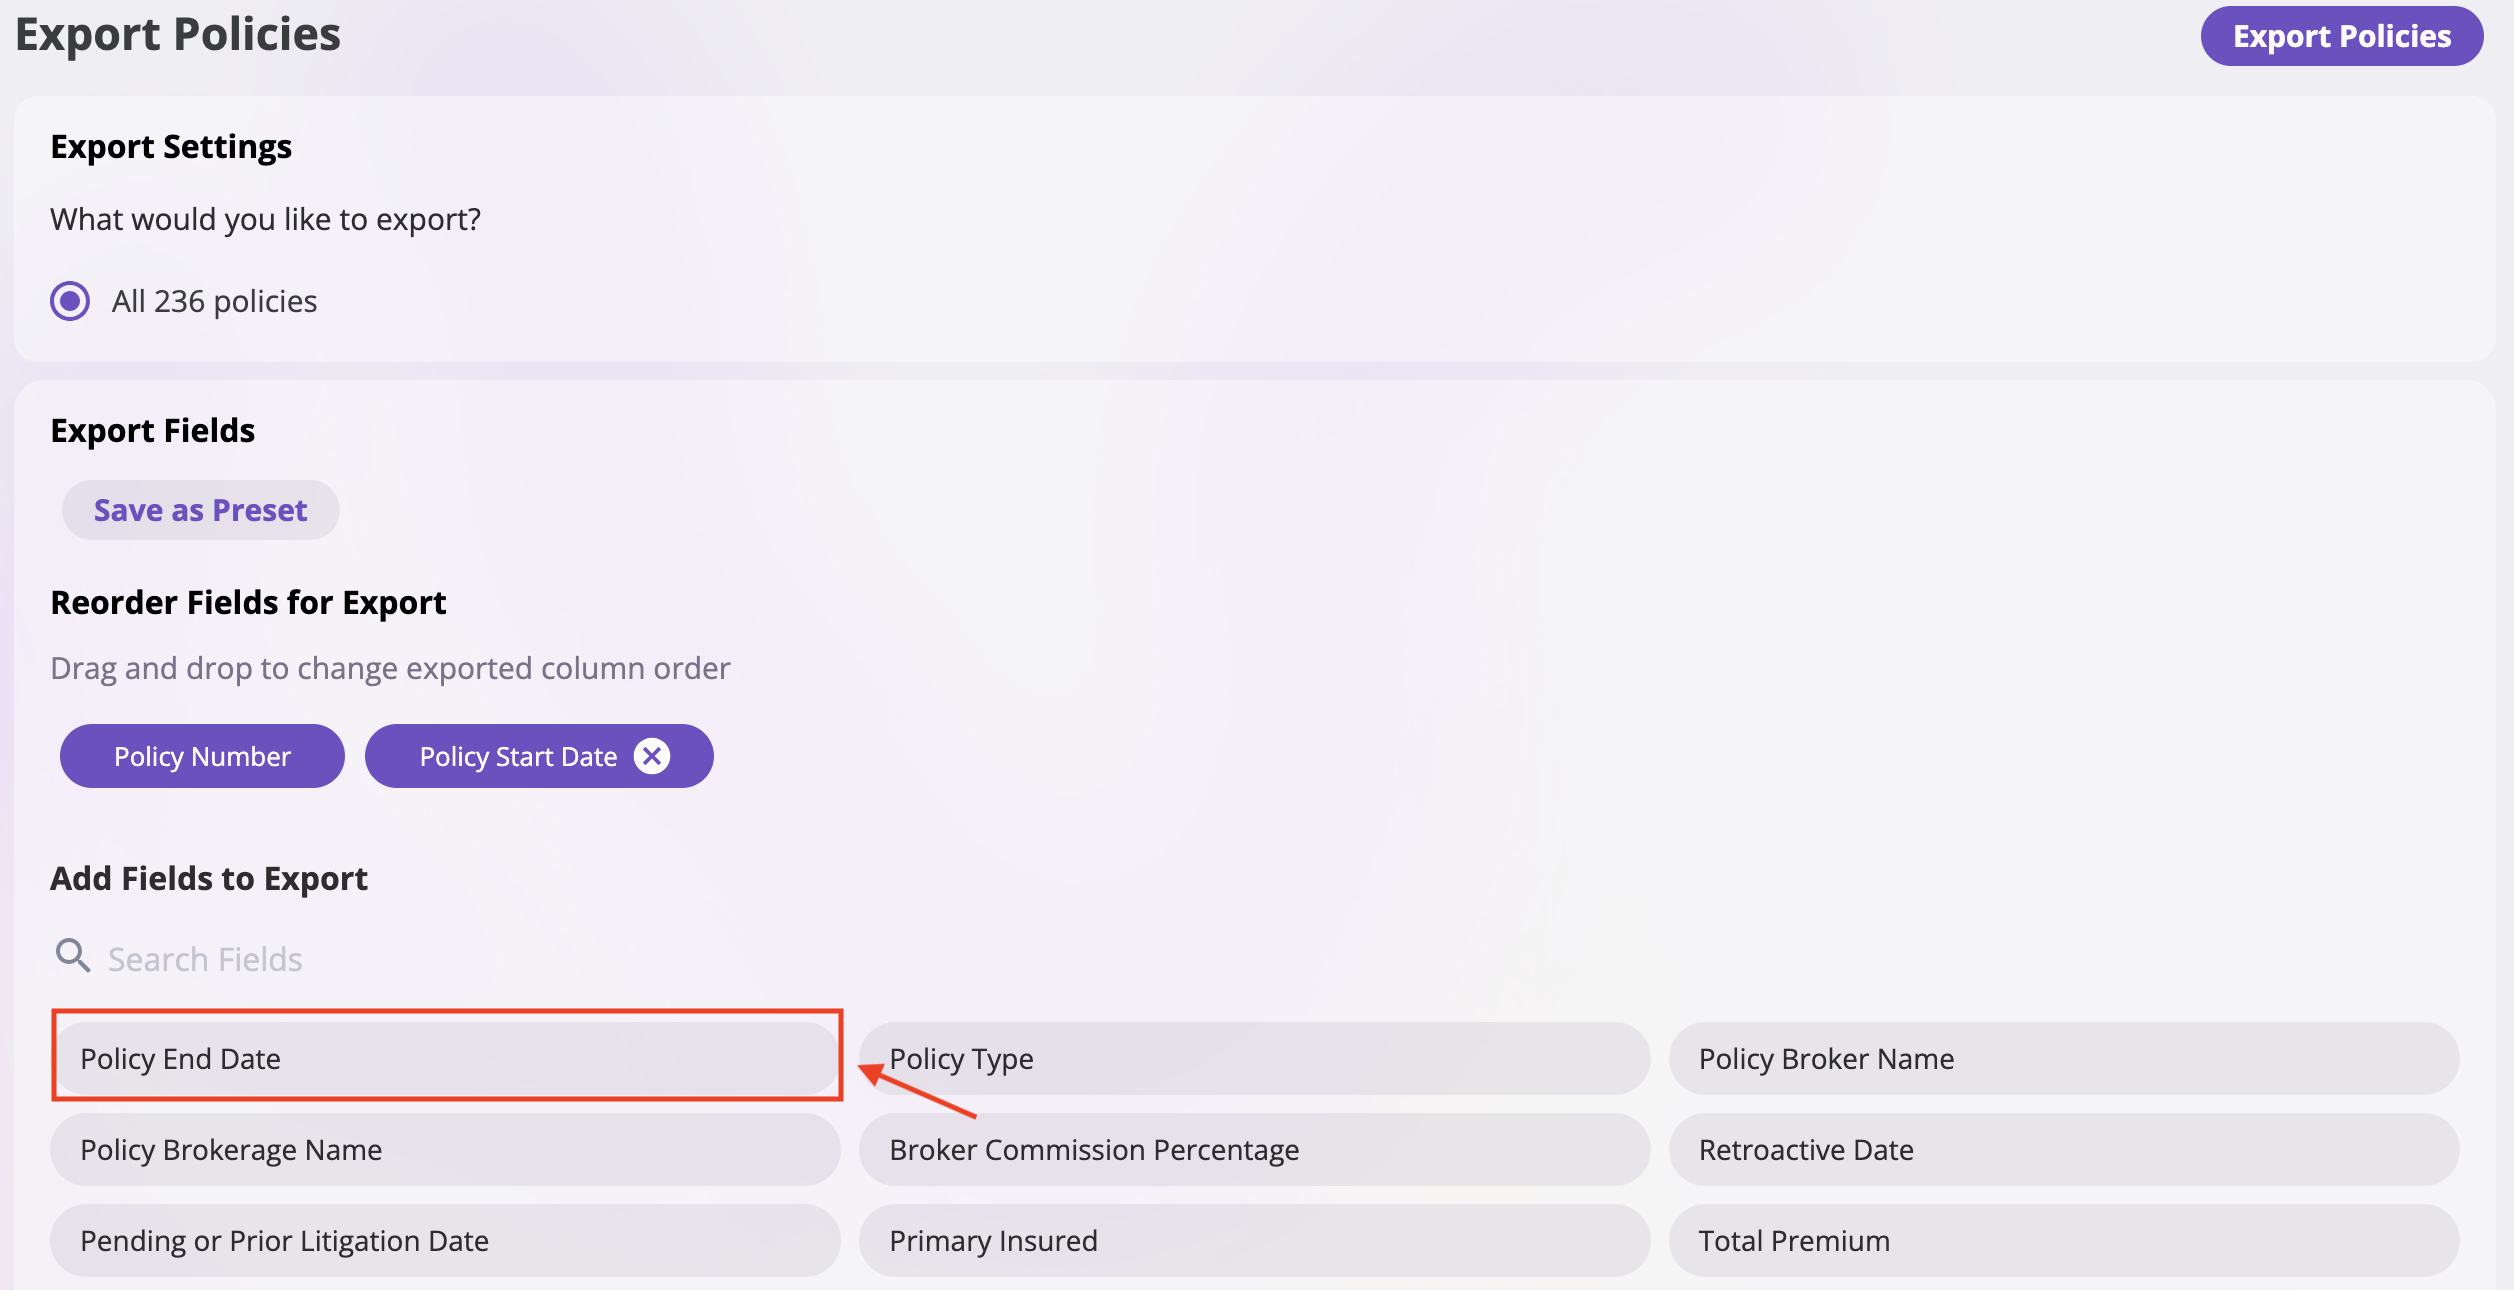
- Reorder Fields: Drag and drop the selected fields in the “Reorder Fields for Export” section to change the column order
- Click Export Policies to generate and download your export
Step 4: Download the Export
The export file will be automatically downloaded to your computer based on your browser’s download settings once you click Export Policies.Exposure Rating Fields
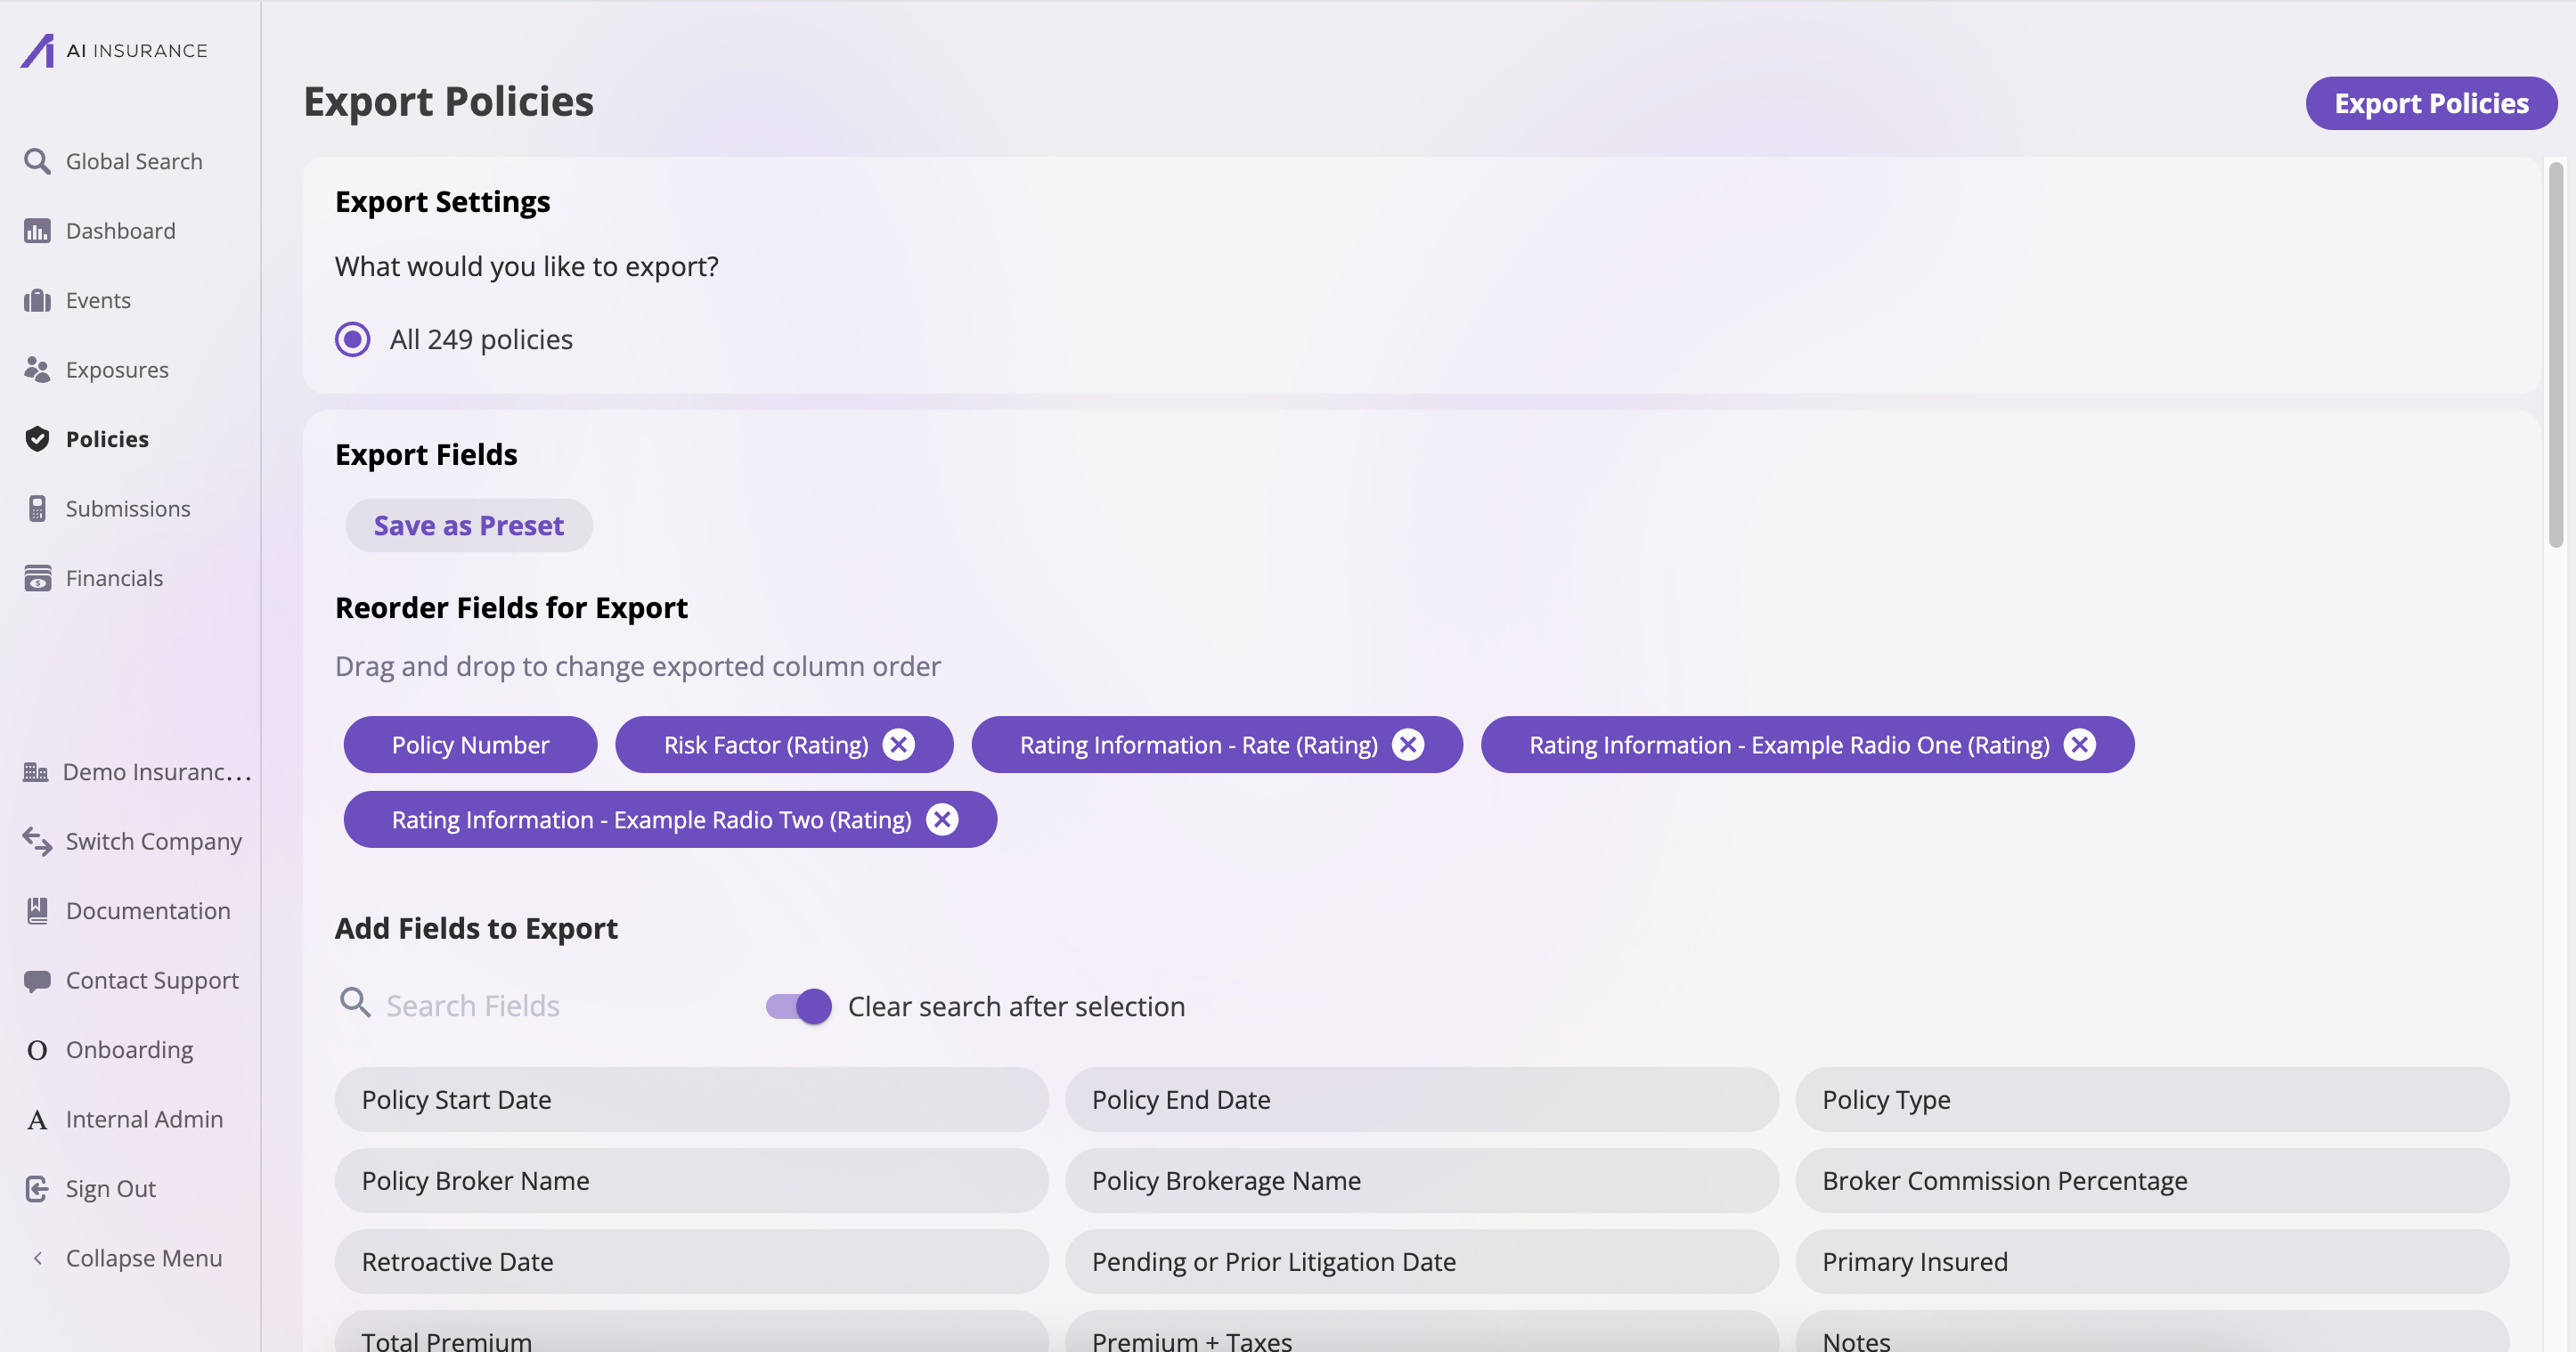
This feature adds exposure rating fields to policy export. The exposure rating field values are populated with the values set on the primary insured. In other words, it’s as if all the primary insured fields became fields on the policy itself (during the export flow). This means that:- For Policy export, we use the primary insured field value for the given point in time of the export
- Group fields get concatenated into one cell
Policy Amount Fields
Policy exports include several categories of amount-related fields. Understanding the differences between them is important for accurate reporting.Rated amounts, billed amounts, and financial amounts can differ for the same policy. This is expected — each category serves a distinct purpose and reflects different amounts.
Rated Amount Fields
These fields reflect amounts calculated by the rating engine at the time of rating:Billed Amount Fields
These fields reflect amounts generated by the quoting process — that is, amounts on invoices created when a quote is bound. They only include amounts that have been billed through the system.Related Field
Note: Rated vs. Billed vs. Financial Amounts
AI Insurance tracks policy amounts in three distinct ways:- Rated Amounts (e.g., Total Premium, Broker Commission, modification/tax/fee fields): Amounts calculated by the rating engine per the policy terms. These reflect the intended premium and adjustments at the time of rating.
- Billed Amounts (e.g., Total Bill, Total Paid): Amounts that have been invoiced and collected through the quoting process. Total Bill is the sum of premium, taxes, and fees on generated invoices. Total Paid is the total collected against those invoices.
- Financial Amounts (e.g., Premiums - Total, available in financial exports): Transaction-based ledger totals from AI Insurance’s financial system. These track actual financial activity and can differ from rated or billed amounts when users create or edit transactions outside of the quoting flow.