How to Export a Loss Run Report
Follow these steps to export a loss run report for a specific insured:Any filters applied on the Exposures page will carry over to the export. Make sure to apply your desired filters before exporting.
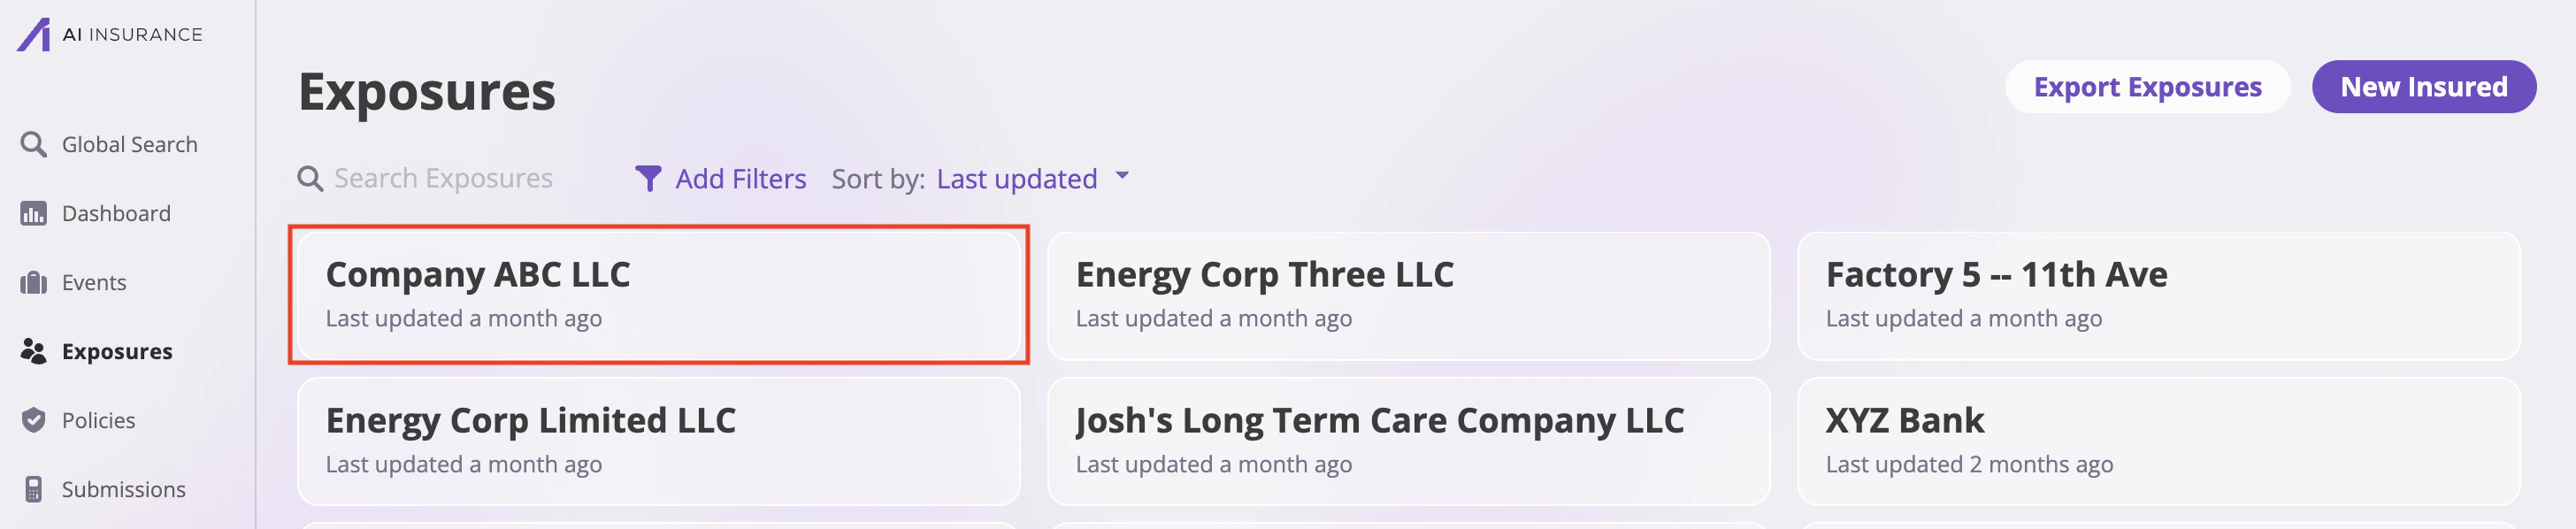
Step 1: Navigate to Exposures
- Go to the Exposures page by clicking on the Exposures tab in the left sidebar
- Search for and select the insured you want to generate a loss run report for
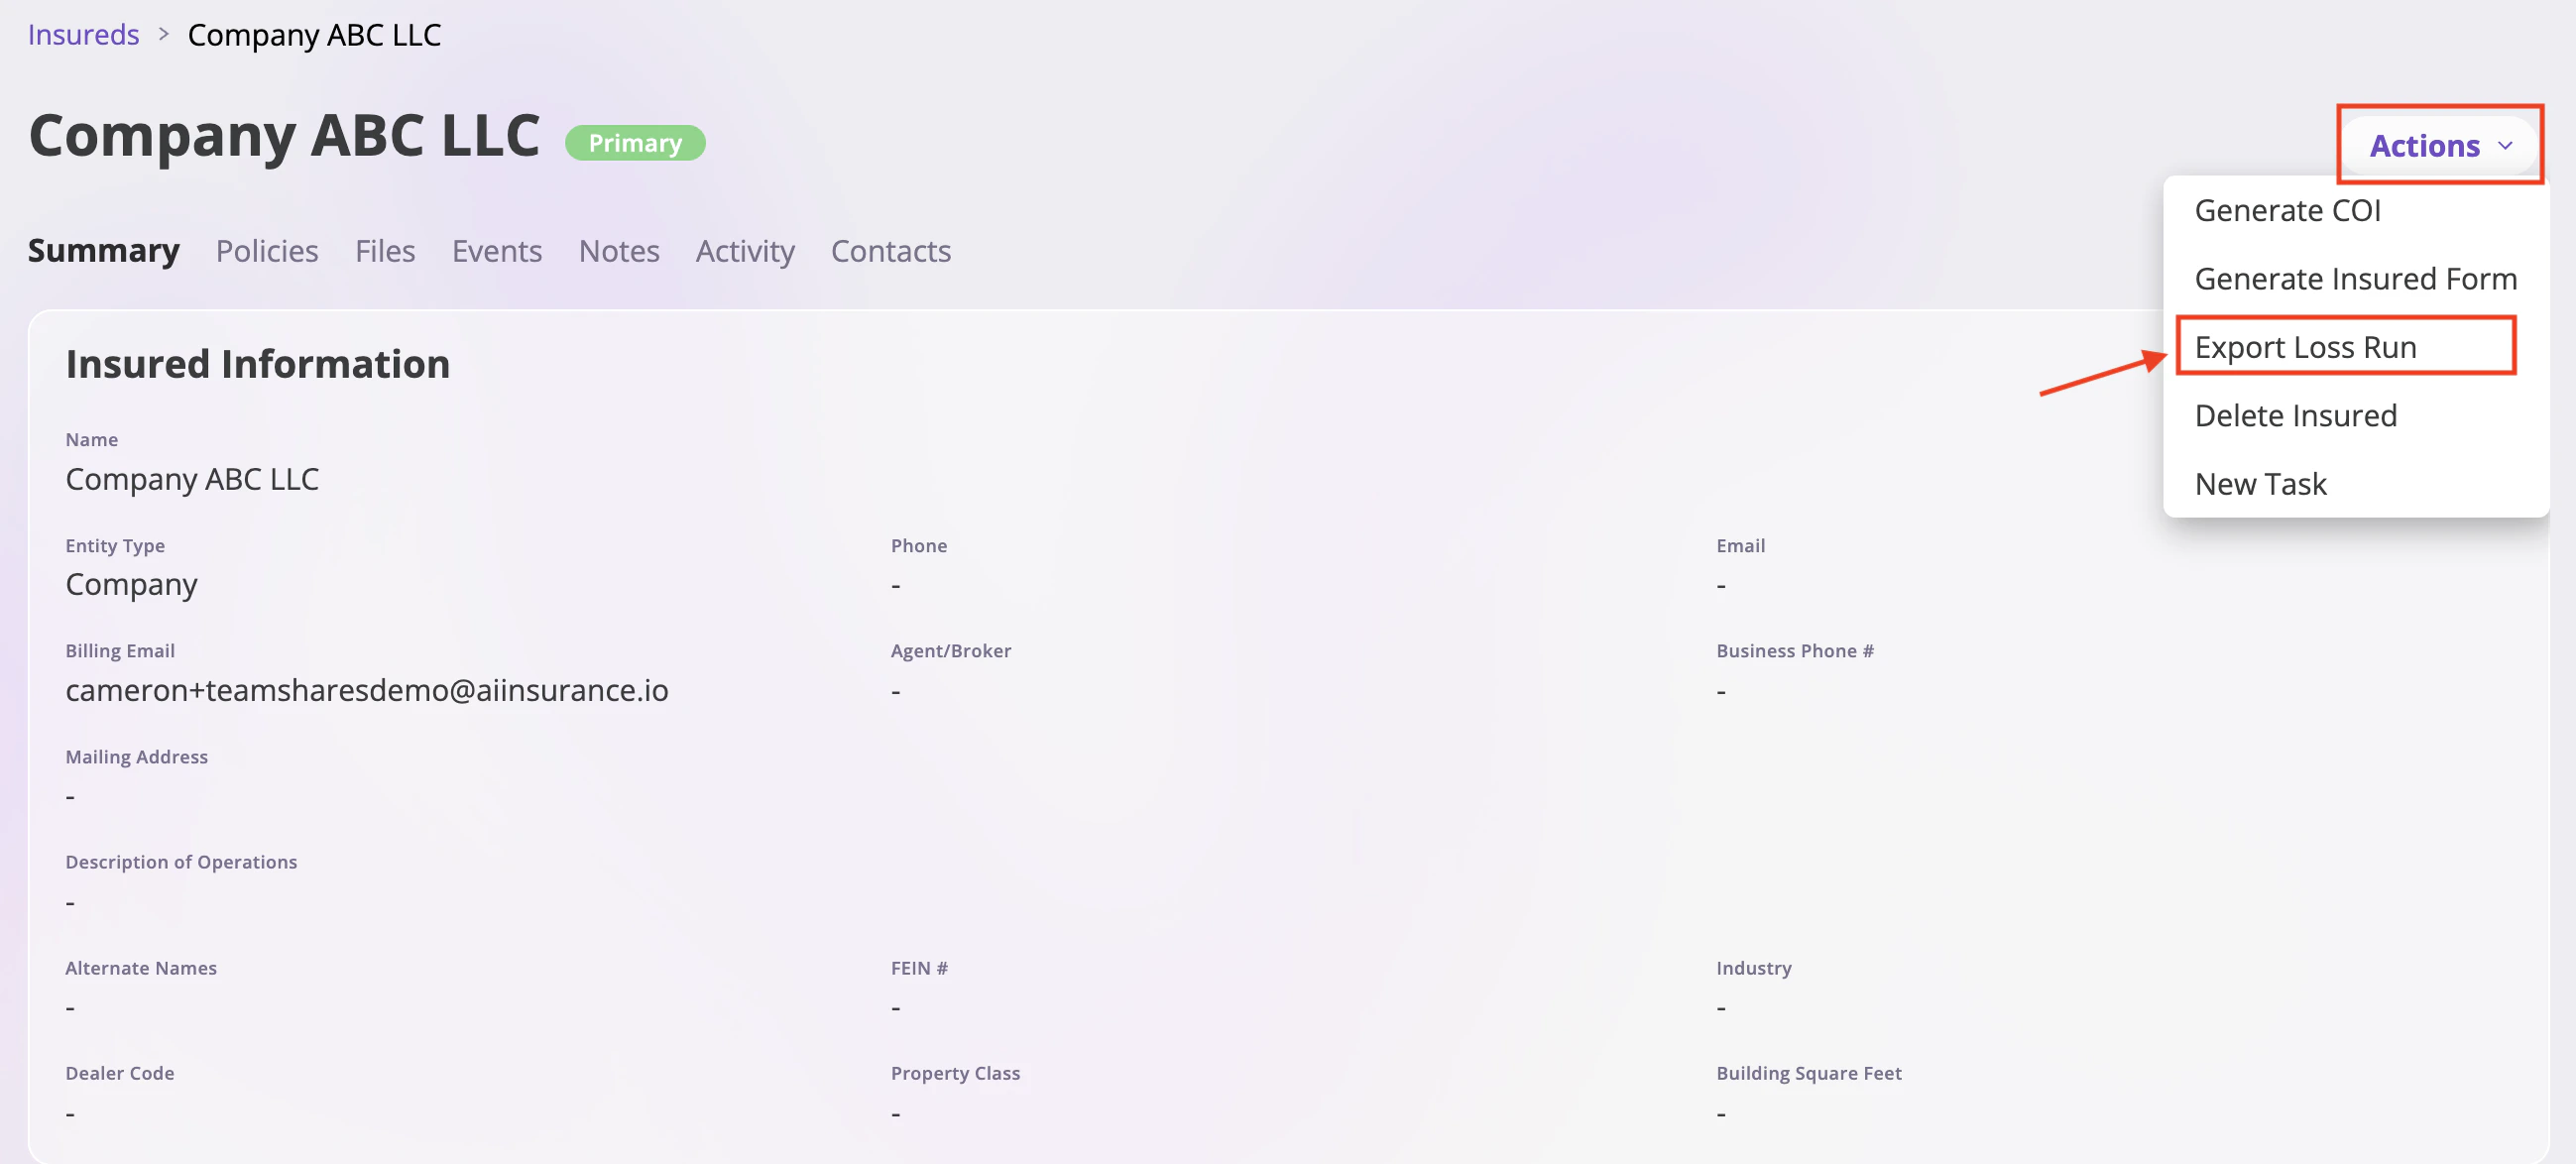
Step 2: Access Export Options
- Once you’ve selected the insured, look for the Actions dropdown menu
- Click on the Actions dropdown button
- Select “Export Loss Run” from the dropdown options
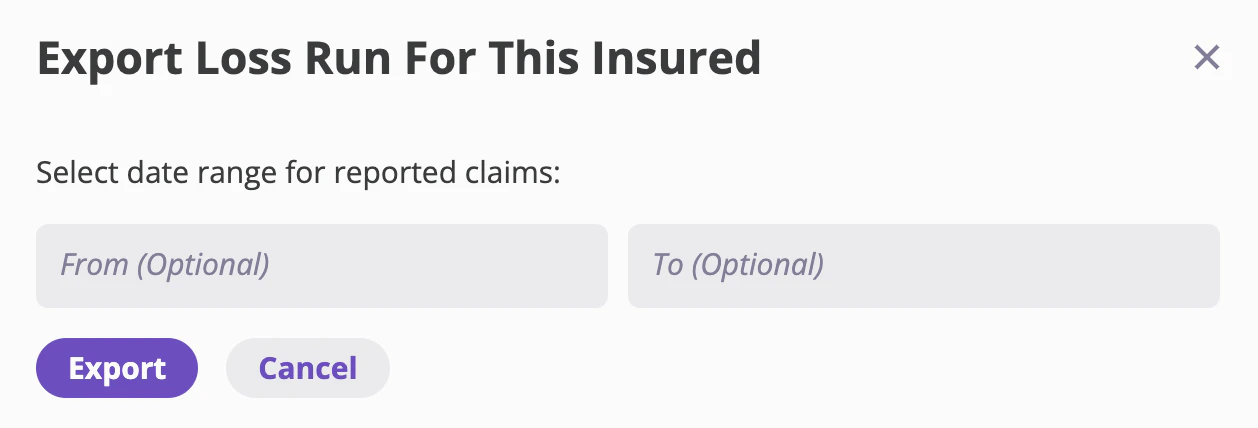
Step 3: Configure Date Range
The “Export Loss Run For This Insured” modal will open with the following options:- Select date range for reported claims:
- From (Optional): Enter the start date for the report period
- To (Optional): Enter the end date for the report period
- If no dates are specified, the report will include all available claims data
Step 4: Insured Page Review
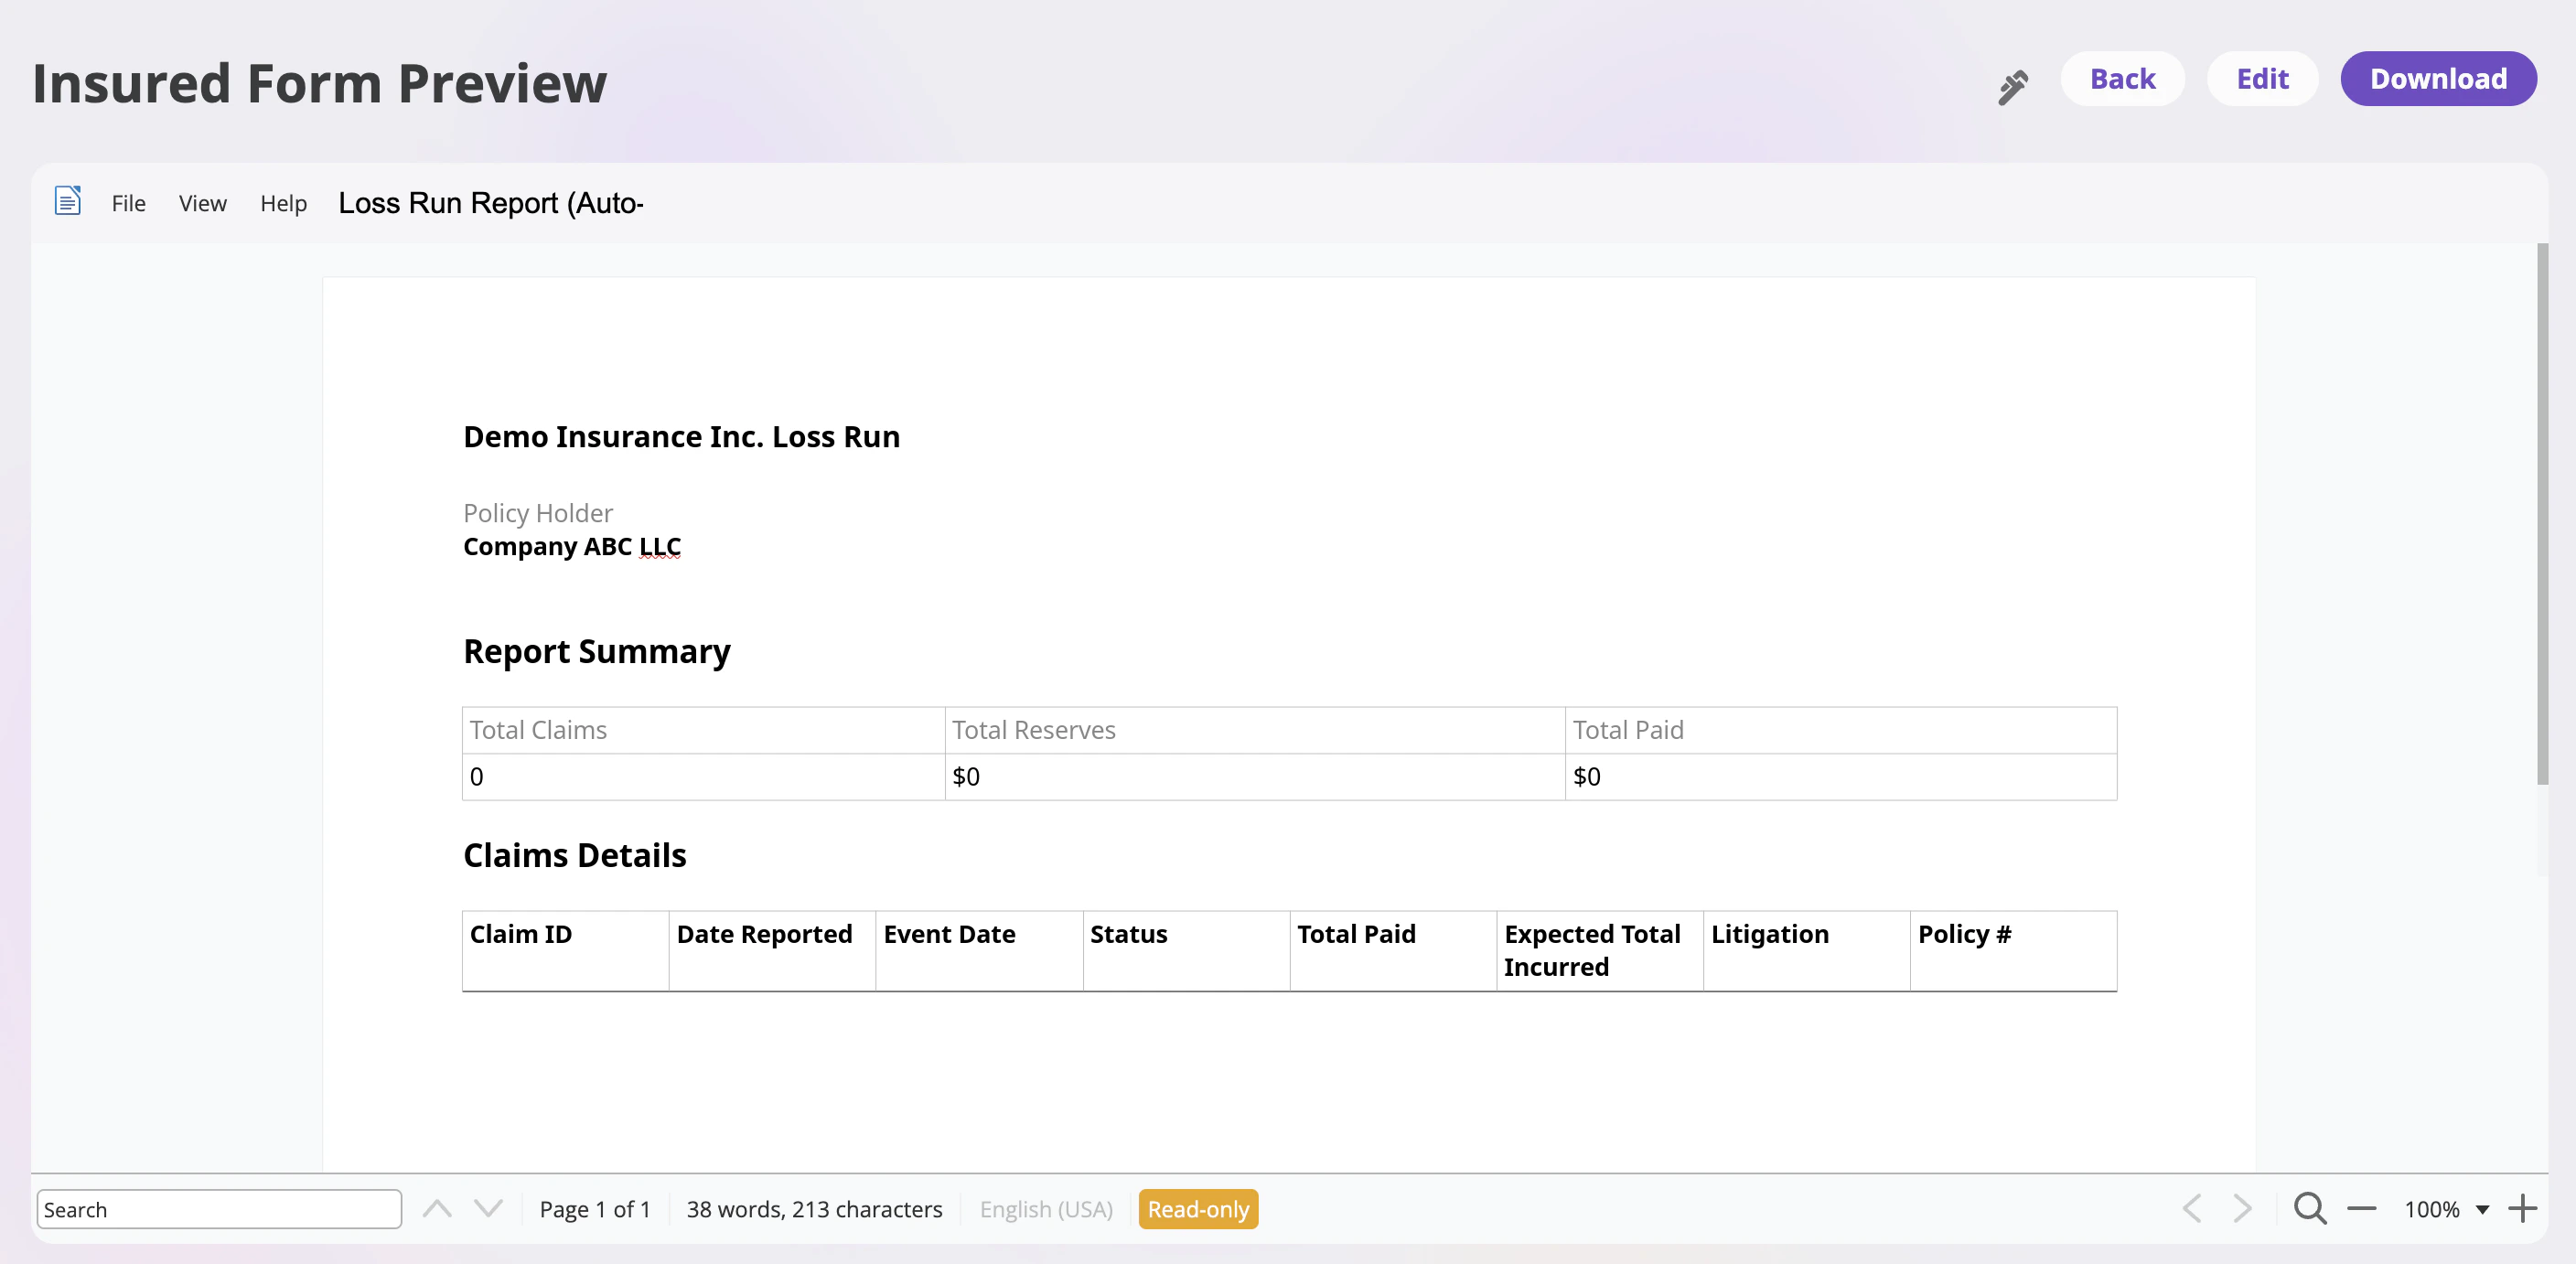
- Click the “Export” button to generate the report
- The system will process the data and generate a PDF report
- The PDF will automatically download to your device
- You can also click “Edit” to make changes to the form before exporting
- Click “Cancel” if you want to close the modal without exporting
Customizing the Loss Run Report Form
If you need to make changes to the loss run report template (such as adding fields, modifying layout, or updating formatting), you can edit the form template:- Navigate to your Company settings in the left sidebar
- Go to the Forms tab
- Find and select the “Loss Run Report” form
- Make your desired changes using the form editor
- Save your updates