1. Locate the Submission
- On the left sidebar, select Submissions.
- Find and open the desired submission.
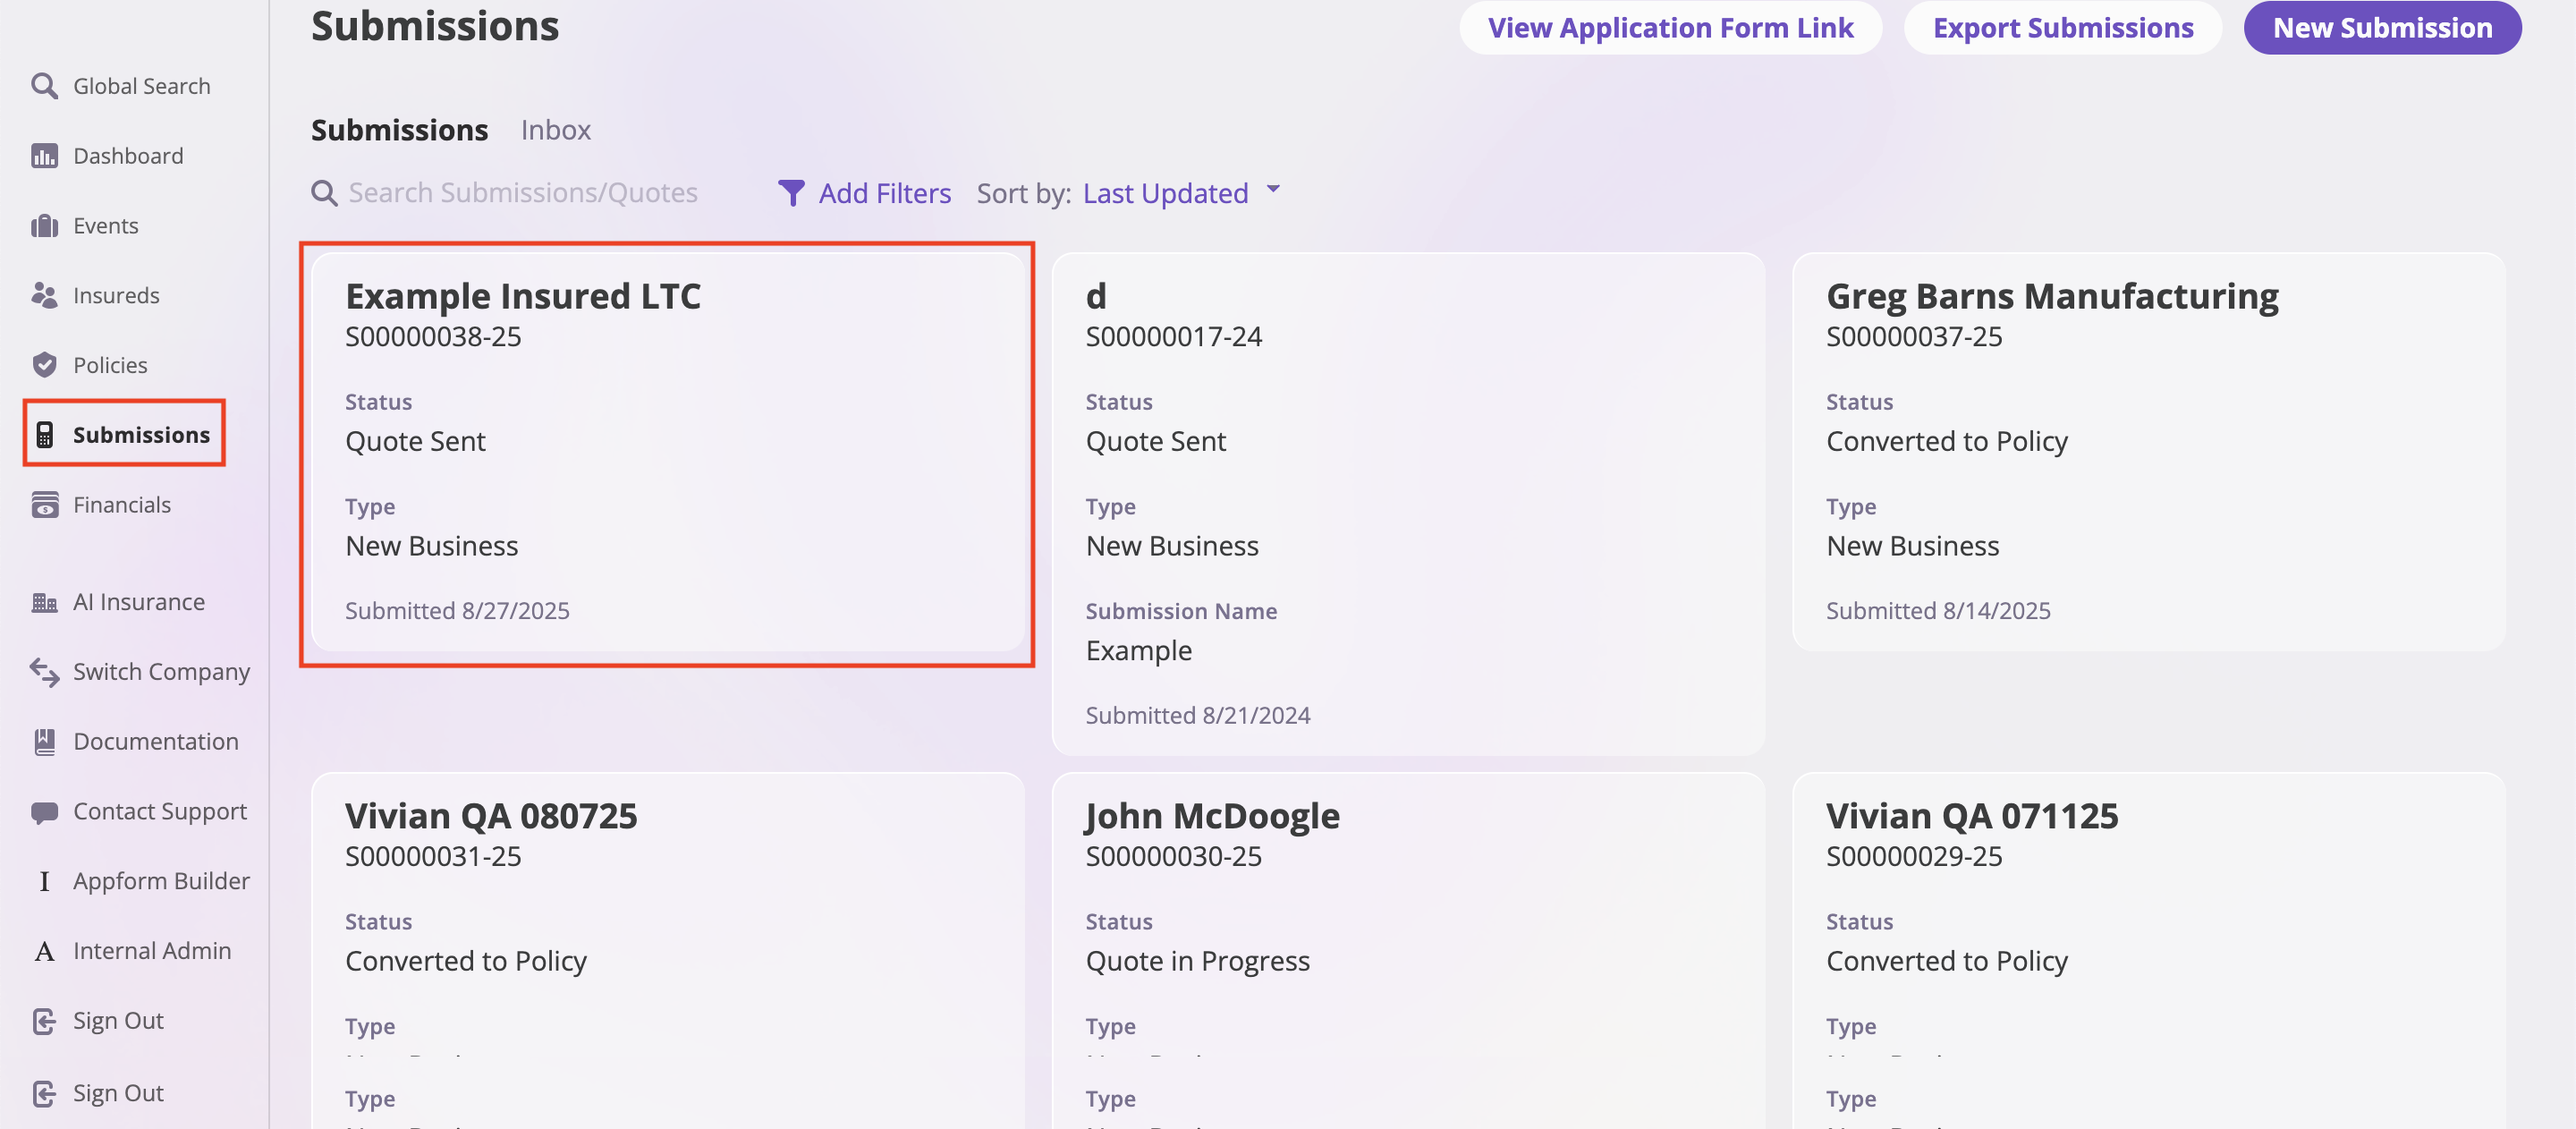
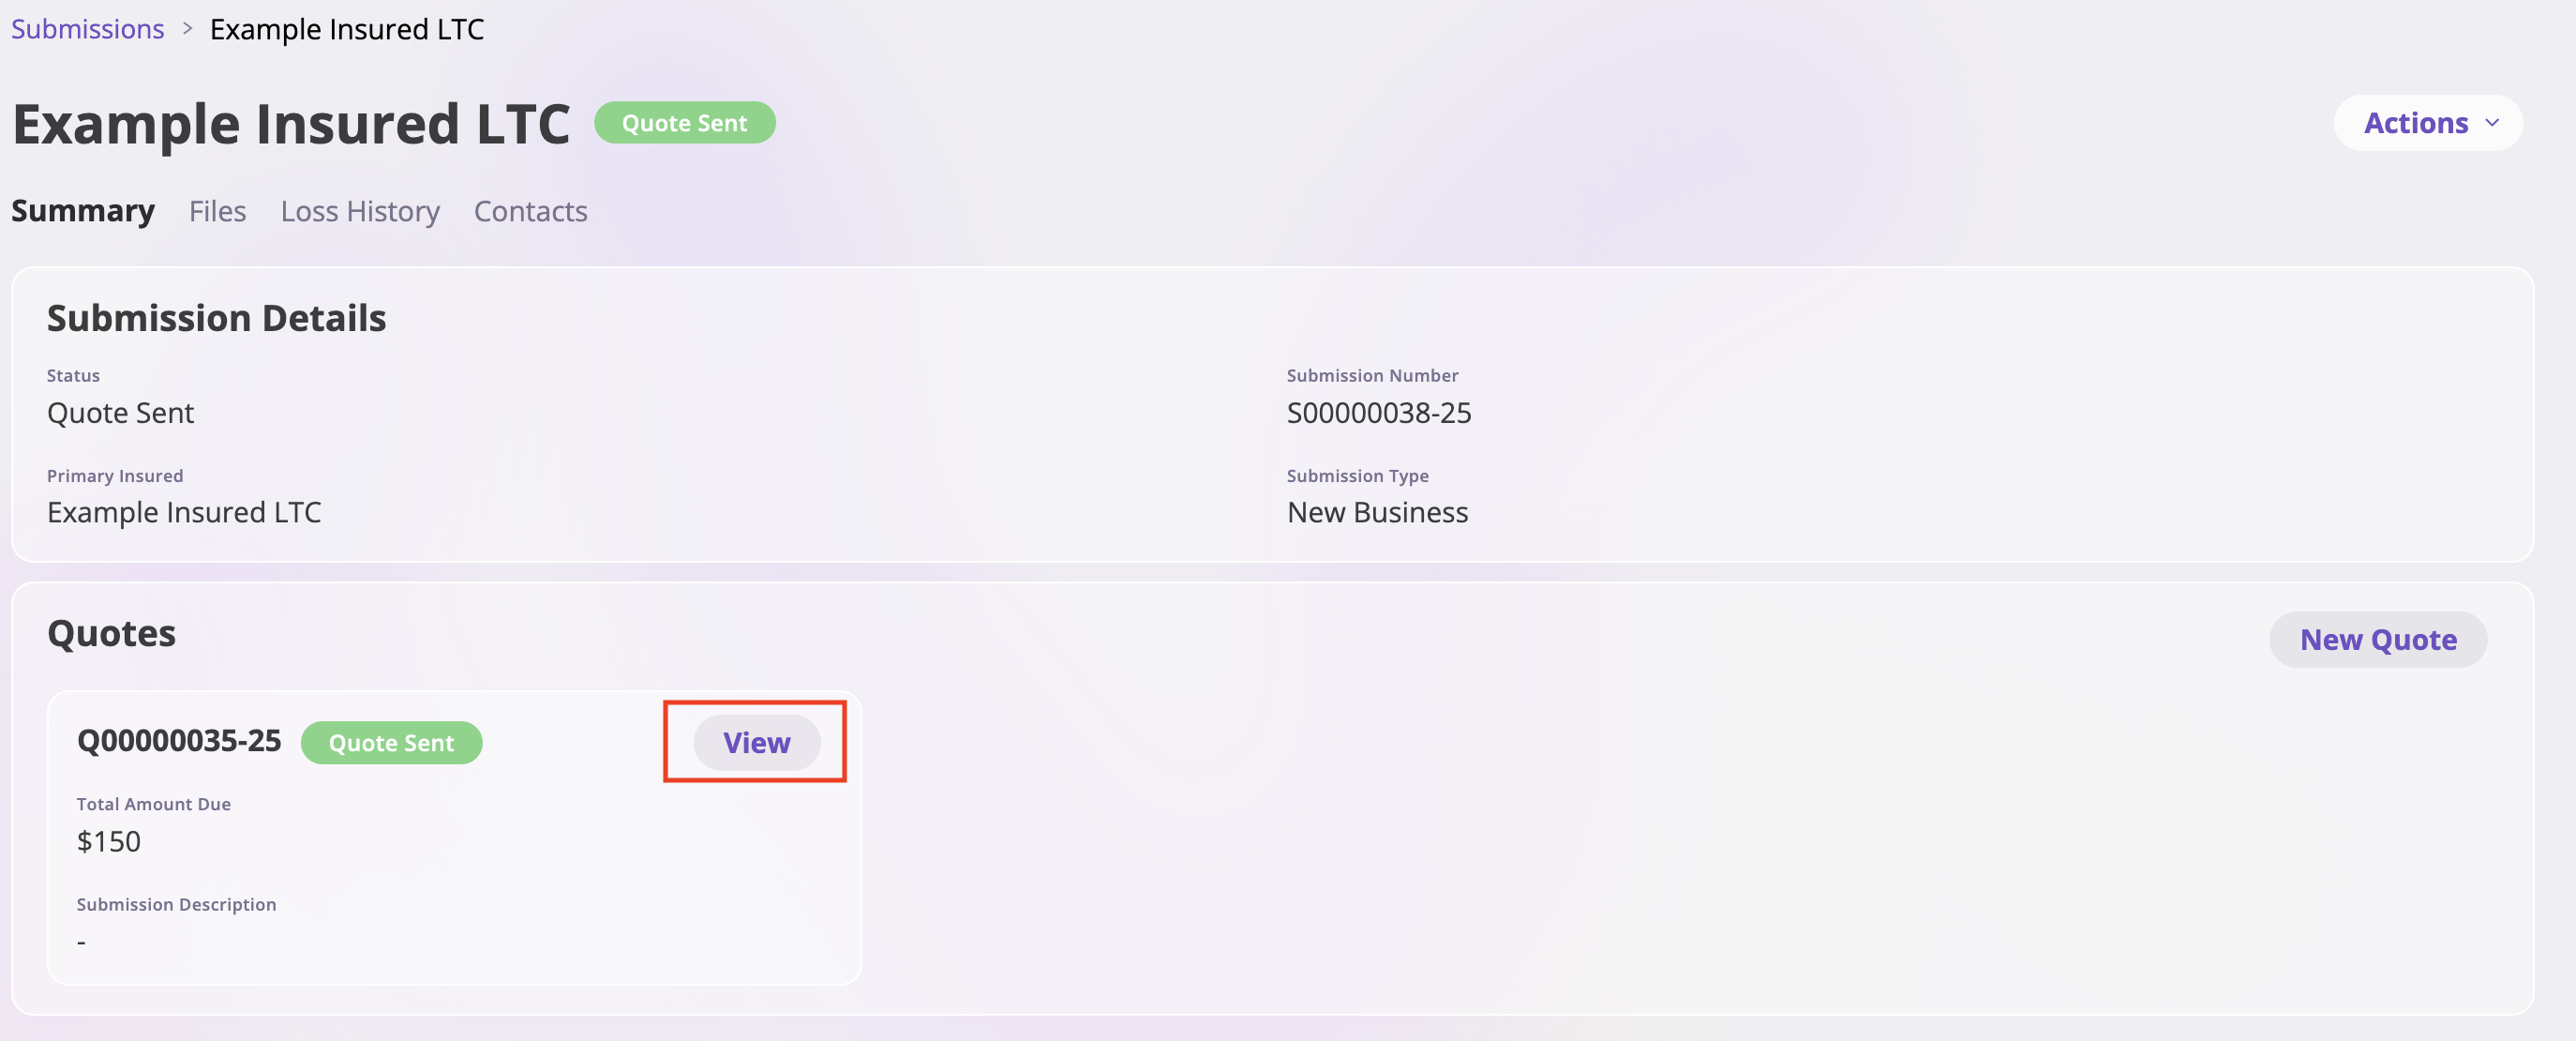
- Within the submission page, locate the Quote section.
- Click View on the quote you want to bind into a policy.
2. Start Binding
- Once inside the quote view, go to the top-right corner.
- Click Actions → Bind into Policy from the dropdown menu.

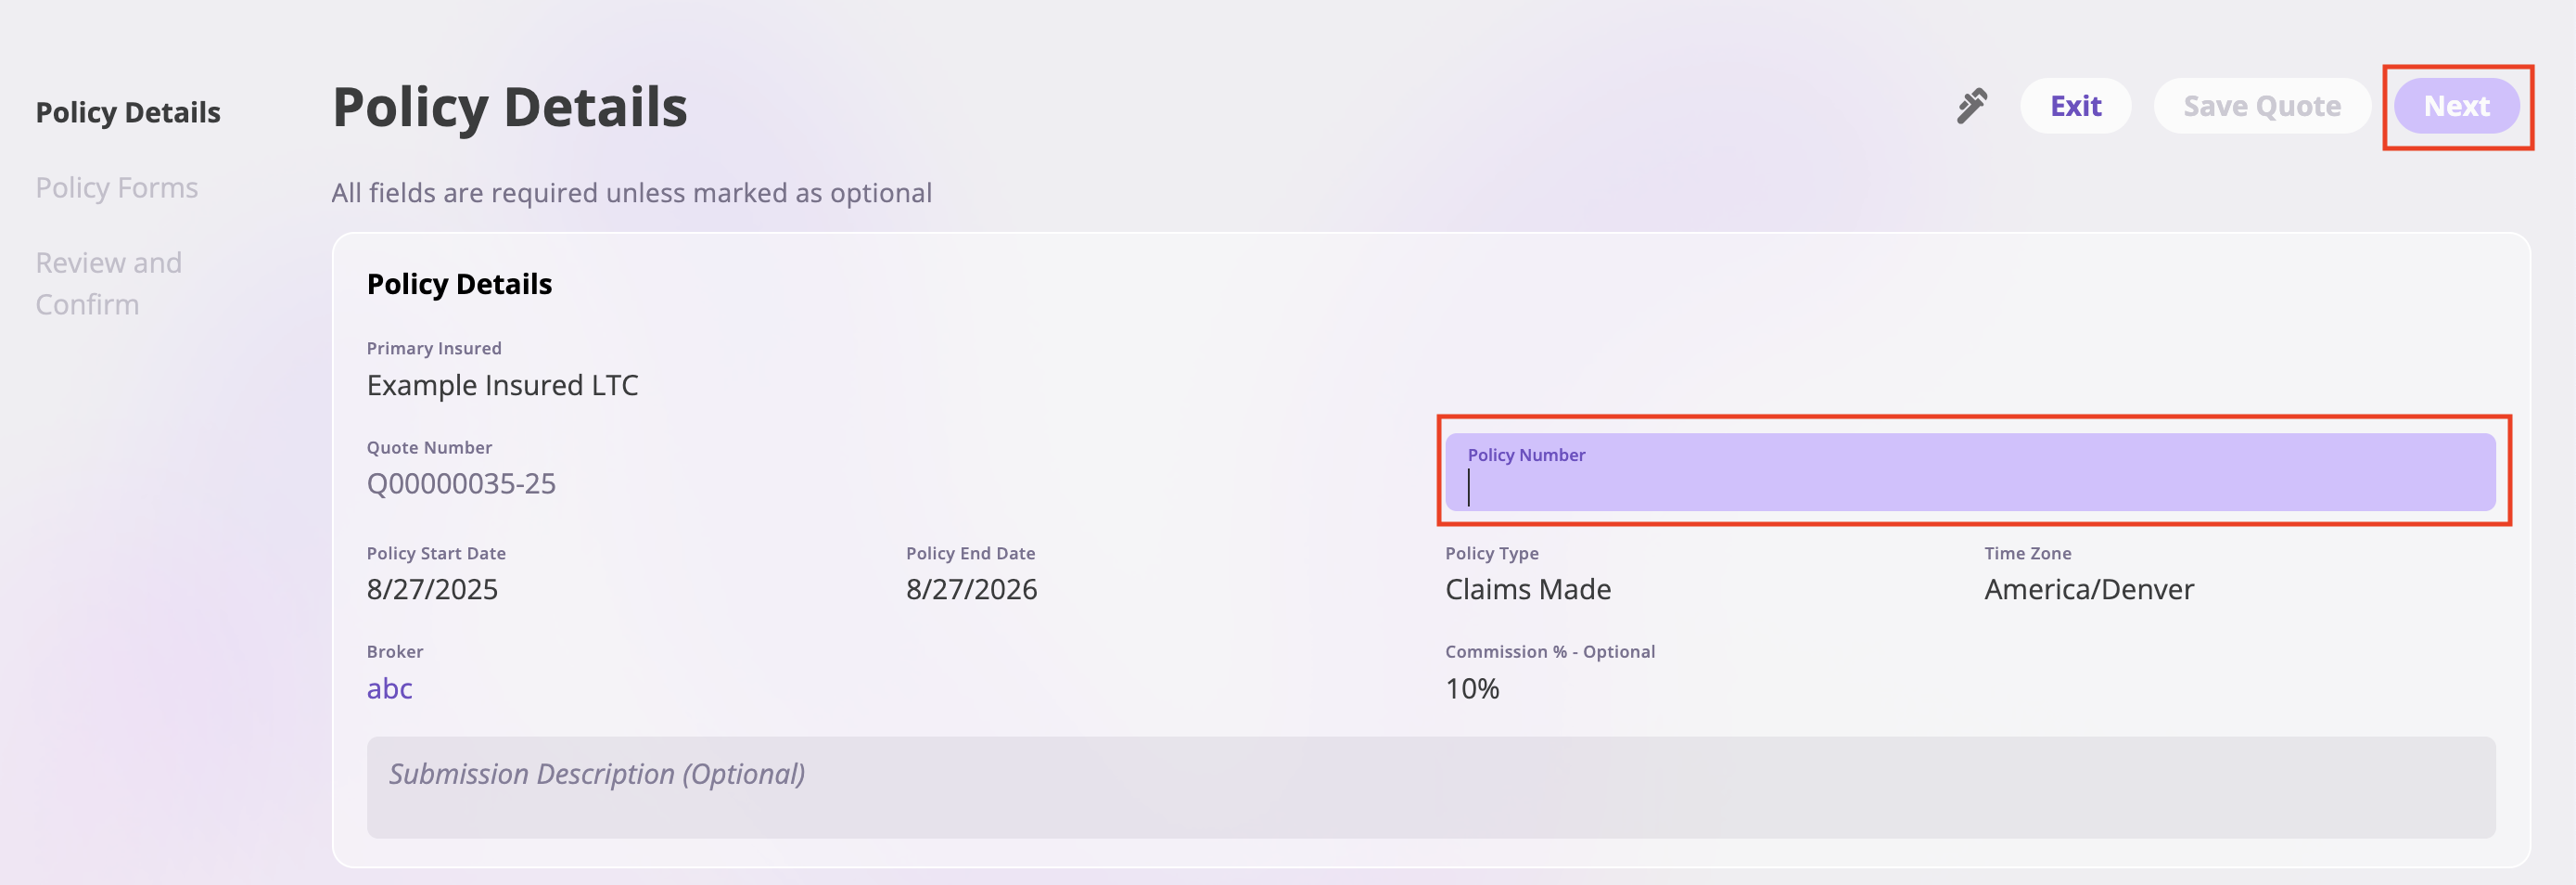
3. Policy Details Page
You will first be taken to the Policy Details page.- Enter the Policy Number in the provided field.
- Click Next in the top-right corner to proceed.
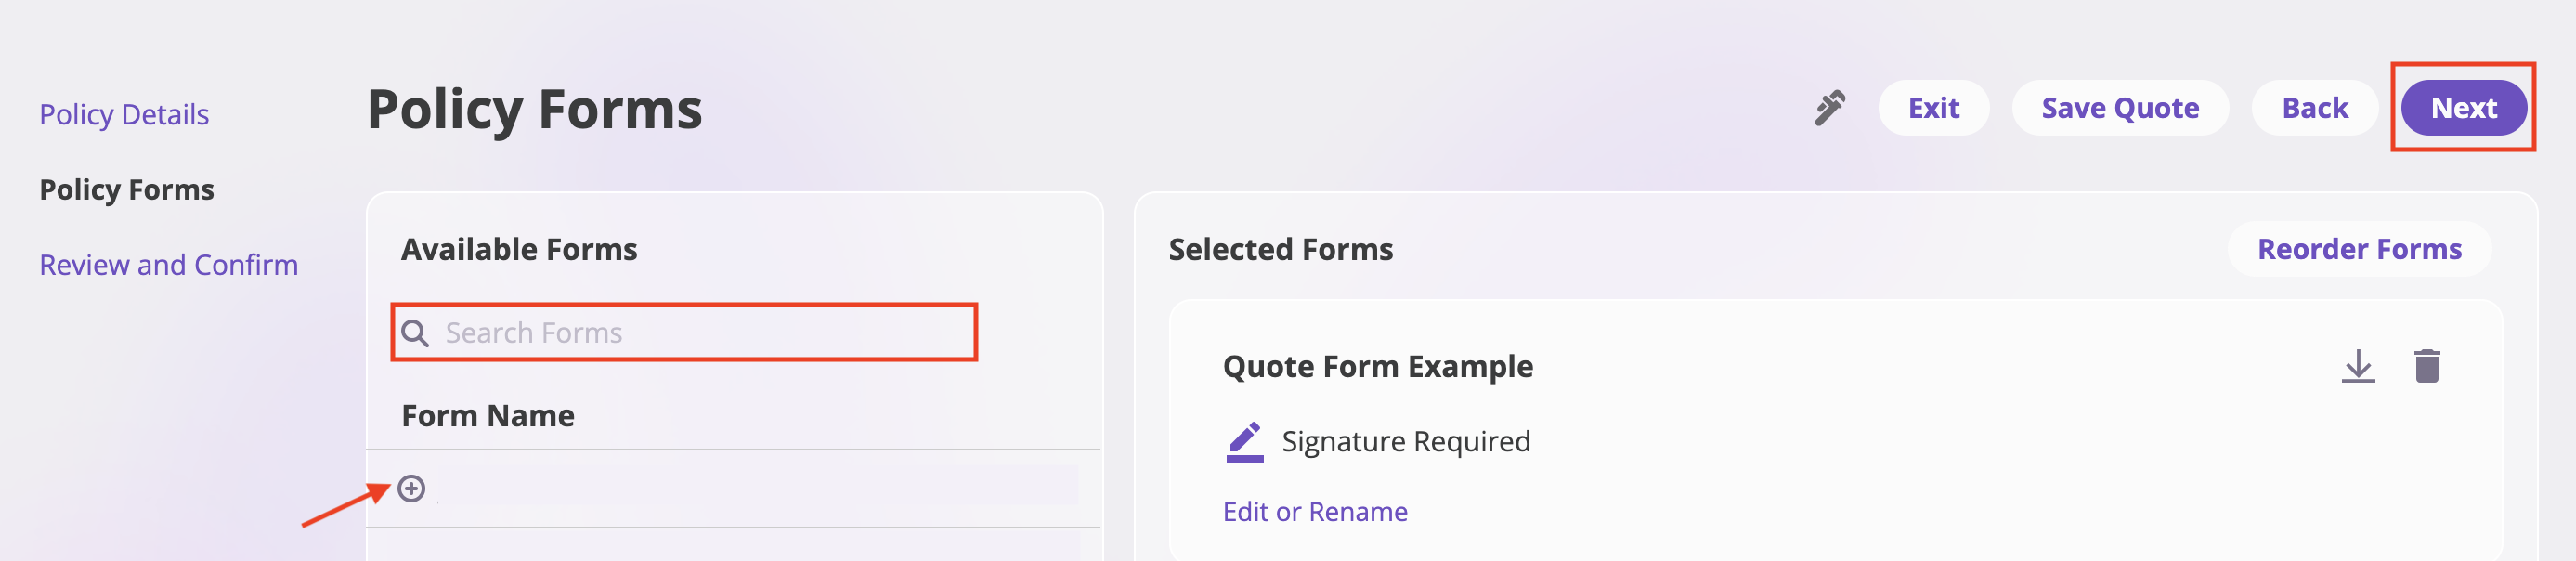
4. Policy Forms Page
On the Policy Forms page:- Select or search the form(s) you want to include in the policy.
- The selected form(s) will appear on the right-hand side.
- You can rename or reorder forms if needed.
- Edit or download the documents to view them before binding:
- Use the Edit option to modify form details or rename forms.
- Use the download icon (downward arrow) to download and review documents before finalizing the binding.
- Preview forms using the view icon in the Available Forms section.
- Once done, click Next.
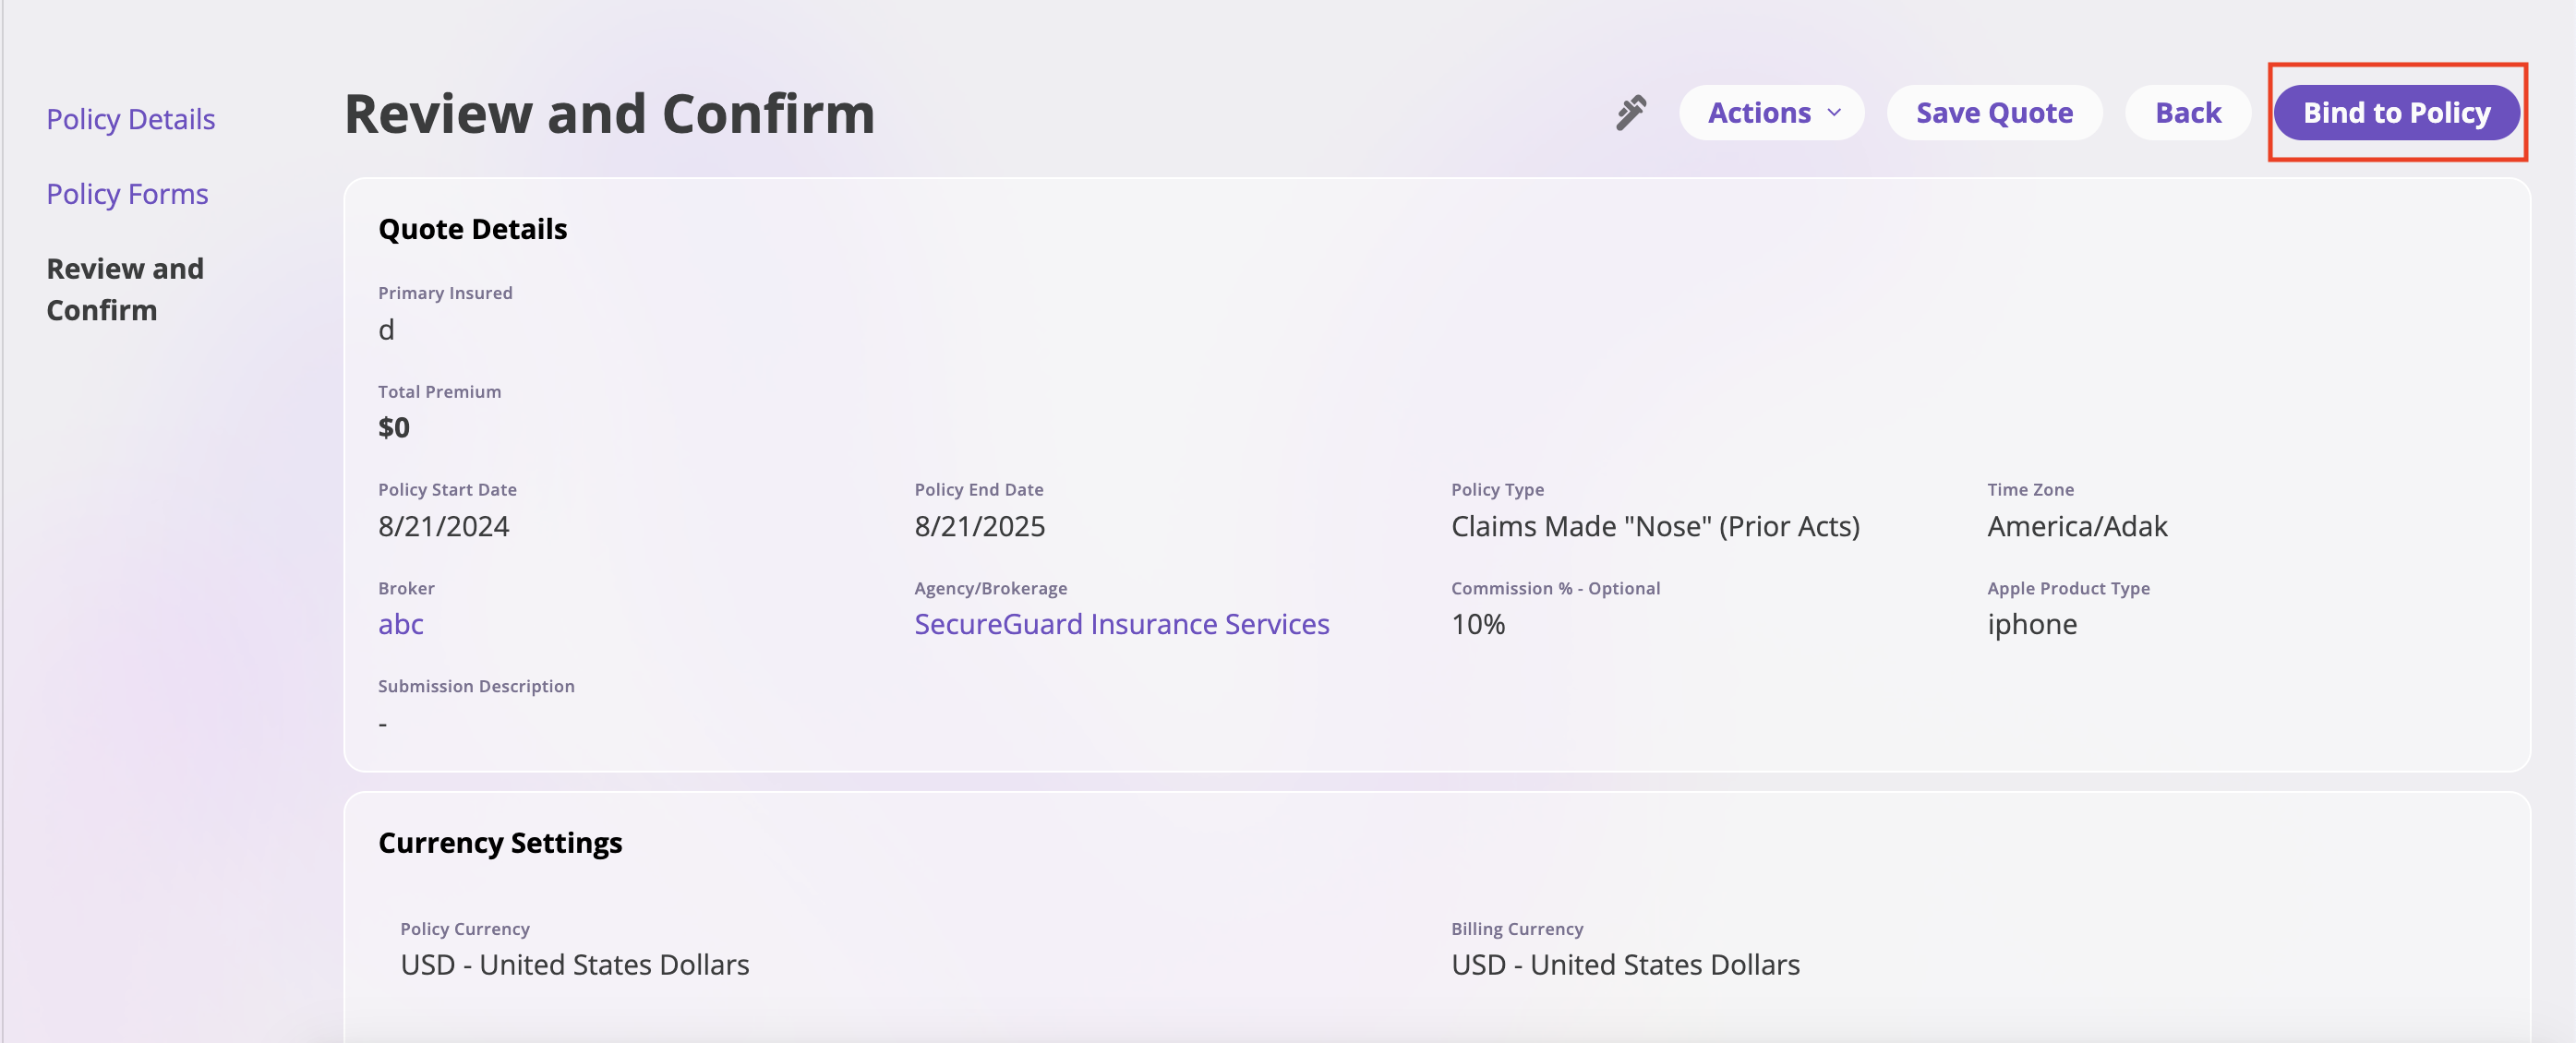
5. Review and Confirm Page
Finally, you will arrive at the Review and Confirm page.- Review all details carefully:
- Primary Insured
- Policy Dates
- Broker / Agency
- Policy Type
- Currency Settings
- Underwriting Workbench (premium, fees, taxes, total amount due)
- Ensure everything is accurate.
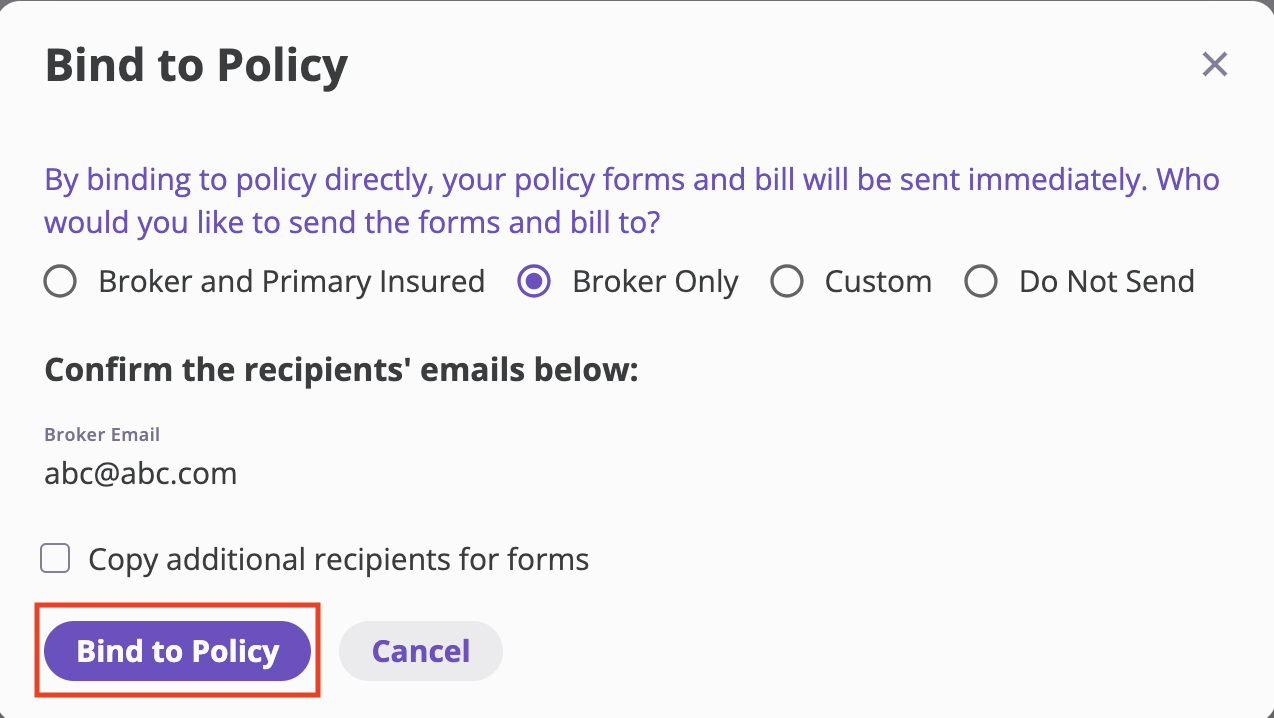
6. Bind a Quote to a Policy
When you click Bind to Policy, a confirmation pop-up will appear. Here you must configure how policy forms and billing information are sent:- Broker and Primary Insured → Sends the policy forms and bill to both the broker and the insured.
- Broker Only → Sends only to the broker.
- Custom → Allows you to define custom recipients.
- Do Not Send → No forms or billing are sent out automatically.
- Confirm the Broker Email (displayed by default).
- Optionally check Copy additional recipients for forms to include other recipients.