> ## Documentation Index
> Fetch the complete documentation index at: https://docs.aiinsurance.io/llms.txt
> Use this file to discover all available pages before exploring further.
# Export Policy Bordereau
## What is a Policy Bordereau?
A policy bordereau is a comprehensive report that provides detailed information about multiple policies in a structured format. Unlike a standard policy export, a bordereau creates **one row for every change to the policy**, making it ideal for tracking policy modifications, endorsements, and historical changes over time.
## Difference Between Export Policy and Export Bordereau
* **Export Policy**: Exports one row per policy, showing the current state of each policy
* **Export Bordereau**: Exports one row for every change to the policy, providing a detailed history of all modifications, endorsements, and updates
Use Export Bordereau when you need to track policy changes over time or analyze policy modifications in detail.
## How to Export a Policy Bordereau
Follow these steps to export a policy bordereau:
Any filters applied on the Policies page will carry over to the export. Make sure to apply your desired filters before exporting.
### Step 1: Filter Policies
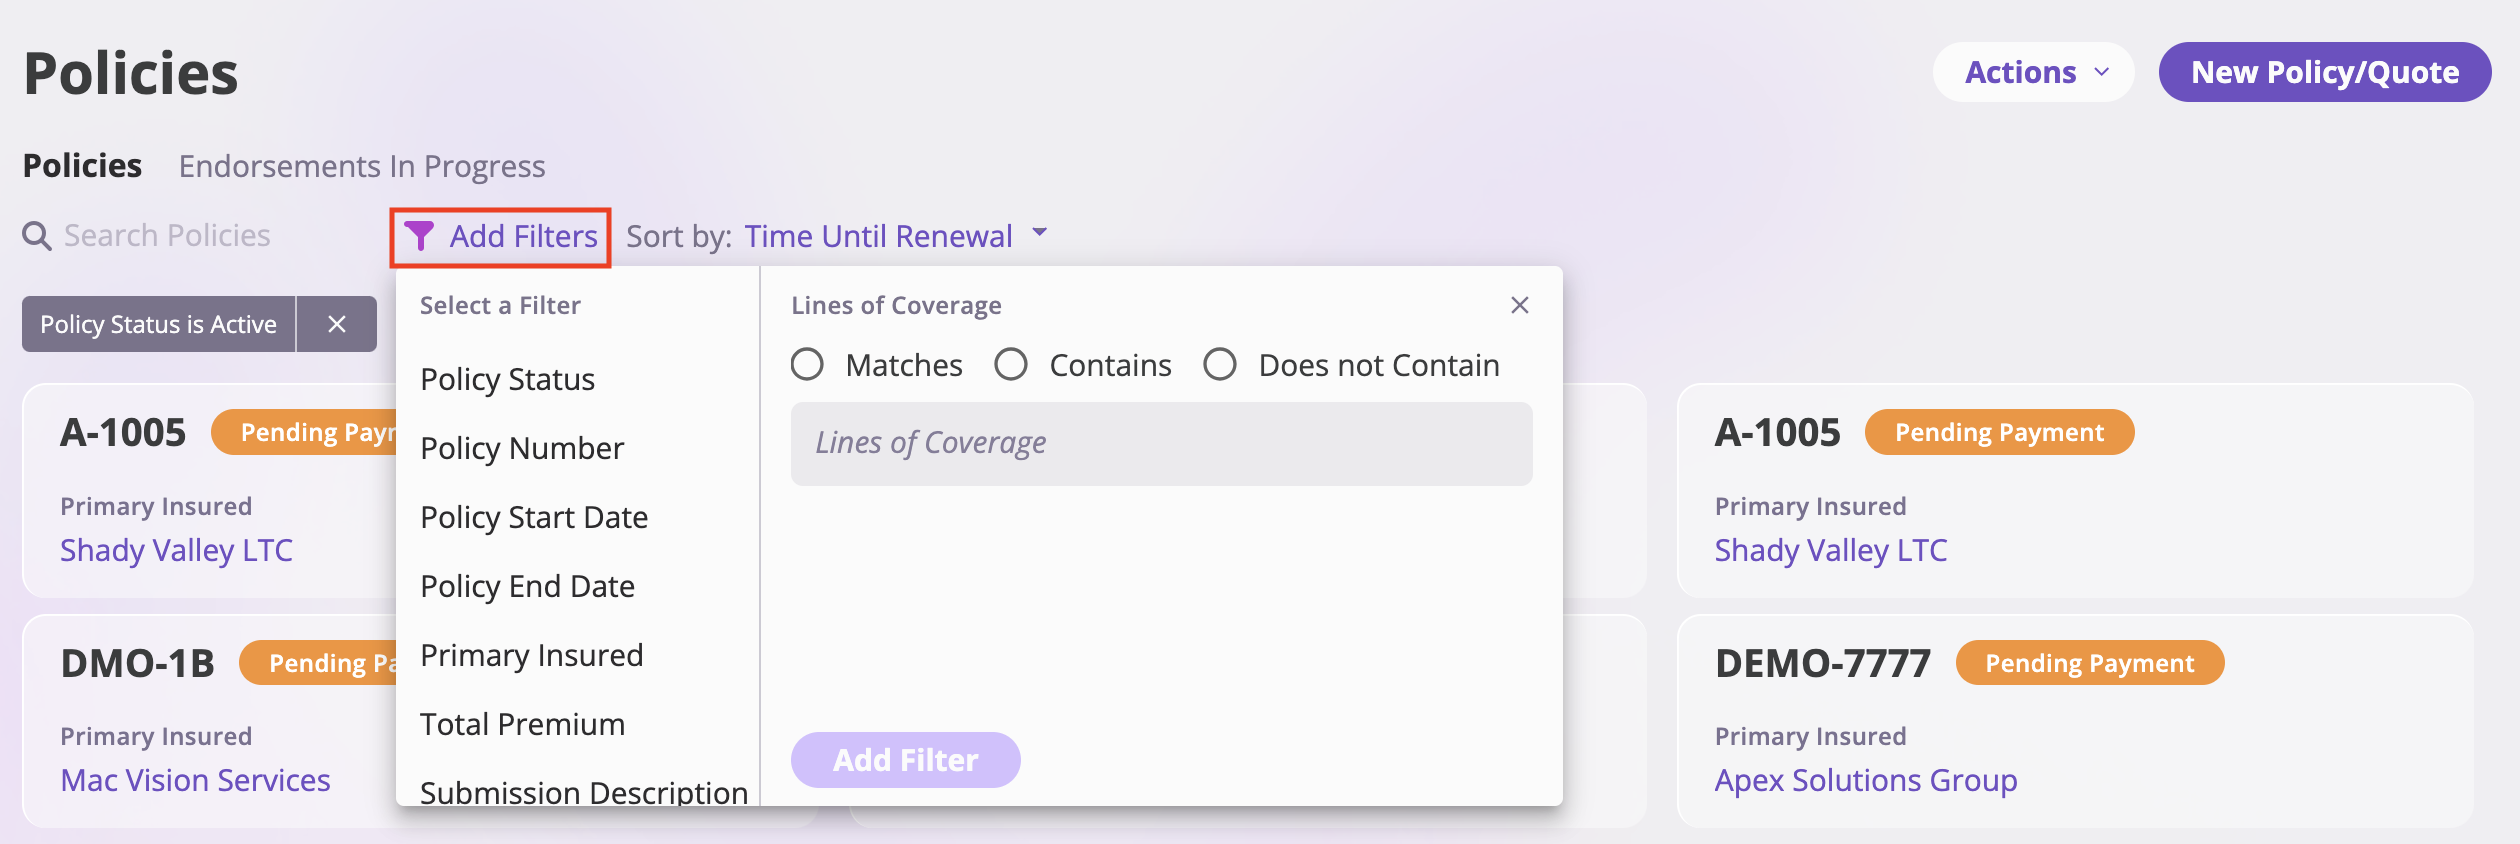
1. Select the **Policies** tab from the sidebar
2. Click the **Add Filters** button to open the filter menu
3. Select your desired filter criteria from the available options
4. Click **Add Filter** to apply your selected criteria
5. The filtered results will display only the policies matching your criteria
 ### Step 2: Access Export Options
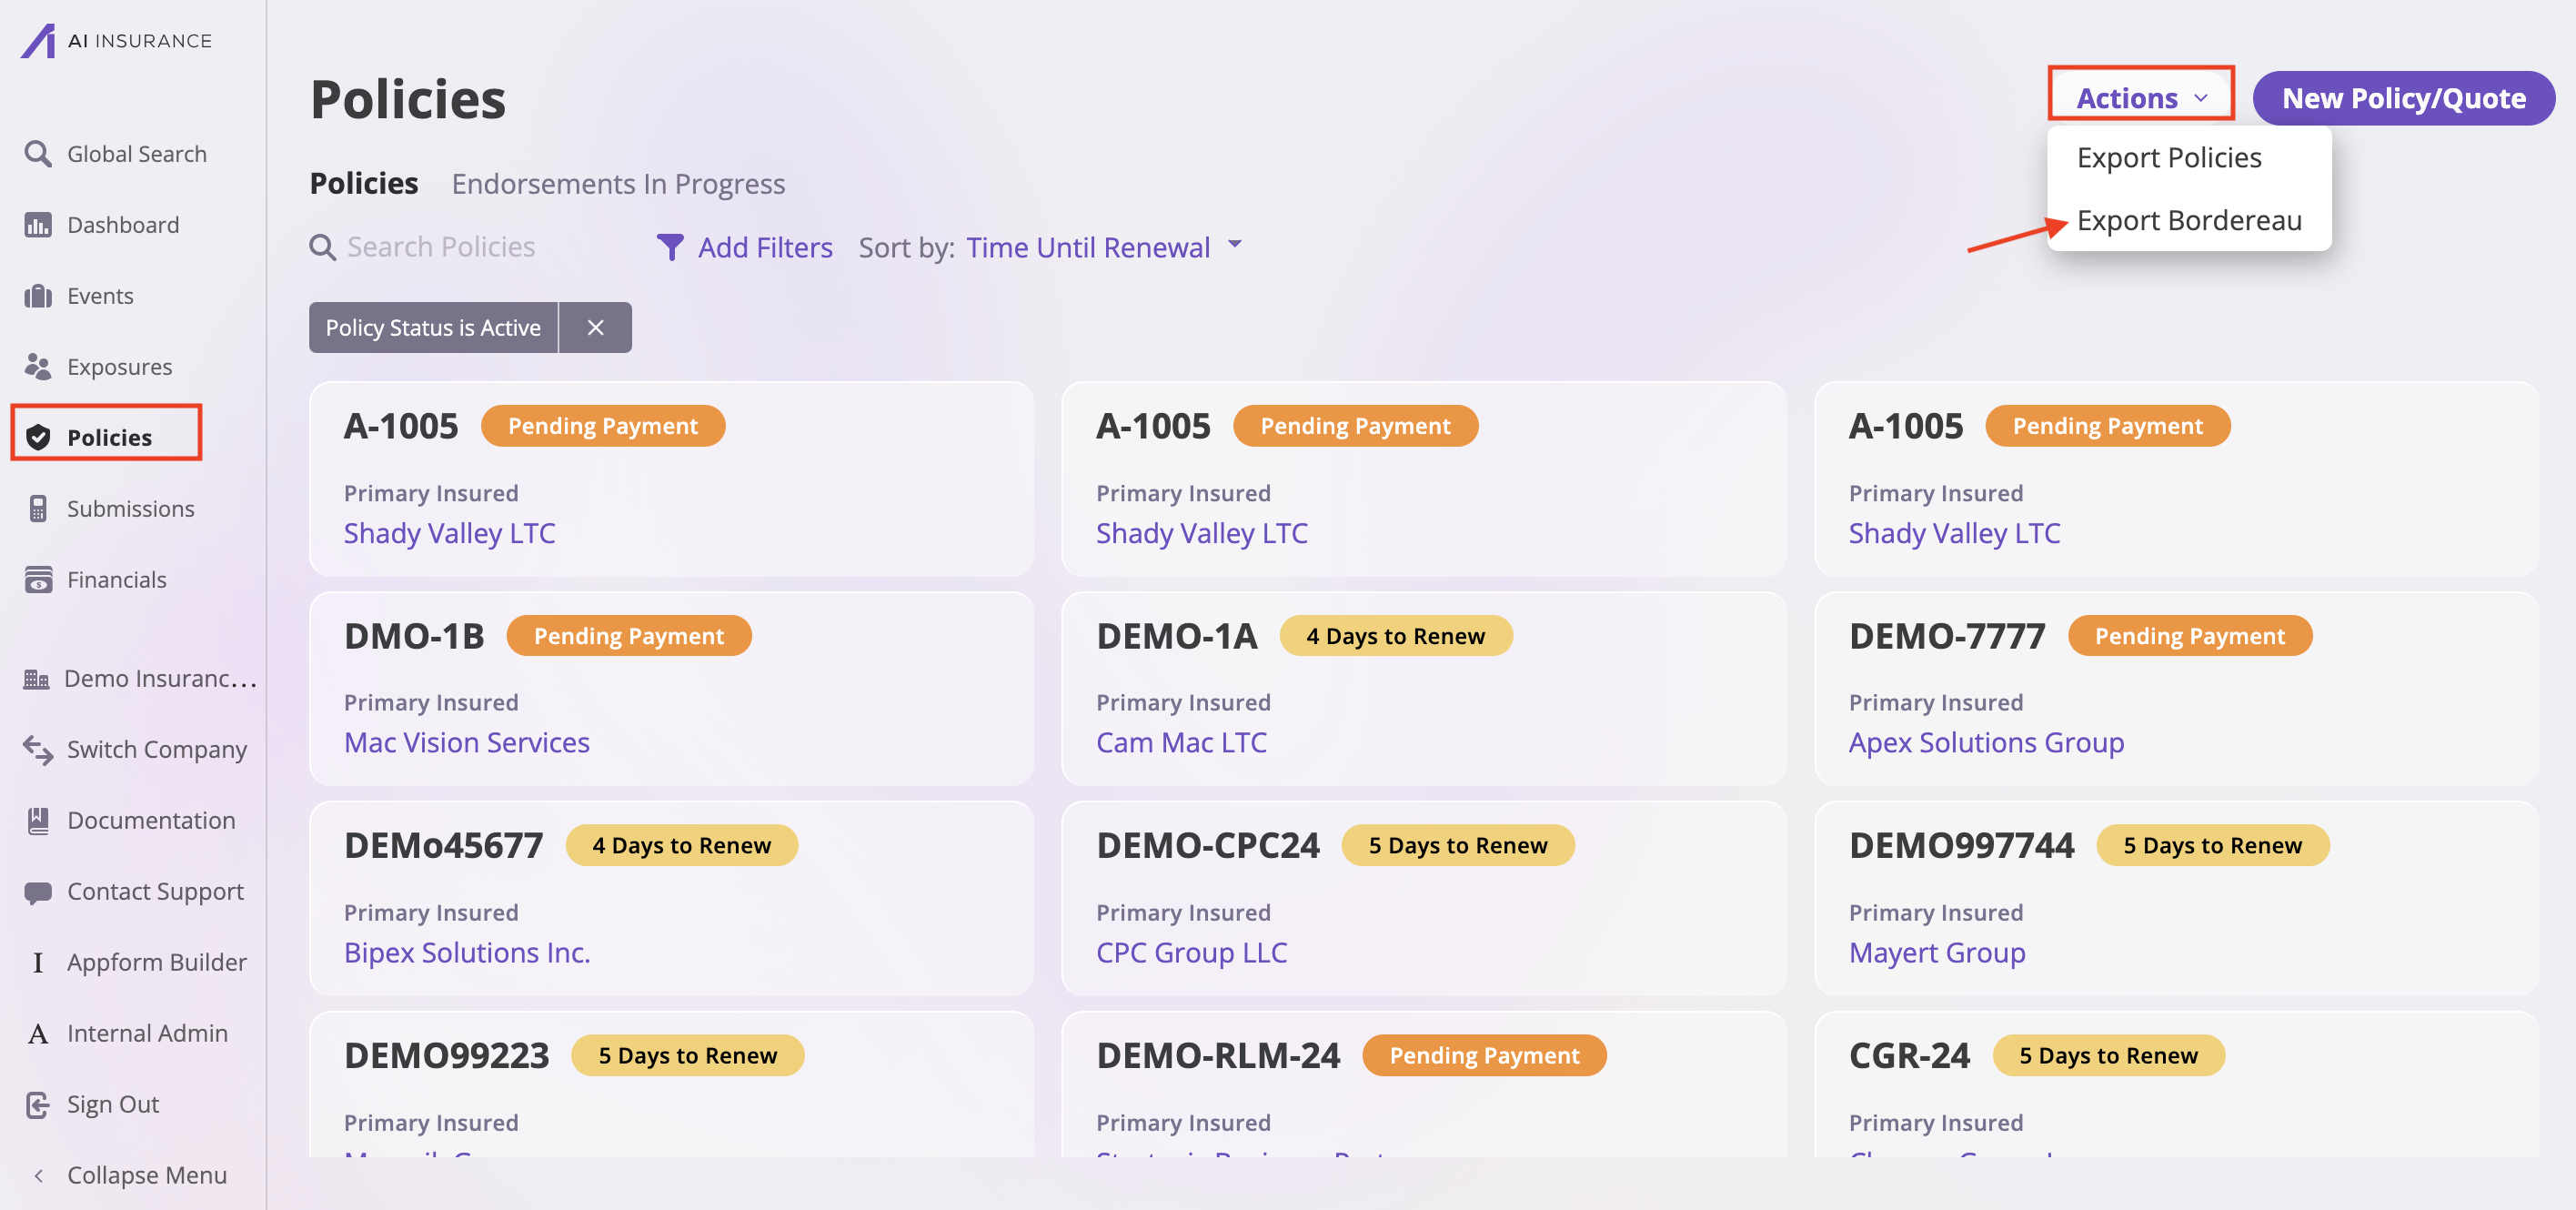
1. Click the **Actions** dropdown in the top right corner
2. Select **Export Bordereau** from the dropdown menu
### Step 2: Access Export Options
1. Click the **Actions** dropdown in the top right corner
2. Select **Export Bordereau** from the dropdown menu
 ### Step 3: Configure Export Settings
1. Verify that the policies you want to export are selected
2. Export Bordereau between dates (Optional):
* Enter a **Period Start** date
* Enter a **Period End** date
3. Save as Preset (Optional):
1. Click the **Save as Preset** button to save your current field configuration
2. Enter a name for your preset in the popup dialog
3. Click **Save** to save the preset or **Cancel** to close without saving
### Step 3: Configure Export Settings
1. Verify that the policies you want to export are selected
2. Export Bordereau between dates (Optional):
* Enter a **Period Start** date
* Enter a **Period End** date
3. Save as Preset (Optional):
1. Click the **Save as Preset** button to save your current field configuration
2. Enter a name for your preset in the popup dialog
3. Click **Save** to save the preset or **Cancel** to close without saving
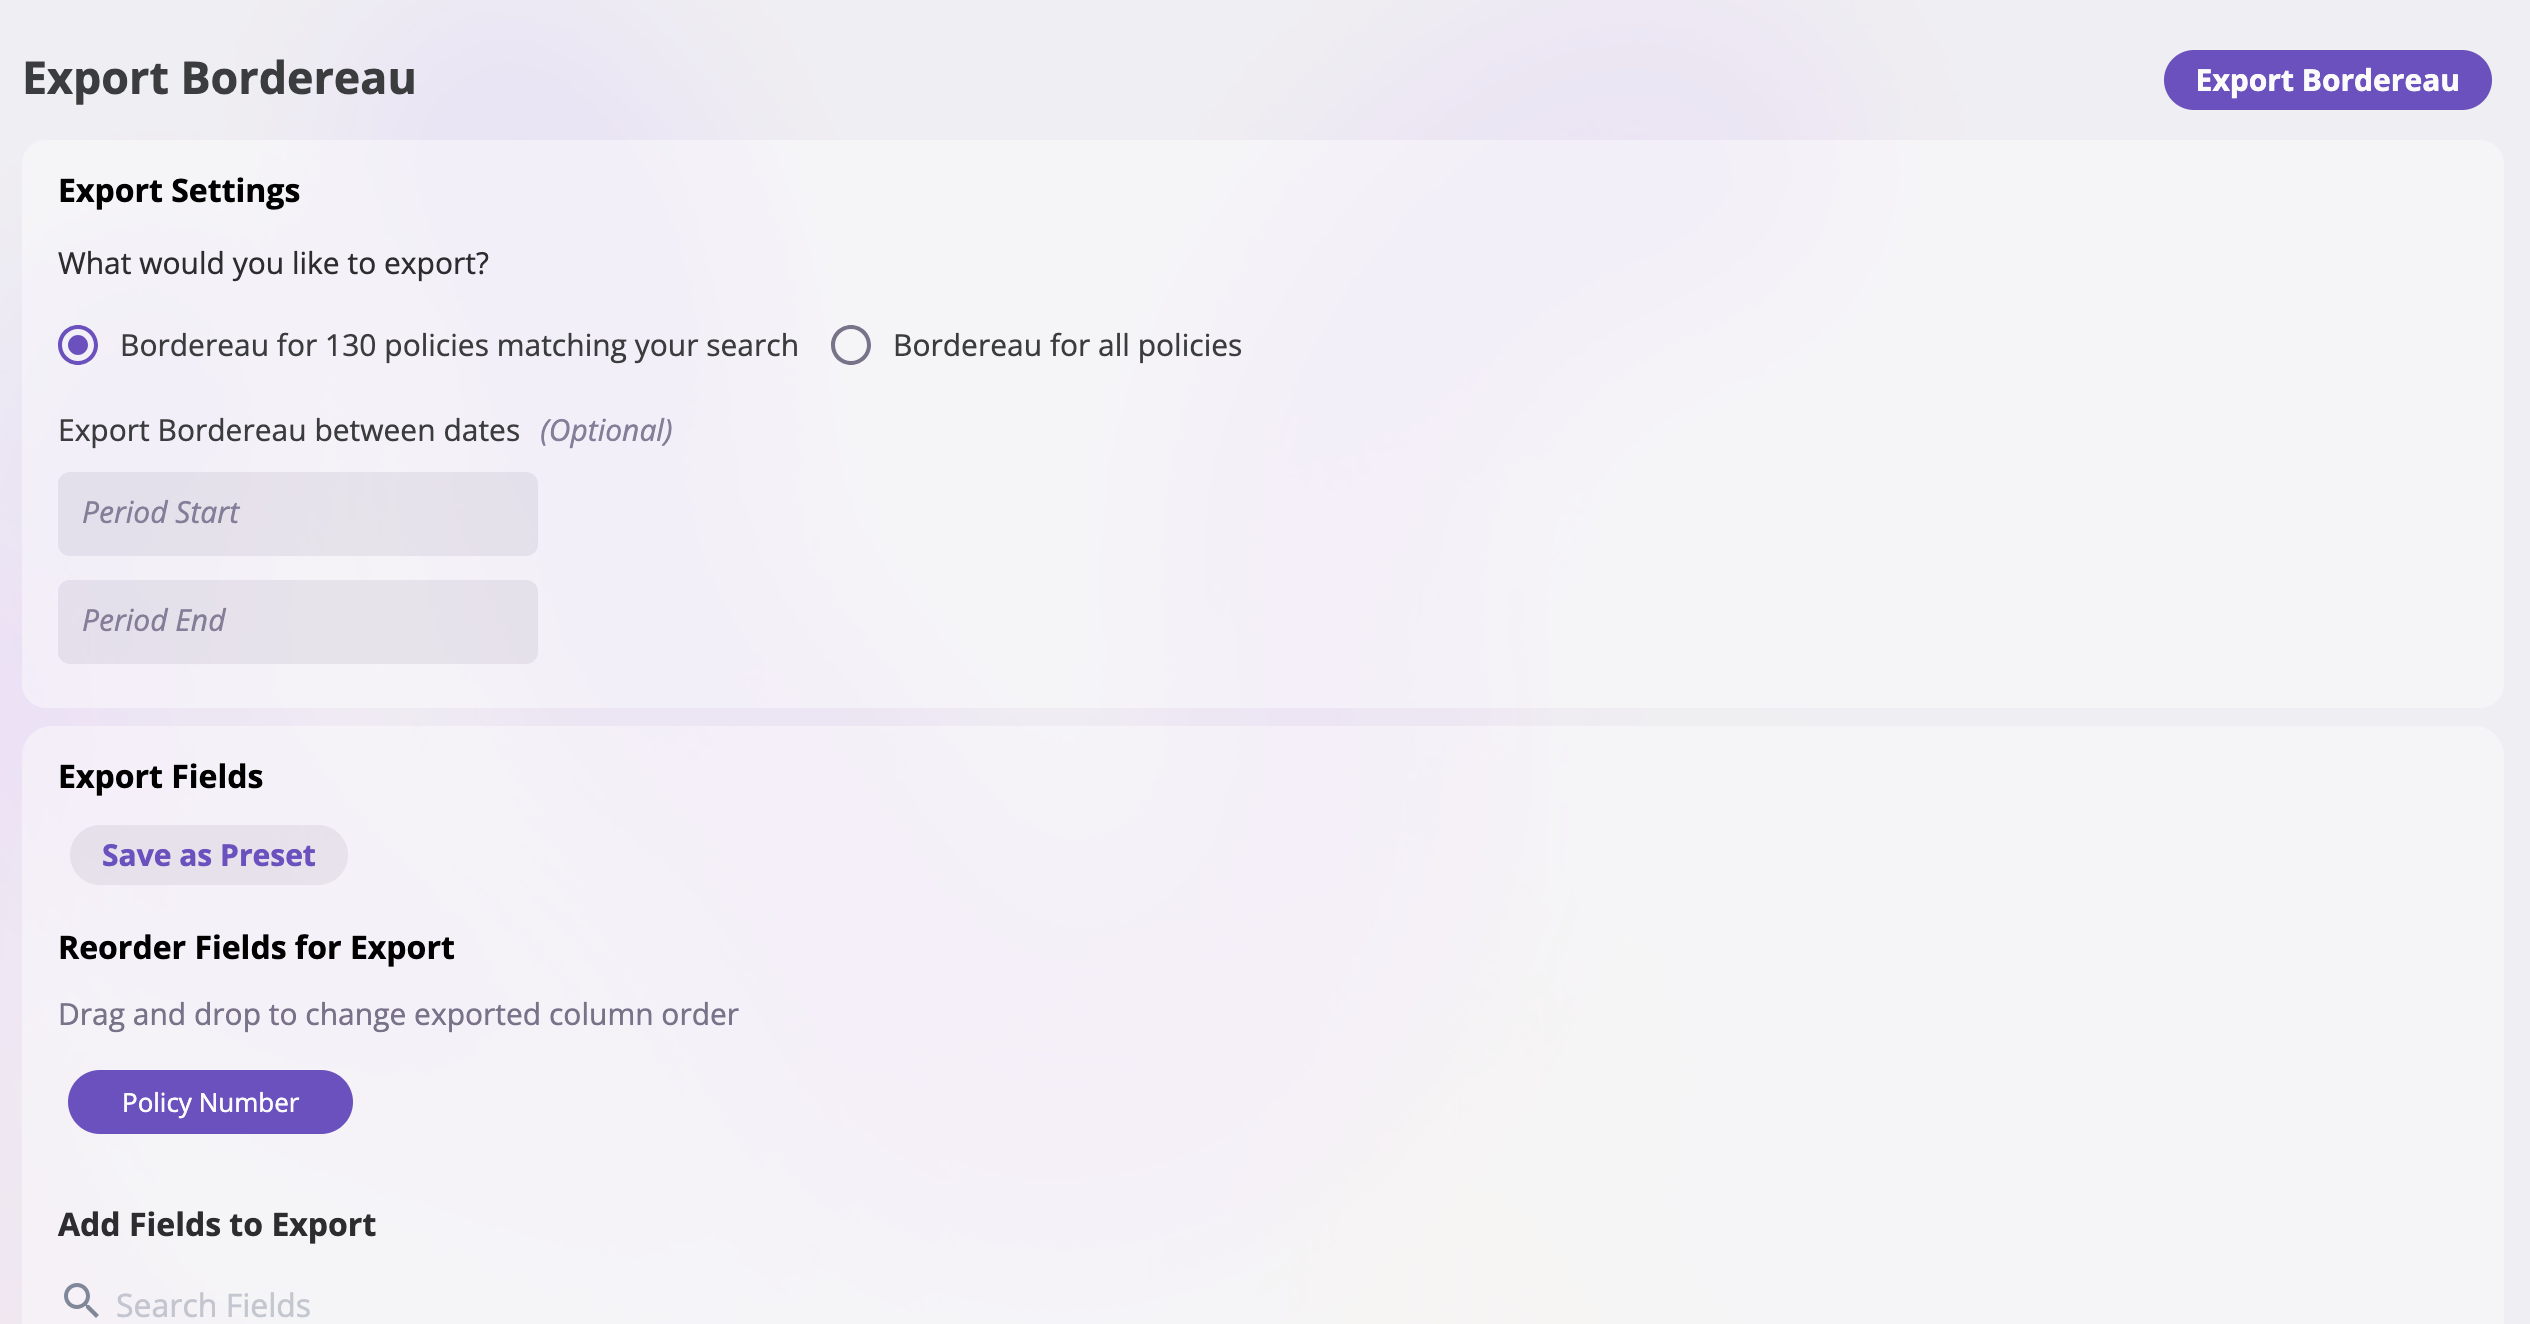 4. **Add Fields to Export**: Click on any field tags in the "Add Fields to Export" section to include them in your export
5. **Reorder Fields**: Drag and drop the selected fields in the "Reorder Fields for Export" section to change the column order
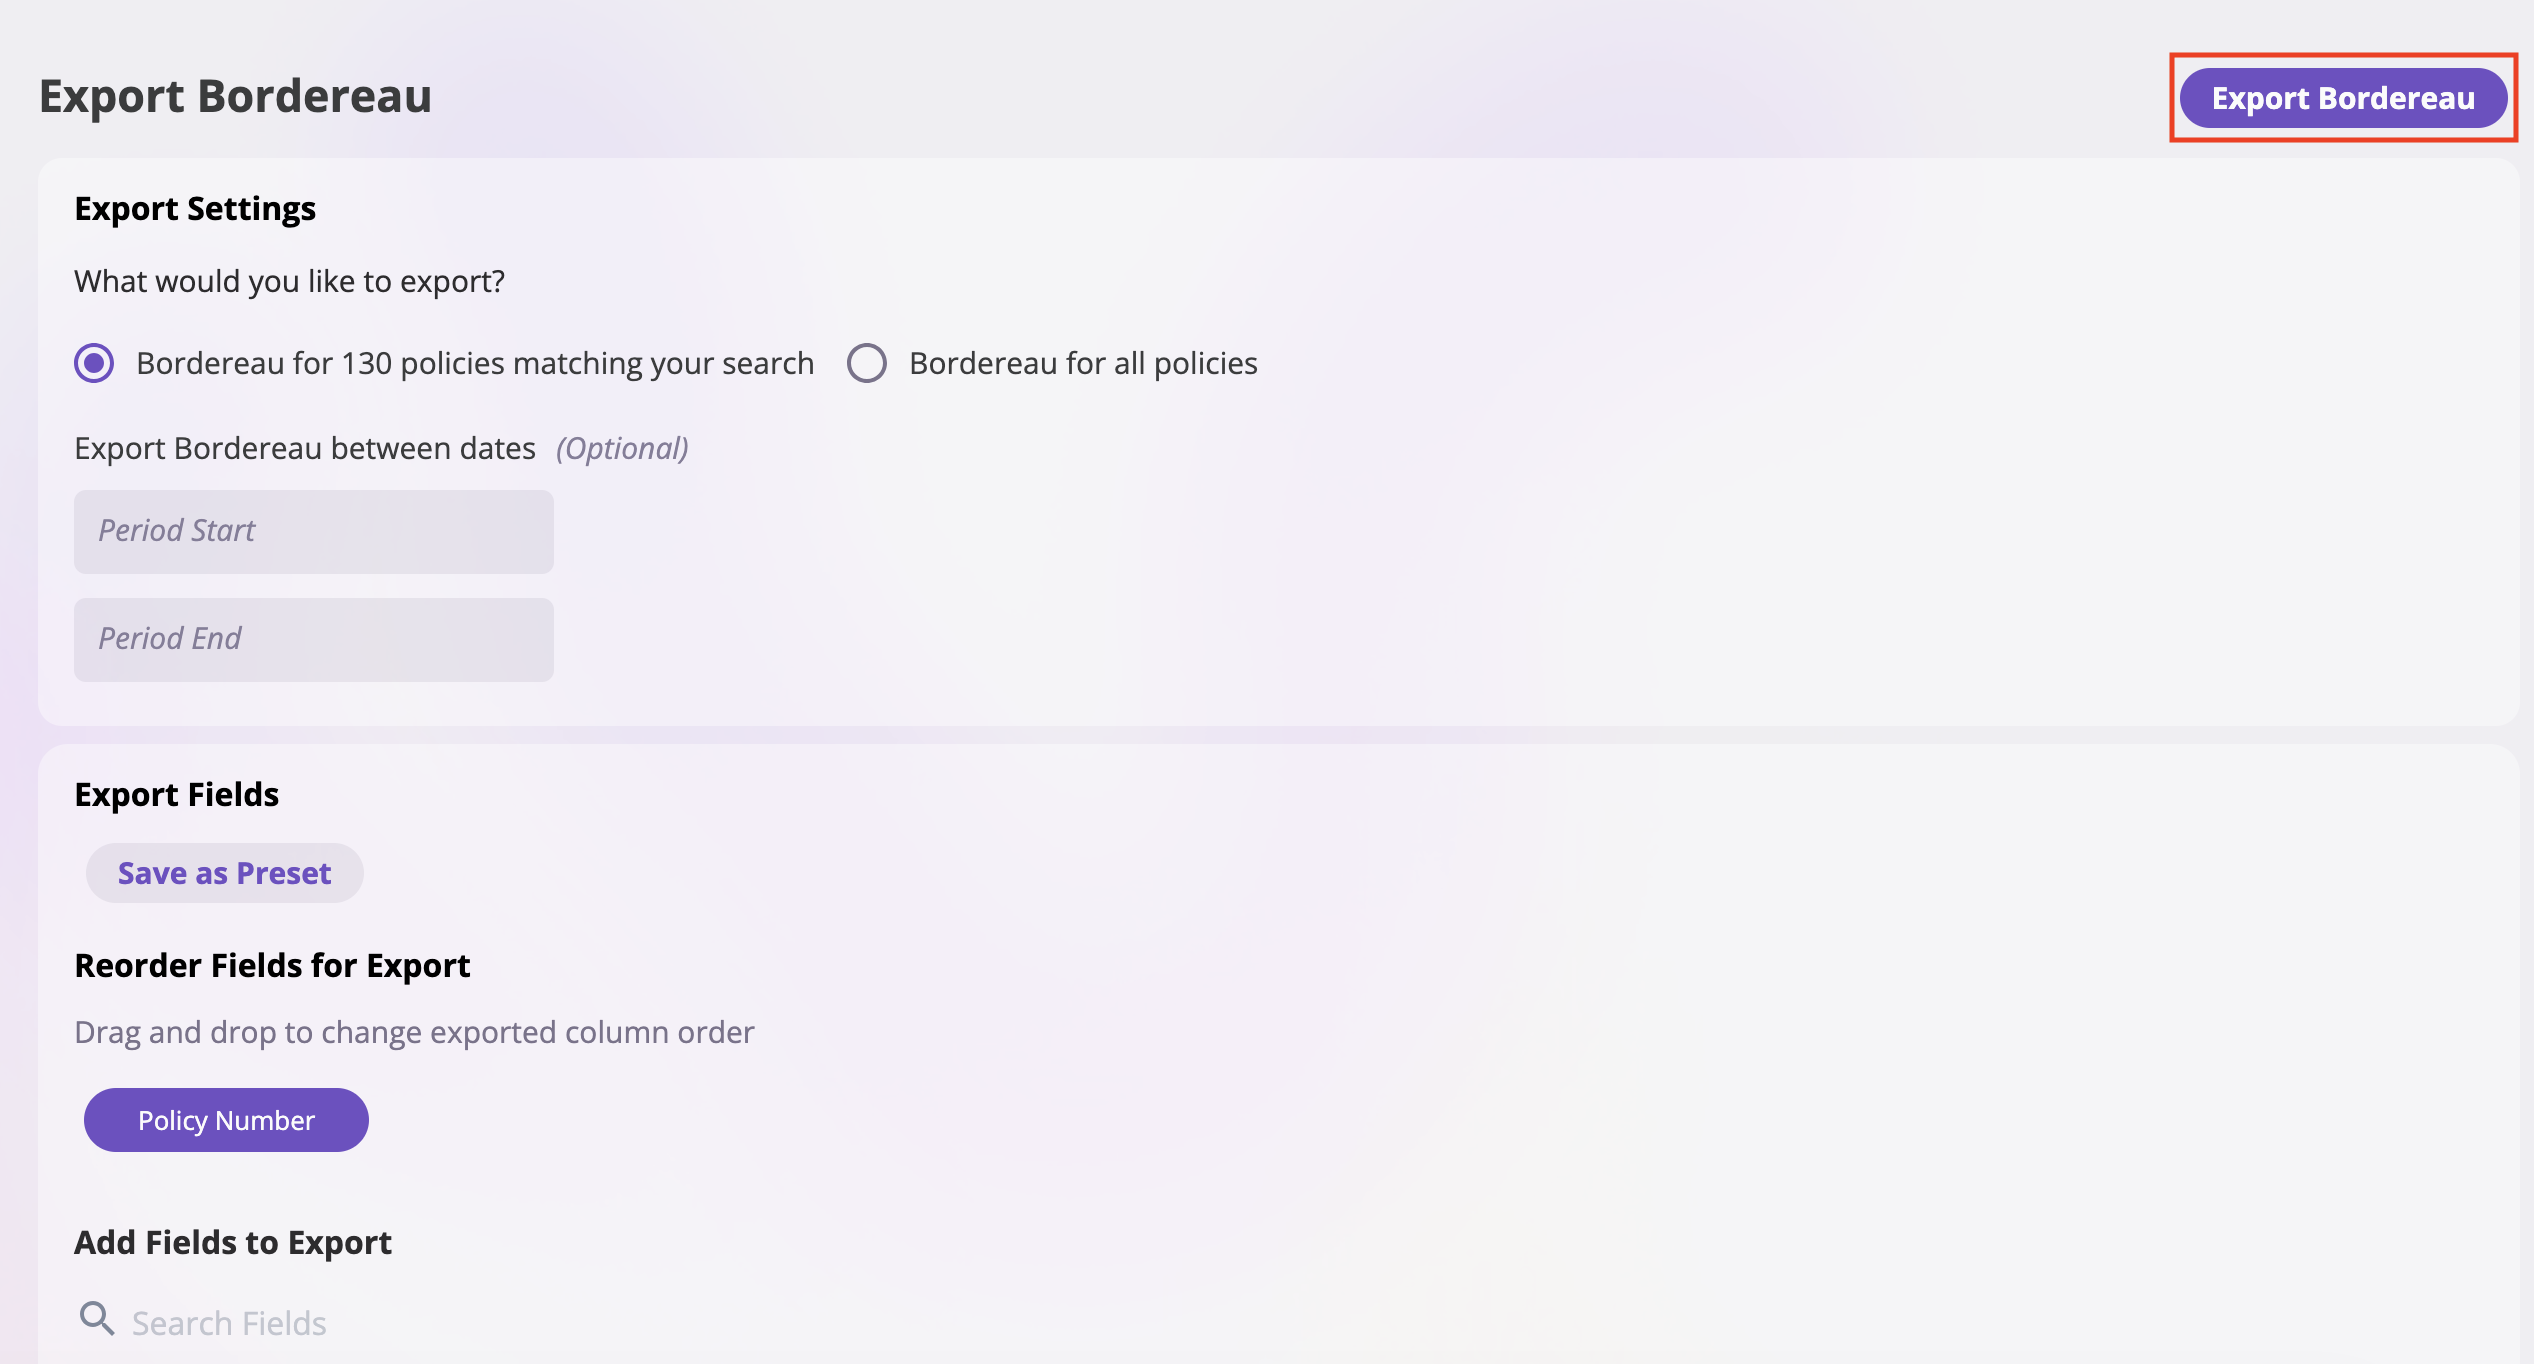
6. Click **Export Bordereau** to generate and download your export
4. **Add Fields to Export**: Click on any field tags in the "Add Fields to Export" section to include them in your export
5. **Reorder Fields**: Drag and drop the selected fields in the "Reorder Fields for Export" section to change the column order
6. Click **Export Bordereau** to generate and download your export
 ### Step 4: Download the Export
The bordereau file will be automatically downloaded to your computer based on your browser's download settings once you click **Export Bordereau**.
## Exposure Rating Fields
This feature adds exposure rating fields to policy bordereau export. The exposure rating field values are populated with the values set on the primary insured.
In other words, it's as if all the primary insured fields became fields on the policy itself (during the export flow).
This means that:
* For **Bordereau export**, we use the primary insured field value for the effective date range of the row
* **Group fields** get concatenated into one cell
For more details, see [exposure rating documentation](#).
### Step 4: Download the Export
The bordereau file will be automatically downloaded to your computer based on your browser's download settings once you click **Export Bordereau**.
## Exposure Rating Fields
This feature adds exposure rating fields to policy bordereau export. The exposure rating field values are populated with the values set on the primary insured.
In other words, it's as if all the primary insured fields became fields on the policy itself (during the export flow).
This means that:
* For **Bordereau export**, we use the primary insured field value for the effective date range of the row
* **Group fields** get concatenated into one cell
For more details, see [exposure rating documentation](#).