> ## Documentation Index
> Fetch the complete documentation index at: https://docs.aiinsurance.io/llms.txt
> Use this file to discover all available pages before exploring further.
# Export Data
AI Insurance believes you should always own and have control of your data. That is why, with the Exporting Data feature, you can generate and export various reports on our platform, with options to customize the fields you wish to export. You can export data related to your [Events](/events/view-events), [Insureds](https://aiinsurance-1ef97d09.mintlify.app/insureds/viewing-insureds), [Policies](/policing/policy-management/viewing-a-policy), [Submissions](/submissions-and-quotes/viewing-submissions/viewing-submissions), or [Financials](/financials/billings).
**Formatting**
All data exported out of AI Insurance are exported as **XLSX** files.
Report presets are user-specific, not company-wide. When you save a preset, it is only available to you and cannot be shared with other users in your company.
## How to export Policy data
To export Policy data, follow the detailed instructions in our [Export Policy](/policing/policy-management/exporting-policies/export-policy) documentation.
For exporting policy bordereaux (comprehensive reports), see our [Export Policy Bordereau](/policing/policy-management/exporting-policies/export-policy-bordereau) documentation.
## How to export Submissions data
Any filters applied on the Submissions page will carry over to the export. Make sure to apply your desired filters before exporting.
1. Navigate to the **Submissions** page from the left navigation pane.
2. Select the fields you want to include and configure any filters or sorting.
3. Click the **Export** button to open the export configuration page.
4. Customize your export settings and fields as needed. See the [Export Customization and Configuration documentation](/platform/reporting-and-reports/export-customization-and-configuration) for more details.
5. Click **Export Submissions** to create the export job.
6. Go to the **Downloads** page (click your company name, then **Export Downloads** tab) to download your file when the status shows **"Completed"**.
**Background Processing**: You can navigate away from the Export page or close your browser—the export will continue processing in the background.
For more information about exporting submissions, see the [Export Submissions documentation](/submissions-and-quotes/exporting-submissions).
## How to export Insured data
Take the following steps to export Insured data:
Any filters applied on the Insureds page will carry over to the export. Make sure to apply your desired filters before exporting.
1. Navigate to the **Insureds** page from the left navigation pane.
2. Select the fields you want to include in your export and configure any filters or sorting.
This page allows you to customize further the information you want your exported data to carry. This page has four sections: **Export Settings**, **Export Fields**, **Reorder Fields for Export**, and **Add Fields for Export**. Check out the [Export Customization and Configuration documentation to learn more about these sections](http://platform/reporting-and-reports/export-customization-and%20configuration.mdx).
3. When you finish your export selection, click **Export Insureds** to continue.
4. You'll see a success message: **"Export job created! Go to the Downloads page to download when ready"** with a link to the Downloads page.
5. Click the link in the success message or head over to the **Downloads** page by clicking the company, and then the **Export Downloads** tab.
6. On the Downloads page, you'll see a table called **"Export Downloads"** showing all your export jobs with:
* **Status** (Processing, Completed, or Failed)
* **File name**
* **Export type** (events, insureds, policies, or submissions)
* **Requested date/time**
* **Download button** (when completed)
7. When the export status shows **"completed"**, click the download button to get your Excel file.
**Background Processing**: You can navigate away from the Export page or close your browser—the export will continue processing in the background.
## How to export Events data
Take the following steps to export Event data:
Any filters applied on the Events page will carry over to the export. Make sure to apply your desired filters before exporting.
1. Navigate to the **Events** page from the left navigation pane.
2. Choose the events you'd like to export: either claims or incidents.
3. Click the **Export Events** button to export data on the events.
4. The **Export Events** page allows you to select and reorder the fields you wish to export. Configure your export before selecting **Export Events** to continue.
Like the previous section, the **Export Events** page has four sections: **Export Settings**, **Export Fields**, **Reorder Fields for Export**, and **Add Fields for Export**. Check out the [Export Customization and Configuration documentation](http://platform/reporting-and-reports/export-customization-and%20configuration.mdx) to learn more about these sections.
5. You can export a subset of your events' financial data in the **Export Settings** section. Entering a date into the **Export Financials as of** field will export the financial values of your selected events at the selected date.
For example, if you only wish to include the invoices and transactions on and before "12/20/2023" and omit the transactions after, enter an “as of” date of “12/20/2023”.
6. After selecting your export options, click the **Export Events** button to proceed.
Once the export is complete, the file will be downloaded to your machine based on your browser's download settings.
## **Exporting Financials Data**
Financial data can be exported in two ways: as transaction records directly from the Financials page, or as financial summary fields included in Event and Policy exports.
### Financial Fields in Event and Policy Exports
When exporting Events or Policies, each active financial category (e.g., ALAE, Indemnity, Deductible) contributes the following summary fields per category:
| Field | Description |
| ----------------------------------- | ----------------------------------------------------------------------------------------------------- |
| **\{Category} - Reserves** | The estimated reserve amount for open claims. Only present for categories that support reserves. |
| **\{Category} - Owed** | Total invoice amount issued but not yet paid. |
| **\{Category} - Paid** | Total amount that has been paid. |
| **\{Category} - Expected Incurred** | The total expected cost — paid + reserves for categories that support reserves, paid + owed otherwise |
For categories with sub-categories (line item breakdowns), an additional field is available per sub-category:
* **\{Sub-category} - Total**: The total amount (paid + owed) for that sub-category.
For categories that support reserves, three fields track the most recent user-set reserve estimate:
* **\{Category} - Last User Expected Incurred**: The dollar amount of the most recent manual reserve estimate.
* **\{Category} - Last User Expected Incurred Date**: The date the estimate was recorded.
* **\{Category} - Last User Expected Incurred User**: The user who recorded the estimate.
By default, financial summary fields reflect all transactions as of the export date. When exporting Events, you can enter an **Export Financials as of** date in Export Settings to limit financial values to transactions on or before a specific date. Deleted and voided payments are always excluded.
### Exporting data from Global Financials
Take the following steps to export Global Financials data:
1. Navigate to the **Financials** page from the left tab.
2. Apply any filters or select specific entries you would like to export.
3. Select **Export** at the top right of the table.
4. Choose your **export scope** (selected items, filter results, or all) and your **export format** (see [Transaction Export Formats](#transaction-export-formats) below), then confirm.
### Exporting from within an Event or Policy
Follow these steps to export financial data from within an Event or Policy:
1. Navigate to a specific [Event](/events/view-events/view-events) or [Policy](/policing/policy-management/viewing-a-policy), and select the **Financials** tab.
2. Apply any filters or select specific entries you would like to export.
3. Select **Export** at the top right of the table.
4. Choose your **export scope** (selected items, filter results, or all) and your **export format** (see [Transaction Export Formats](#transaction-export-formats) below), then confirm.
### Transaction Export Formats
The export dialog offers two formats. Choose the one that fits your reporting need.
#### Transactions
One row per transaction. This is the standard format for reconciliation, reporting, and most accounting workflows.
Each row contains the transaction header fields — type, status, invoice date, payee, amount — along with any linked payment and entity details.
#### Transaction Line Items
One row per line item on each transaction, with the Transaction ID included on every row so you can group back to the parent transaction. This format is suited for ledger-level analysis, account reconciliation, and auditing individual debit/credit entries.
**Columns exported:**
| Column | Description |
| ---------------------- | ------------------------------------------------------------------------------------------------------------------------------------- |
| **Transaction Id** | Identifier of the parent transaction. |
| **Invoice Number** | Invoice number on the parent transaction, if assigned. |
| **Transaction Type** | Type of the parent transaction (e.g., Policy Invoice, Indemnity). |
| **Status** | Status of the parent transaction (e.g., Paid, Owed, Approved). |
| **Invoice Date** | Date the invoice was created. |
| **Payee Name** | Name of the payee on the parent transaction. |
| **Entity Type** | Type of the linked entity (e.g., event, policy). |
| **Entity Name** | Name of the linked entity. |
| **Entity Id** | Internal identifier (UUID) of the linked entity. |
| **Payout Id** | Stripe payout ID, if the transaction was settled via payout. |
| **Payment Id** | Stripe transaction ID, if linked to a payment. |
| **Line Item Category** | Category of the line item, derived from the line item's subcategory (e.g., Attorney Fees Expenses, Expert Fees Expenses, Deductible). |
| **Line Item Id** | Identifier of the individual line item. |
| **Amount** | Signed dollar amount — **positive for income, negative for expenses**. |
| **Description** | Description of the line item (e.g., "ALAE reserve", "broker commission"). |
**Signed amount convention**
Line item amounts use +/− signing to represent the direction of money flow:
* **Positive** — money coming in (e.g., a premium payment received).
* **Negative** — money going out (e.g., a commission paid, an indemnity disbursement).
The sign on a line item row reflects the ledger direction of that individual entry. It does not match the gross amount shown on the parent transaction row in a Transactions export, which always displays the absolute invoice amount.
**Example: one transaction, multiple line items**
A single Policy Invoice for \$1,200 might expand into the following line items in the Transaction Line Items export:
| Transaction Id | Transaction Type | Amount | Description |
| -------------- | ---------------- | -------- | ----------------- |
| txn-001 | Policy Invoice | \$950.00 | Net premium |
| txn-001 | Policy Invoice | \$190.00 | Surplus lines tax |
| txn-001 | Policy Invoice | \$60.00 | Policy fee |
The same transaction in a **Transactions** export appears as a single row with an amount of **\$1,200.00** — the rolled-up total of all three line items.
Use **Transaction Line Items** when you need the per-account breakdown. Use **Transactions** when you only need the top-level totals.
 2. Select the fields you want to include in your export and configure any filters or sorting.
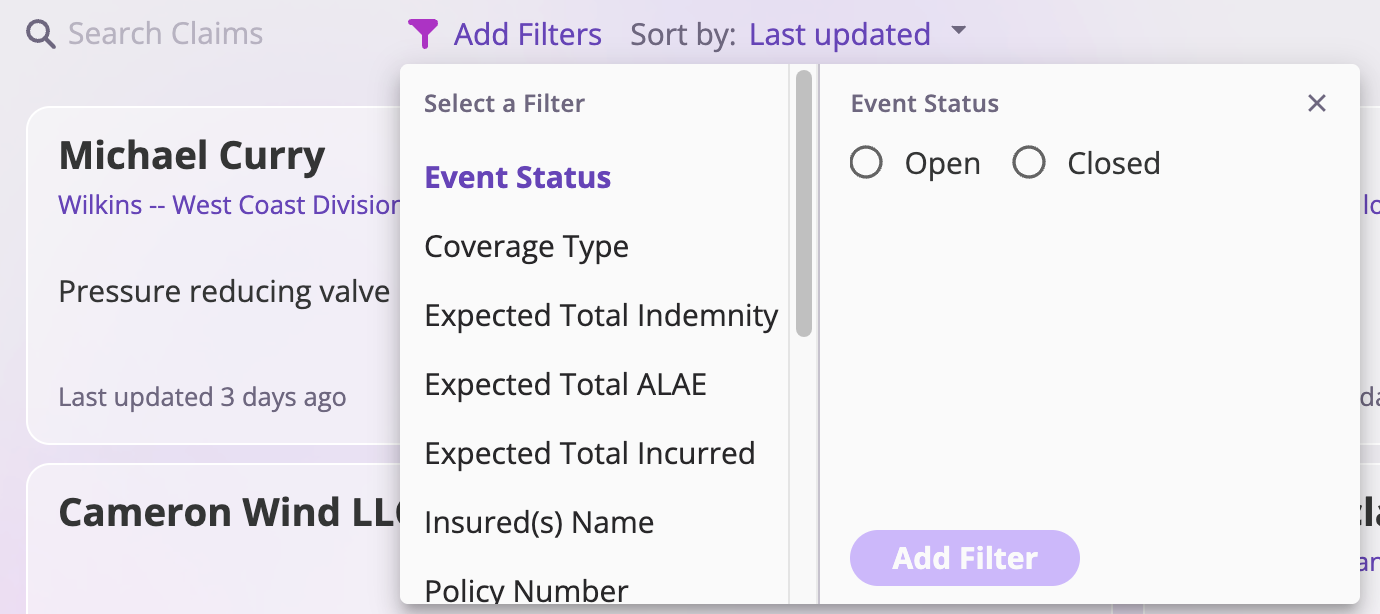 This page allows you to customize further the information you want your exported data to carry. This page has four sections: **Export Settings**, **Export Fields**, **Reorder Fields for Export**, and **Add Fields for Export**. Check out the [Export Customization and Configuration documentation to learn more about these sections](http://platform/reporting-and-reports/export-customization-and%20configuration.mdx).
3. When you finish your export selection, click **Export Insureds** to continue.
This page allows you to customize further the information you want your exported data to carry. This page has four sections: **Export Settings**, **Export Fields**, **Reorder Fields for Export**, and **Add Fields for Export**. Check out the [Export Customization and Configuration documentation to learn more about these sections](http://platform/reporting-and-reports/export-customization-and%20configuration.mdx).
3. When you finish your export selection, click **Export Insureds** to continue.
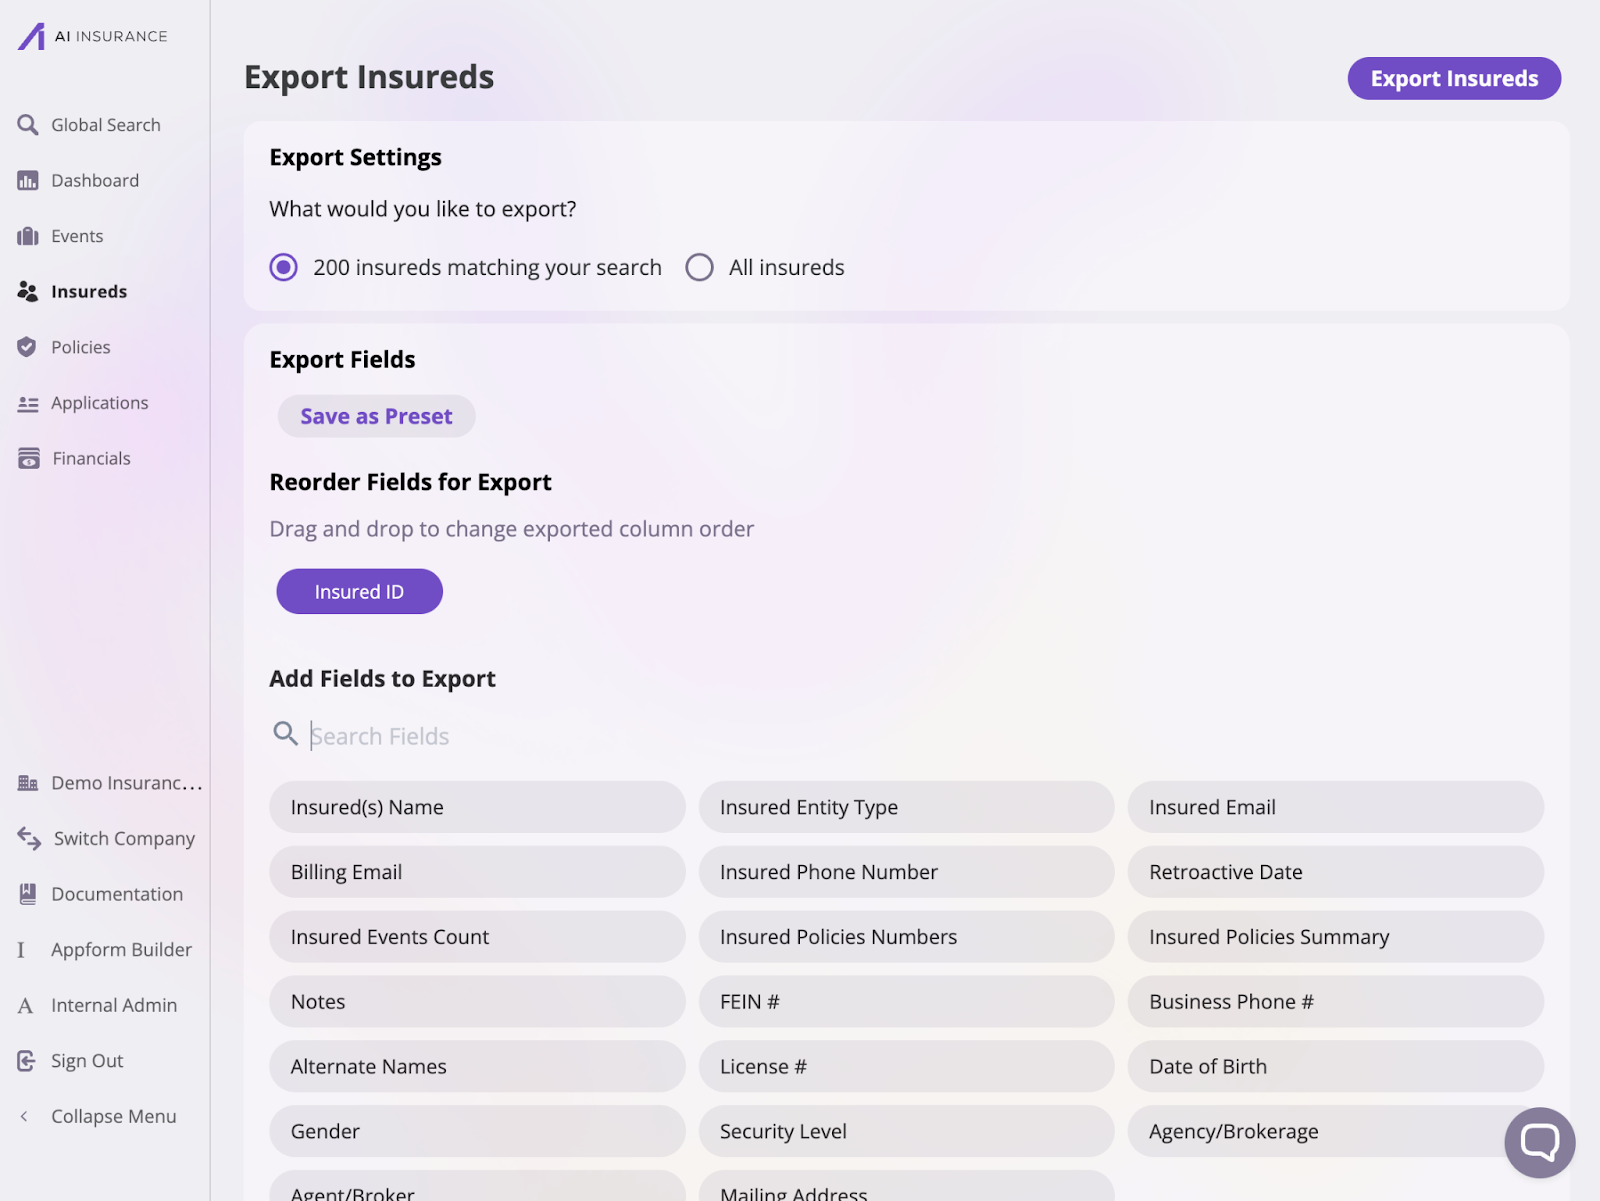 4. You'll see a success message: **"Export job created! Go to the Downloads page to download when ready"** with a link to the Downloads page.
5. Click the link in the success message or head over to the **Downloads** page by clicking the company, and then the **Export Downloads** tab.
6. On the Downloads page, you'll see a table called **"Export Downloads"** showing all your export jobs with:
* **Status** (Processing, Completed, or Failed)
* **File name**
* **Export type** (events, insureds, policies, or submissions)
* **Requested date/time**
* **Download button** (when completed)
7. When the export status shows **"completed"**, click the download button to get your Excel file.
4. You'll see a success message: **"Export job created! Go to the Downloads page to download when ready"** with a link to the Downloads page.
5. Click the link in the success message or head over to the **Downloads** page by clicking the company, and then the **Export Downloads** tab.
6. On the Downloads page, you'll see a table called **"Export Downloads"** showing all your export jobs with:
* **Status** (Processing, Completed, or Failed)
* **File name**
* **Export type** (events, insureds, policies, or submissions)
* **Requested date/time**
* **Download button** (when completed)
7. When the export status shows **"completed"**, click the download button to get your Excel file.
 2. Choose the events you'd like to export: either claims or incidents.
 3. Click the **Export Events** button to export data on the events.
 4. The **Export Events** page allows you to select and reorder the fields you wish to export. Configure your export before selecting **Export Events** to continue.
Like the previous section, the **Export Events** page has four sections: **Export Settings**, **Export Fields**, **Reorder Fields for Export**, and **Add Fields for Export**. Check out the [Export Customization and Configuration documentation](http://platform/reporting-and-reports/export-customization-and%20configuration.mdx) to learn more about these sections.
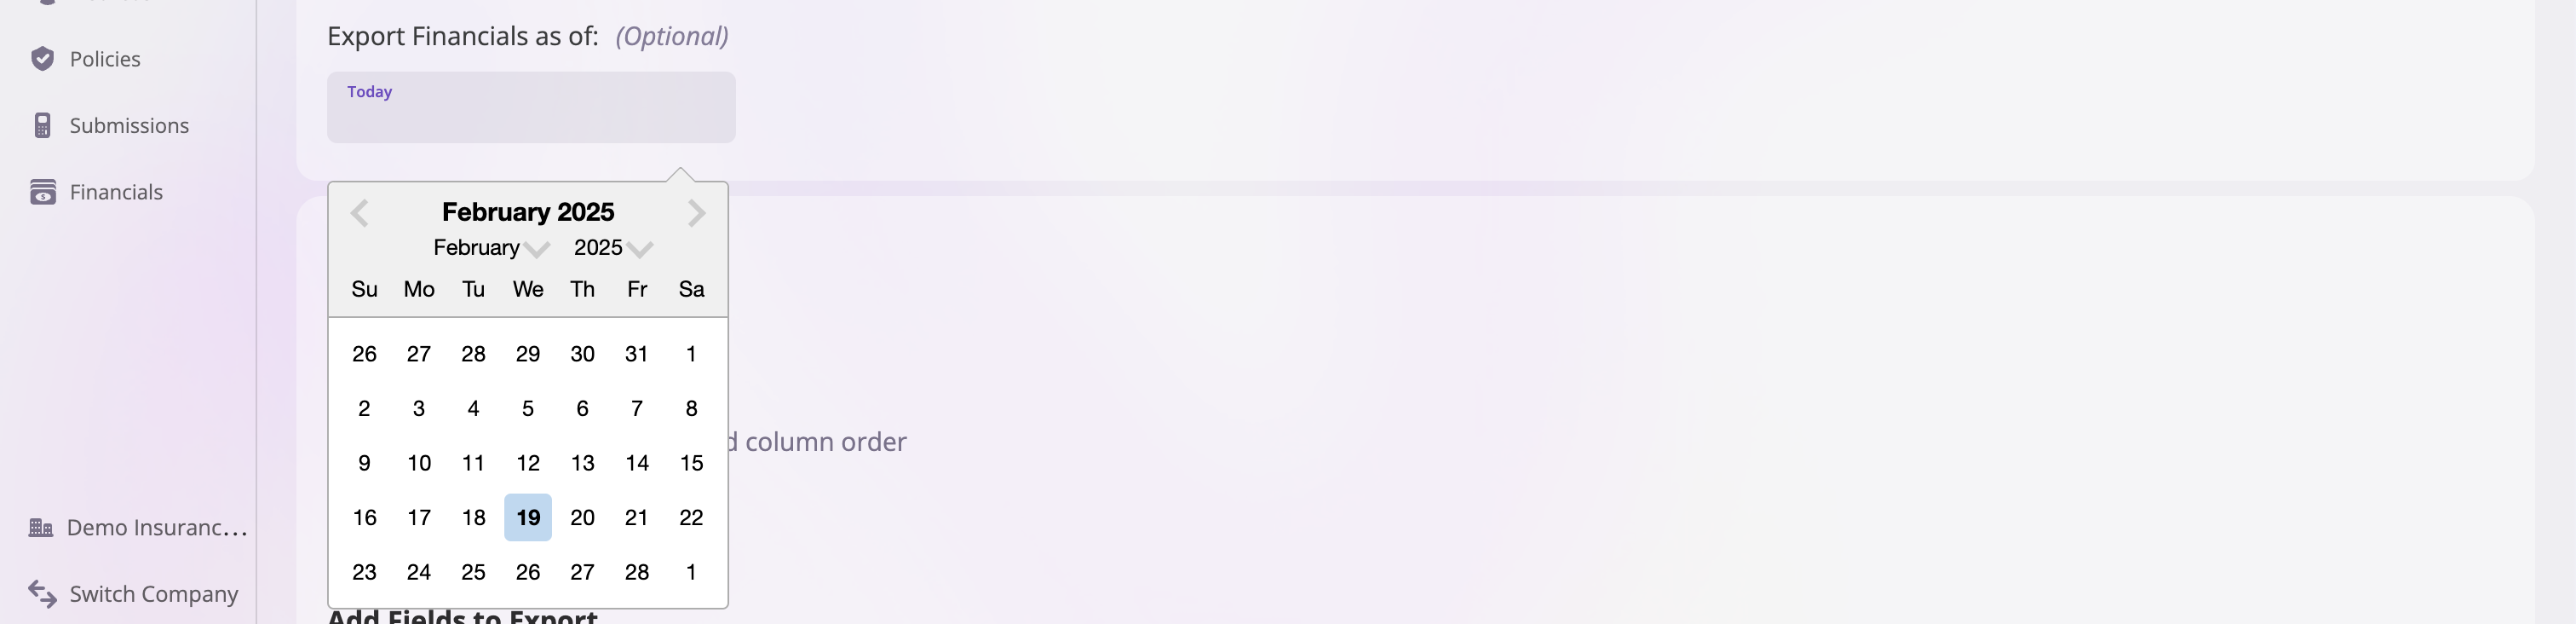
5. You can export a subset of your events' financial data in the **Export Settings** section. Entering a date into the **Export Financials as of** field will export the financial values of your selected events at the selected date.
For example, if you only wish to include the invoices and transactions on and before "12/20/2023" and omit the transactions after, enter an “as of” date of “12/20/2023”.
4. The **Export Events** page allows you to select and reorder the fields you wish to export. Configure your export before selecting **Export Events** to continue.
Like the previous section, the **Export Events** page has four sections: **Export Settings**, **Export Fields**, **Reorder Fields for Export**, and **Add Fields for Export**. Check out the [Export Customization and Configuration documentation](http://platform/reporting-and-reports/export-customization-and%20configuration.mdx) to learn more about these sections.
5. You can export a subset of your events' financial data in the **Export Settings** section. Entering a date into the **Export Financials as of** field will export the financial values of your selected events at the selected date.
For example, if you only wish to include the invoices and transactions on and before "12/20/2023" and omit the transactions after, enter an “as of” date of “12/20/2023”.
 6. After selecting your export options, click the **Export Events** button to proceed.
Once the export is complete, the file will be downloaded to your machine based on your browser's download settings.
## **Exporting Financials Data**
Financial data can be exported in two ways: as transaction records directly from the Financials page, or as financial summary fields included in Event and Policy exports.
### Financial Fields in Event and Policy Exports
When exporting Events or Policies, each active financial category (e.g., ALAE, Indemnity, Deductible) contributes the following summary fields per category:
| Field | Description |
| ----------------------------------- | ----------------------------------------------------------------------------------------------------- |
| **\{Category} - Reserves** | The estimated reserve amount for open claims. Only present for categories that support reserves. |
| **\{Category} - Owed** | Total invoice amount issued but not yet paid. |
| **\{Category} - Paid** | Total amount that has been paid. |
| **\{Category} - Expected Incurred** | The total expected cost — paid + reserves for categories that support reserves, paid + owed otherwise |
For categories with sub-categories (line item breakdowns), an additional field is available per sub-category:
* **\{Sub-category} - Total**: The total amount (paid + owed) for that sub-category.
For categories that support reserves, three fields track the most recent user-set reserve estimate:
* **\{Category} - Last User Expected Incurred**: The dollar amount of the most recent manual reserve estimate.
* **\{Category} - Last User Expected Incurred Date**: The date the estimate was recorded.
* **\{Category} - Last User Expected Incurred User**: The user who recorded the estimate.
6. After selecting your export options, click the **Export Events** button to proceed.
Once the export is complete, the file will be downloaded to your machine based on your browser's download settings.
## **Exporting Financials Data**
Financial data can be exported in two ways: as transaction records directly from the Financials page, or as financial summary fields included in Event and Policy exports.
### Financial Fields in Event and Policy Exports
When exporting Events or Policies, each active financial category (e.g., ALAE, Indemnity, Deductible) contributes the following summary fields per category:
| Field | Description |
| ----------------------------------- | ----------------------------------------------------------------------------------------------------- |
| **\{Category} - Reserves** | The estimated reserve amount for open claims. Only present for categories that support reserves. |
| **\{Category} - Owed** | Total invoice amount issued but not yet paid. |
| **\{Category} - Paid** | Total amount that has been paid. |
| **\{Category} - Expected Incurred** | The total expected cost — paid + reserves for categories that support reserves, paid + owed otherwise |
For categories with sub-categories (line item breakdowns), an additional field is available per sub-category:
* **\{Sub-category} - Total**: The total amount (paid + owed) for that sub-category.
For categories that support reserves, three fields track the most recent user-set reserve estimate:
* **\{Category} - Last User Expected Incurred**: The dollar amount of the most recent manual reserve estimate.
* **\{Category} - Last User Expected Incurred Date**: The date the estimate was recorded.
* **\{Category} - Last User Expected Incurred User**: The user who recorded the estimate.
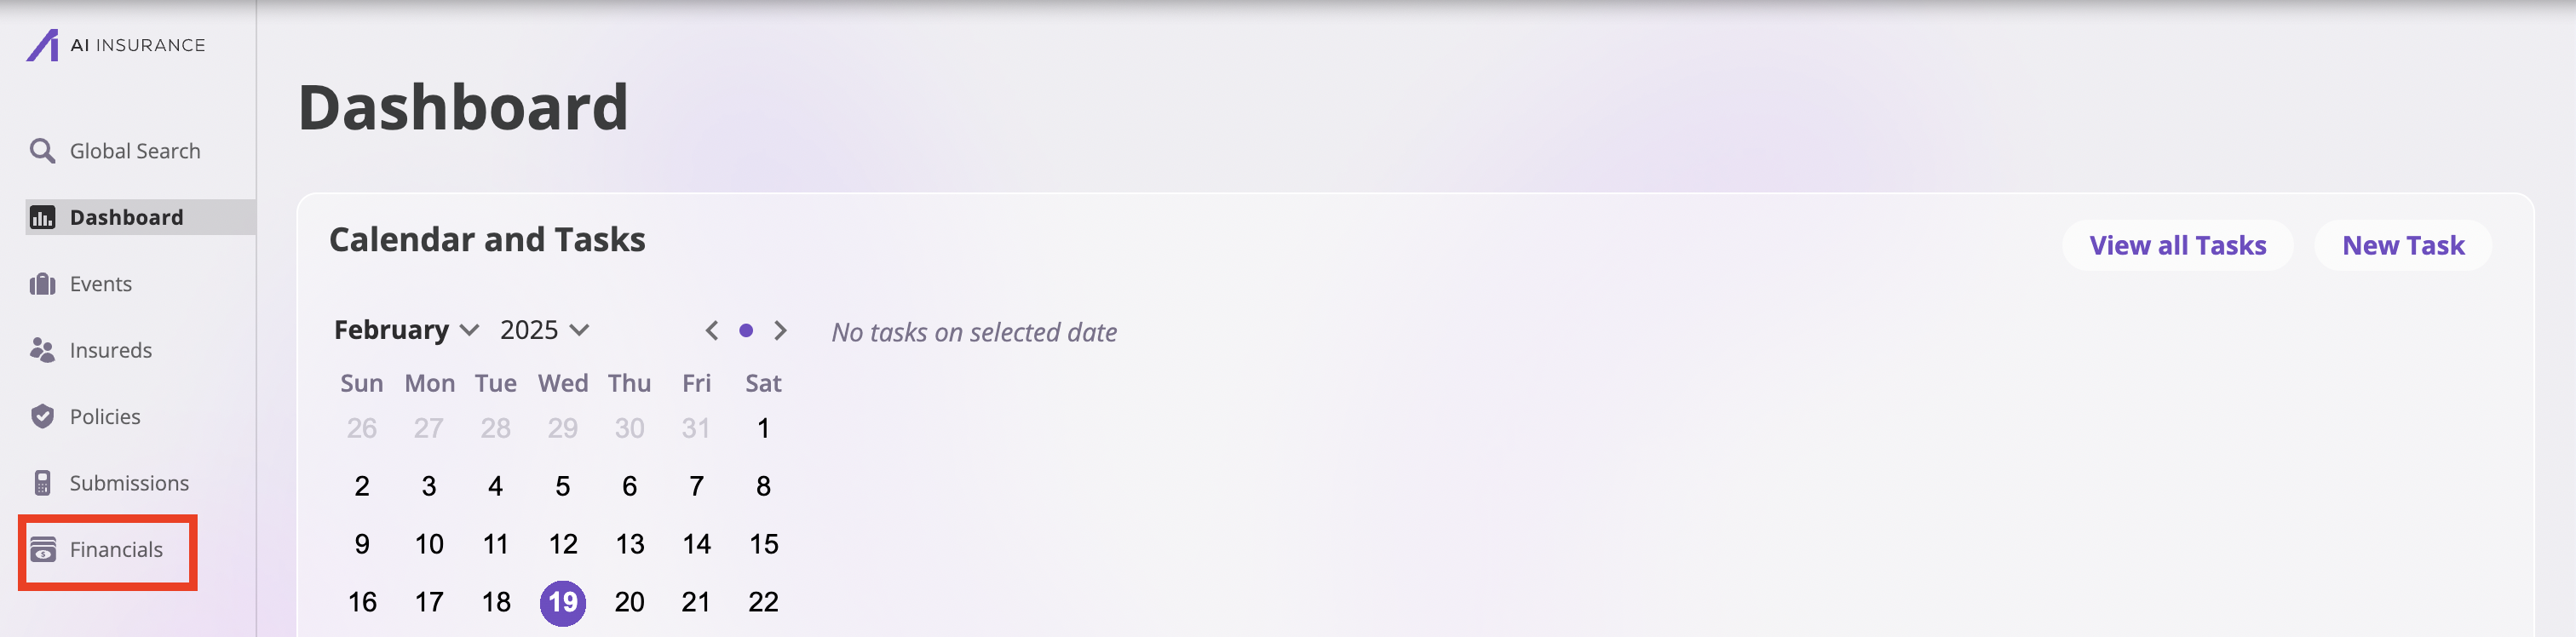 2. Apply any filters or select specific entries you would like to export.
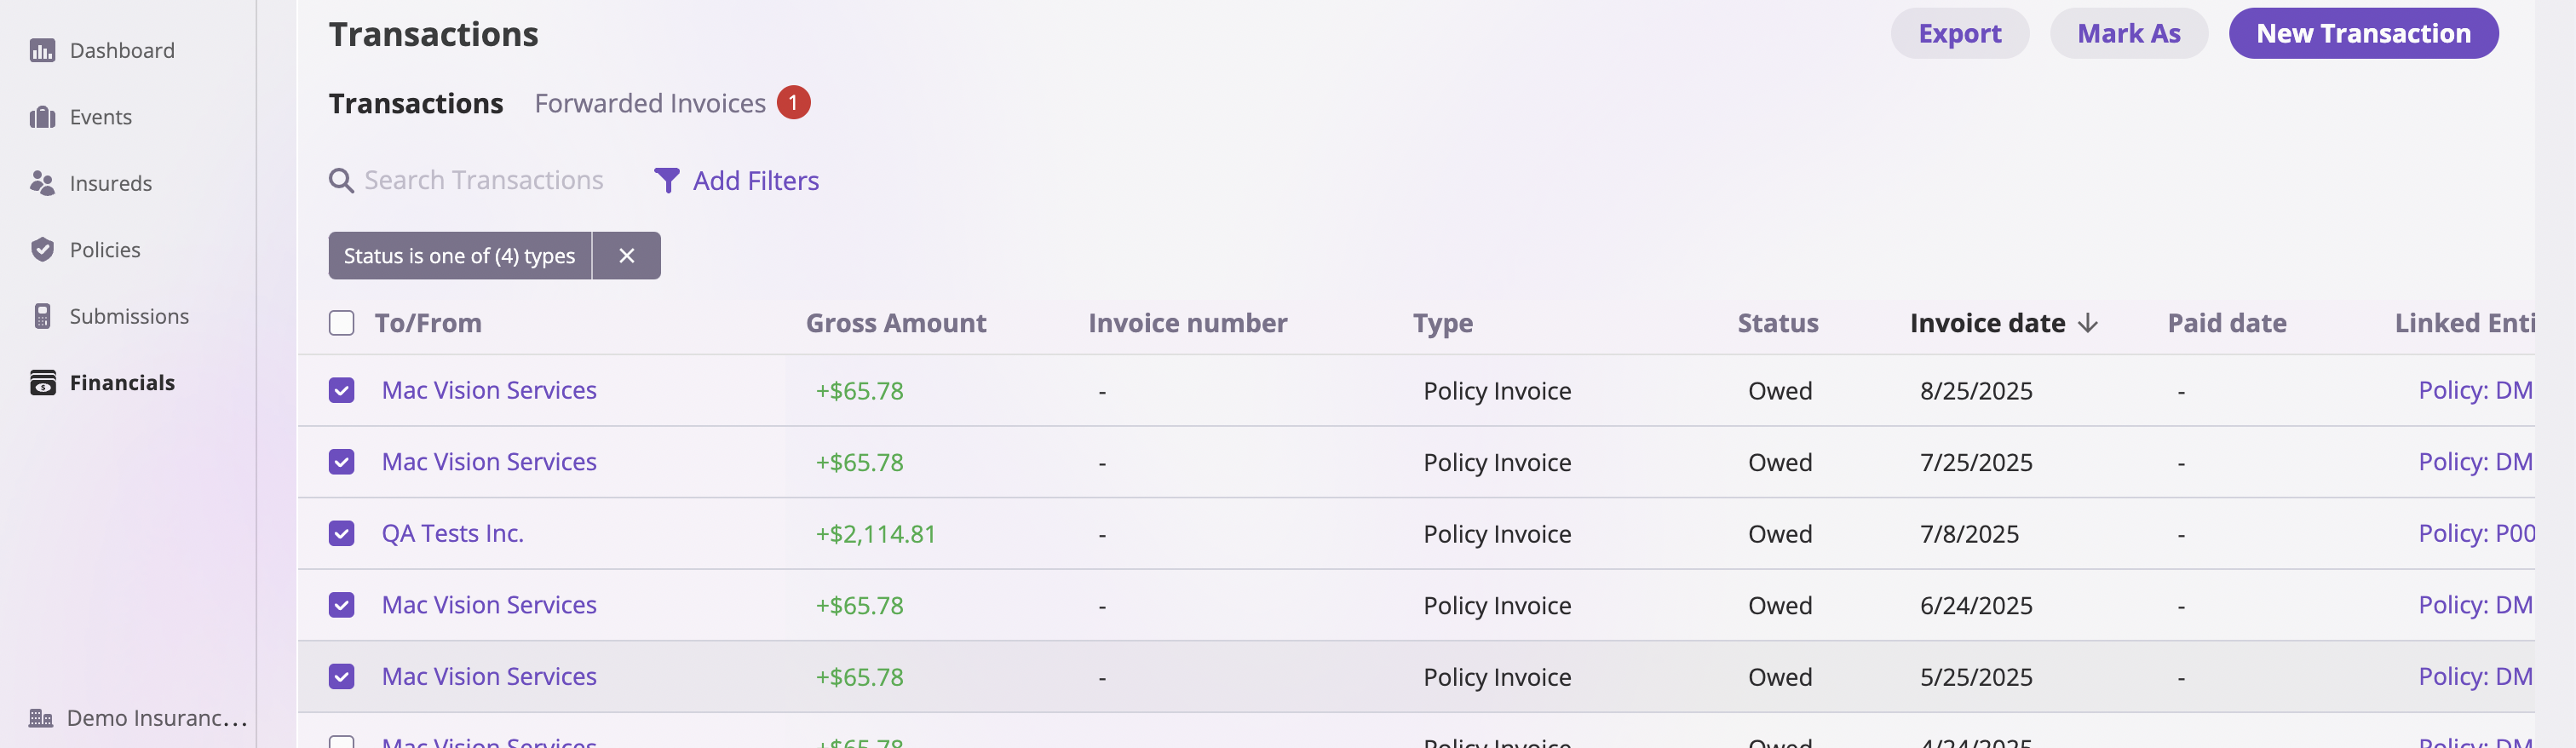 3. Select **Export** at the top right of the table.
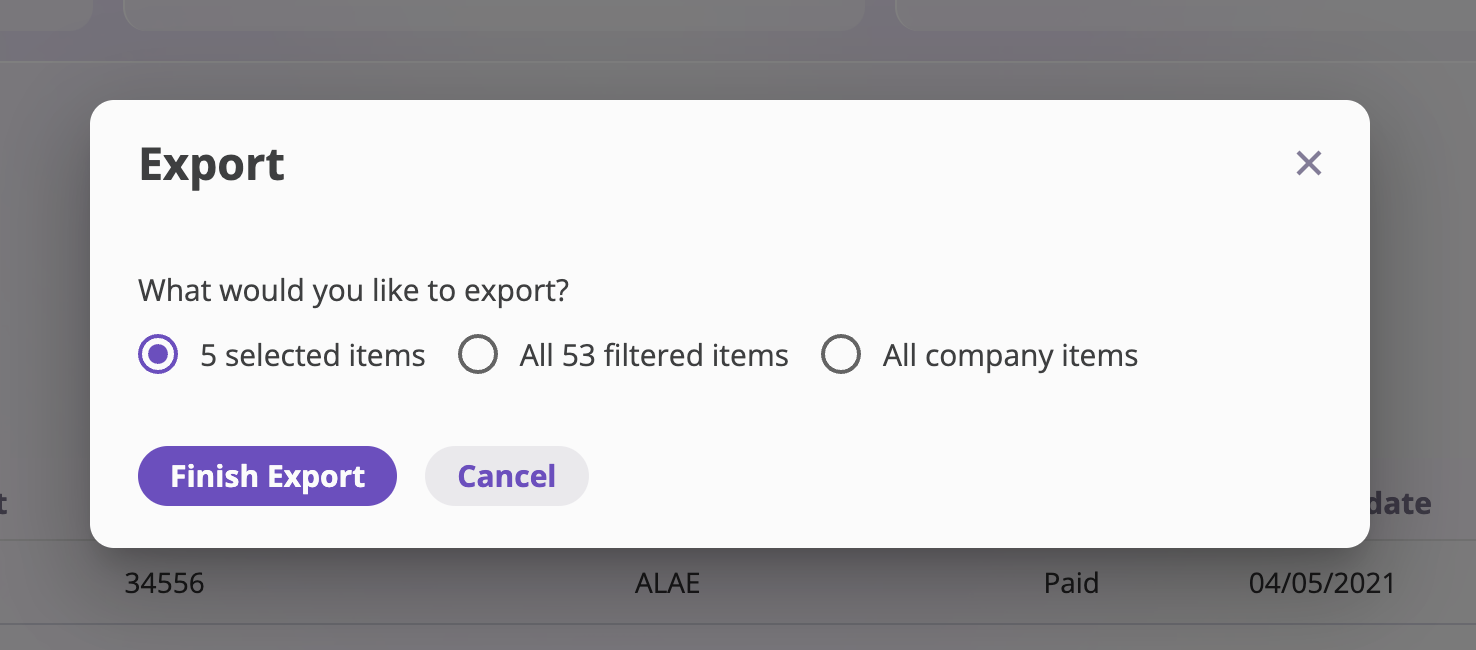
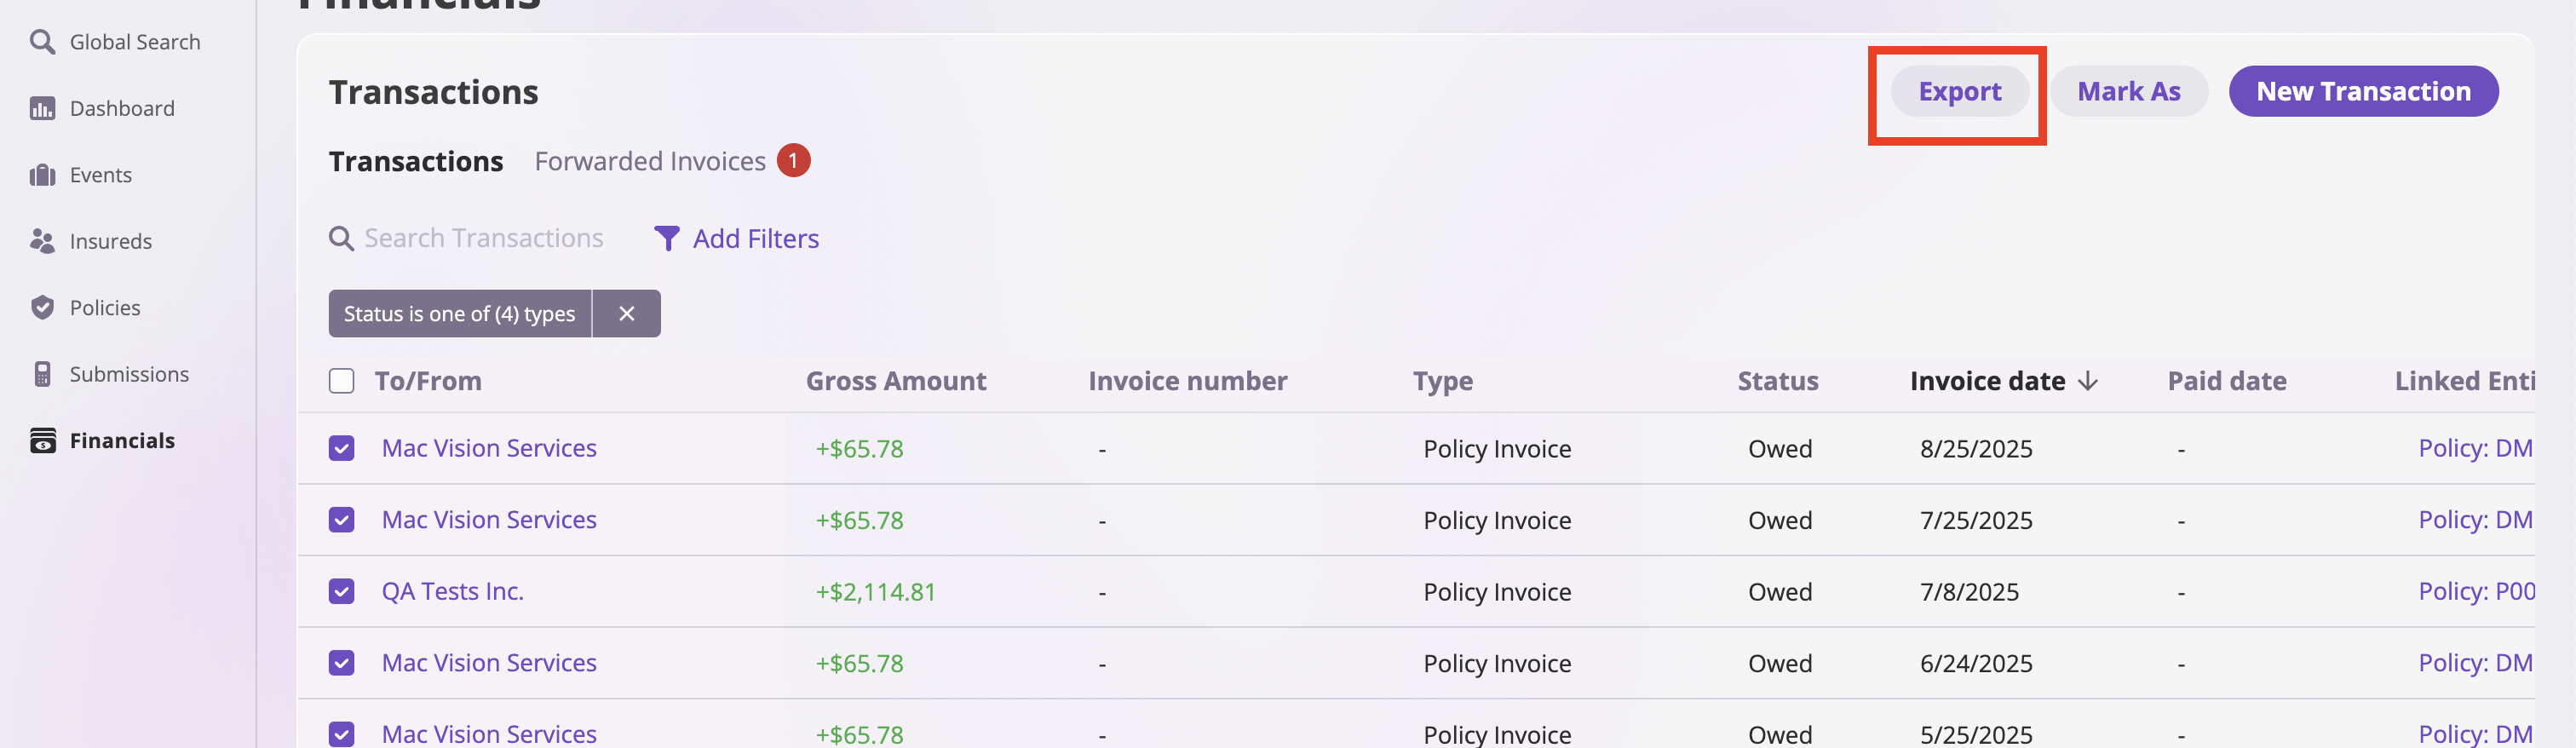 4. Choose your **export scope** (selected items, filter results, or all) and your **export format** (see [Transaction Export Formats](#transaction-export-formats) below), then confirm.
 ### Exporting from within an Event or Policy
Follow these steps to export financial data from within an Event or Policy:
1. Navigate to a specific [Event](/events/view-events/view-events) or [Policy](/policing/policy-management/viewing-a-policy), and select the **Financials** tab.
### Exporting from within an Event or Policy
Follow these steps to export financial data from within an Event or Policy:
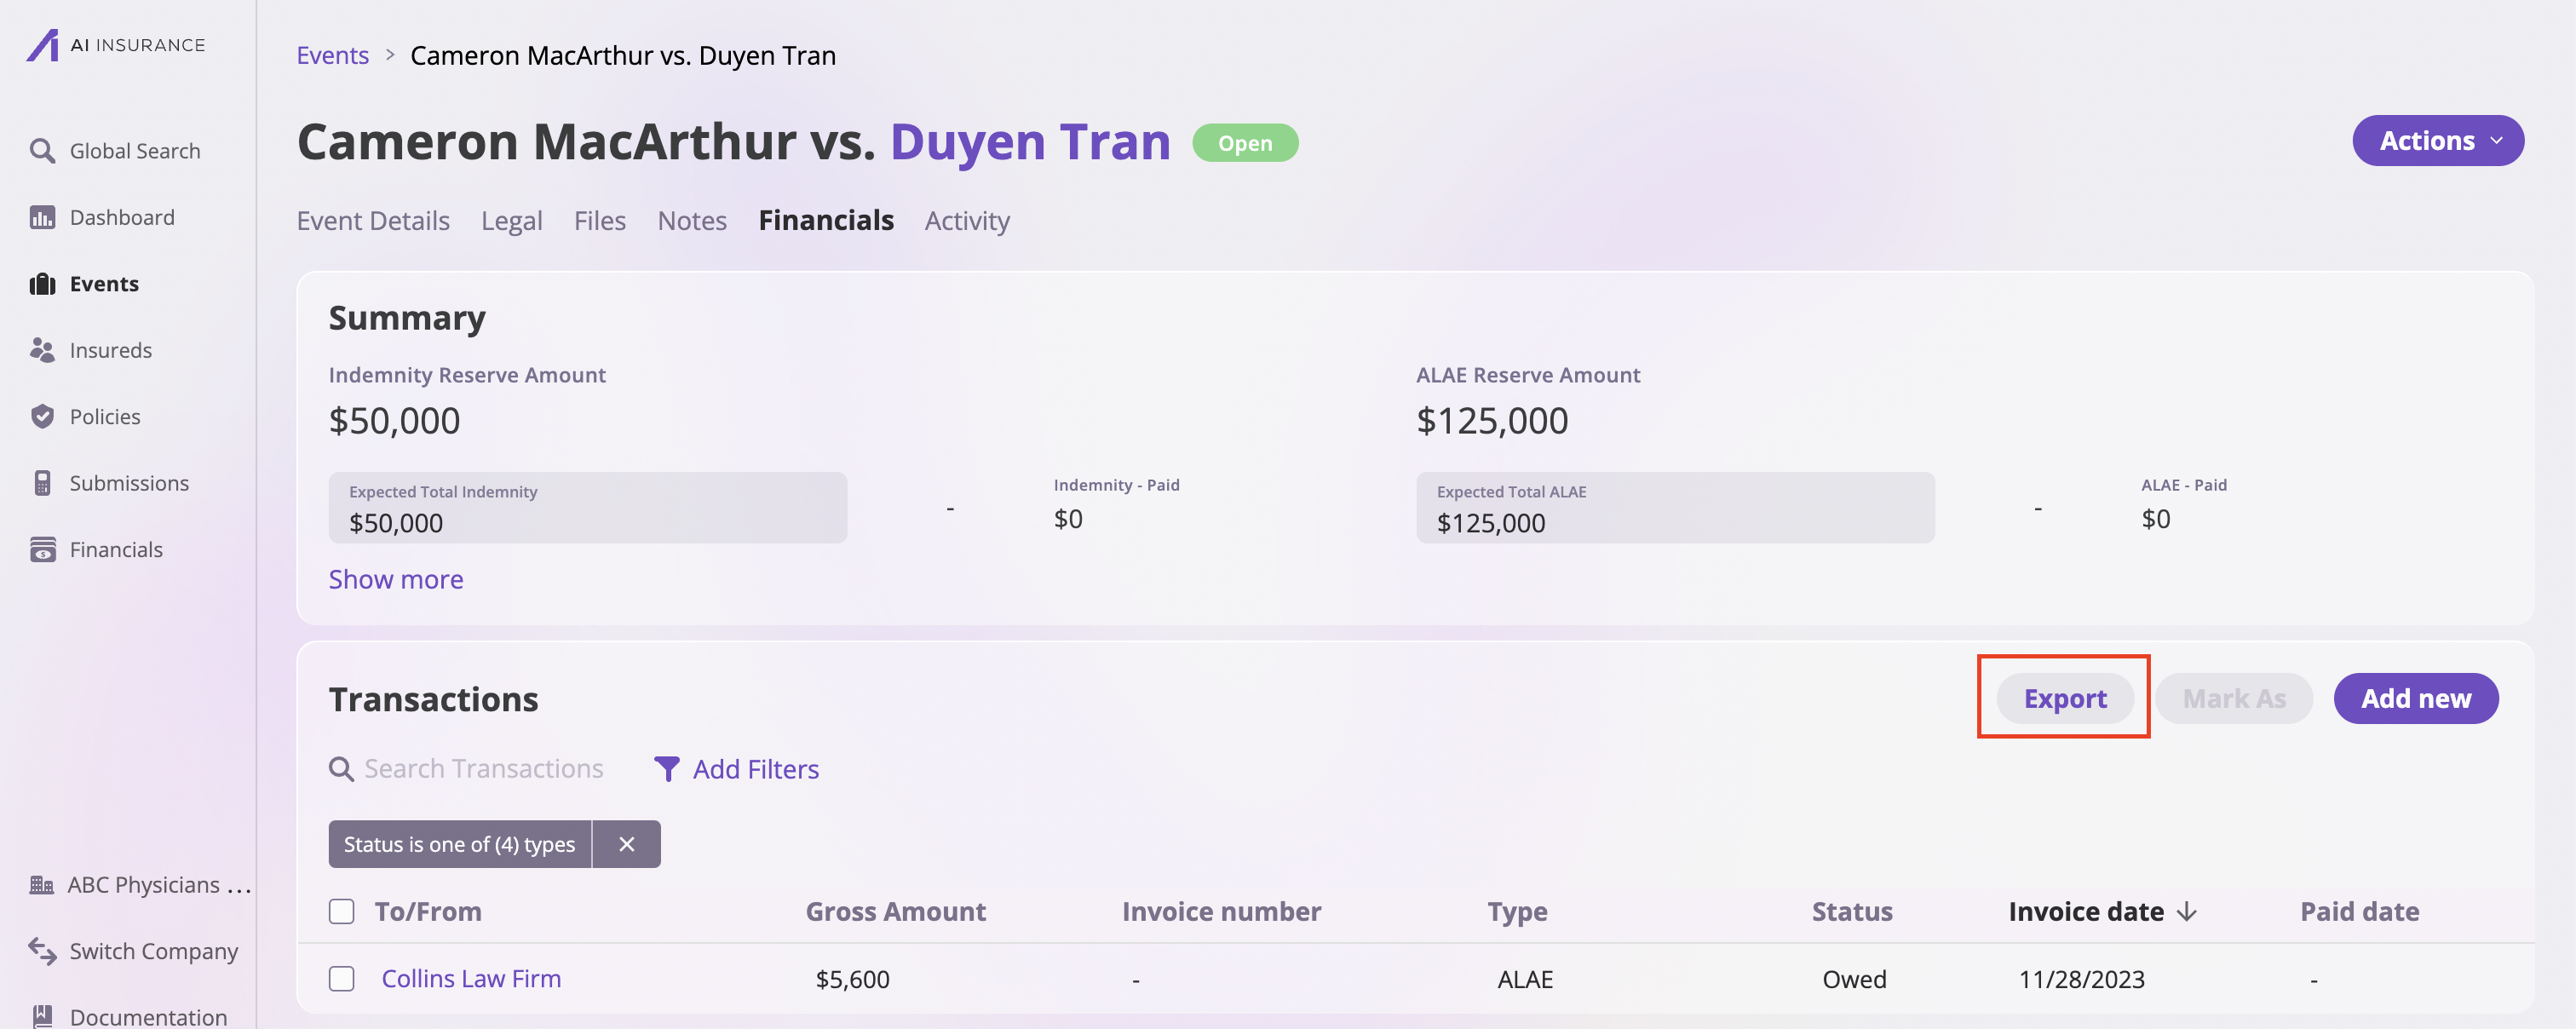
1. Navigate to a specific [Event](/events/view-events/view-events) or [Policy](/policing/policy-management/viewing-a-policy), and select the **Financials** tab.
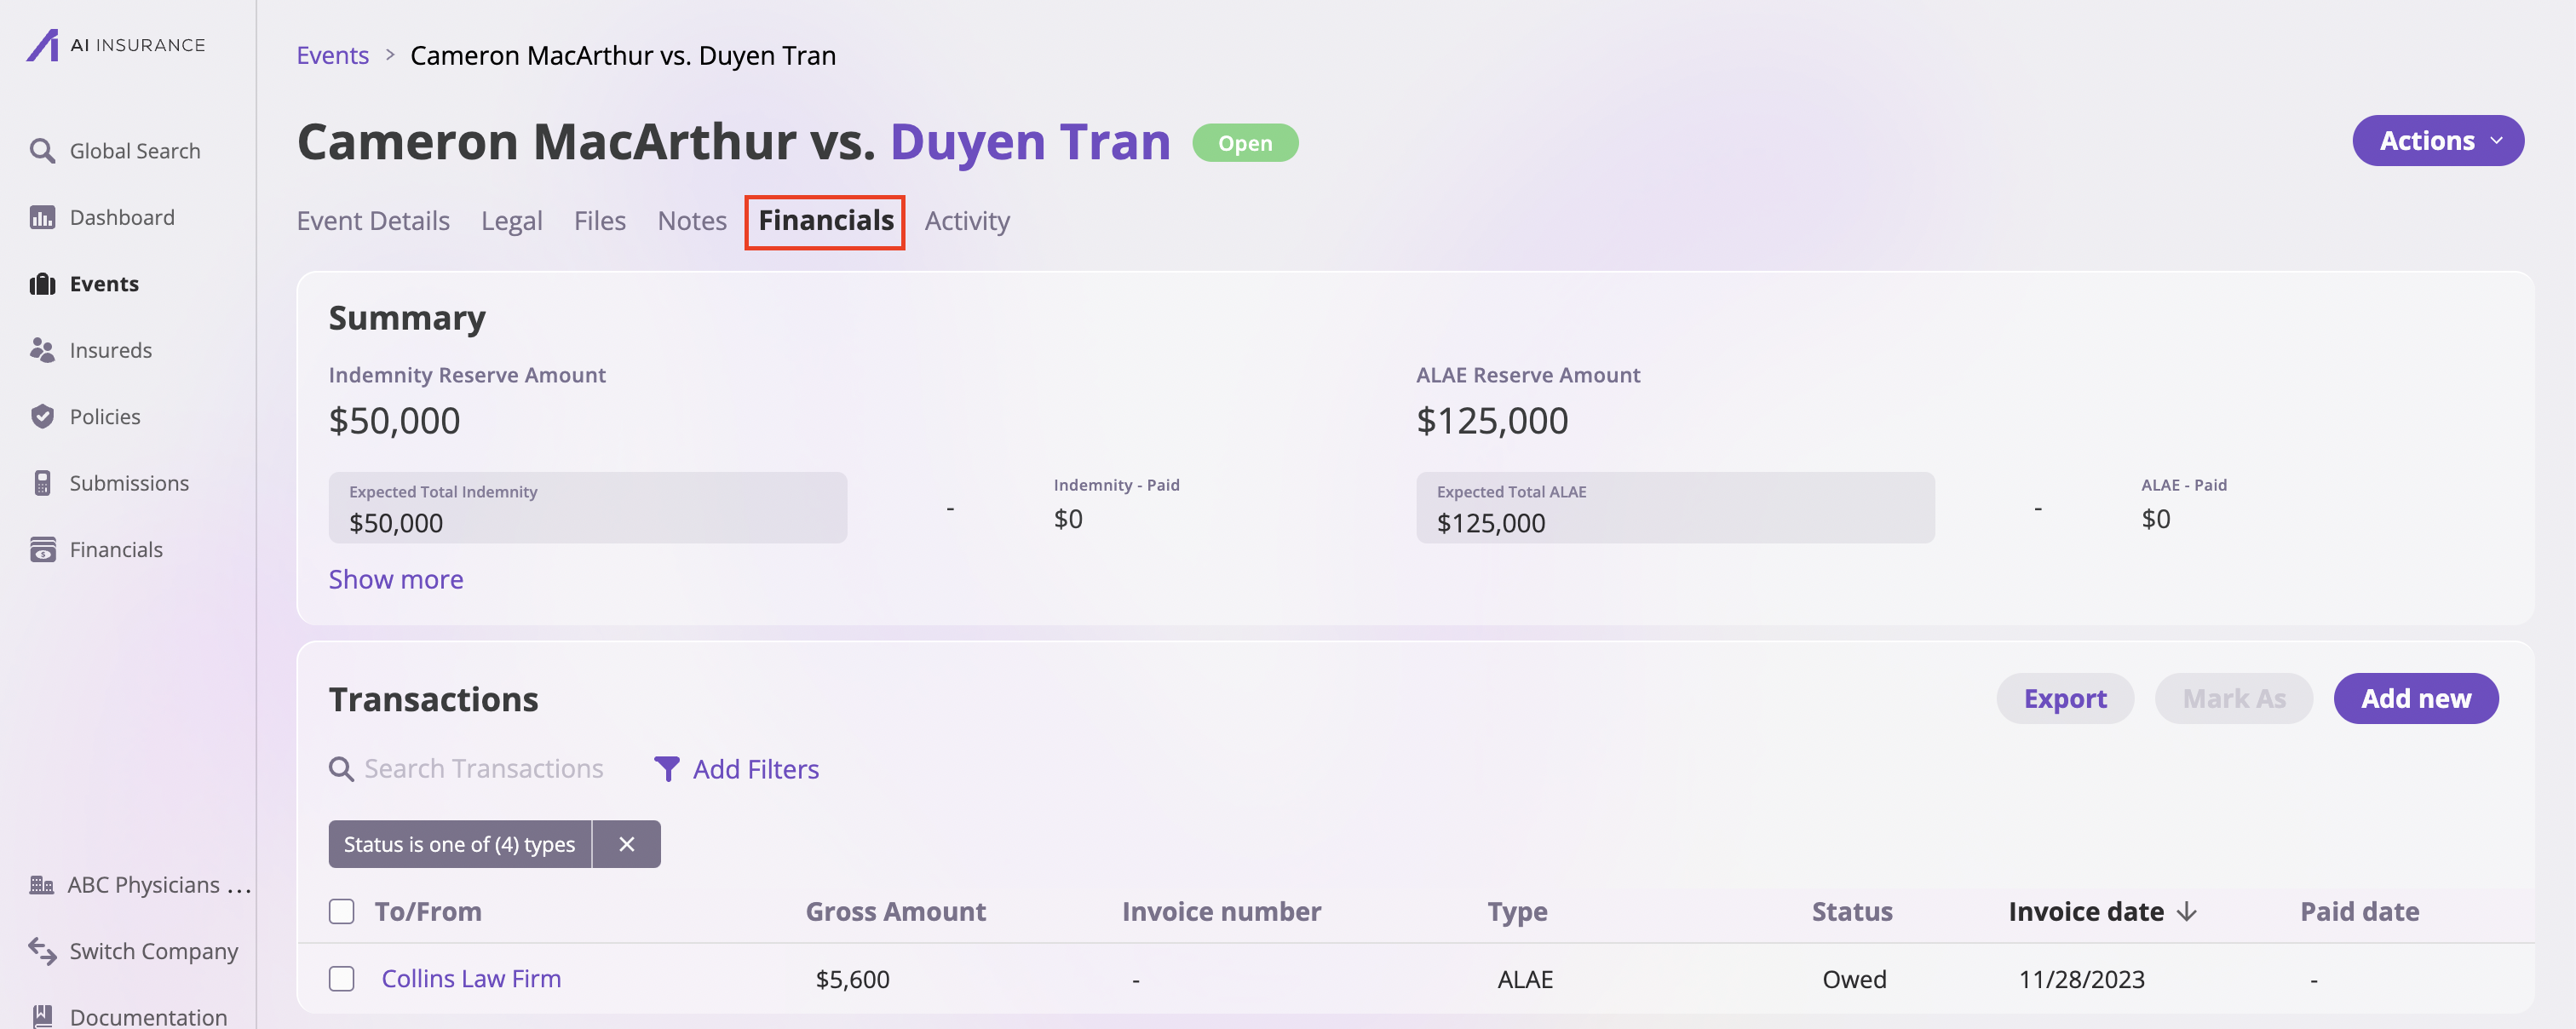 2. Apply any filters or select specific entries you would like to export.
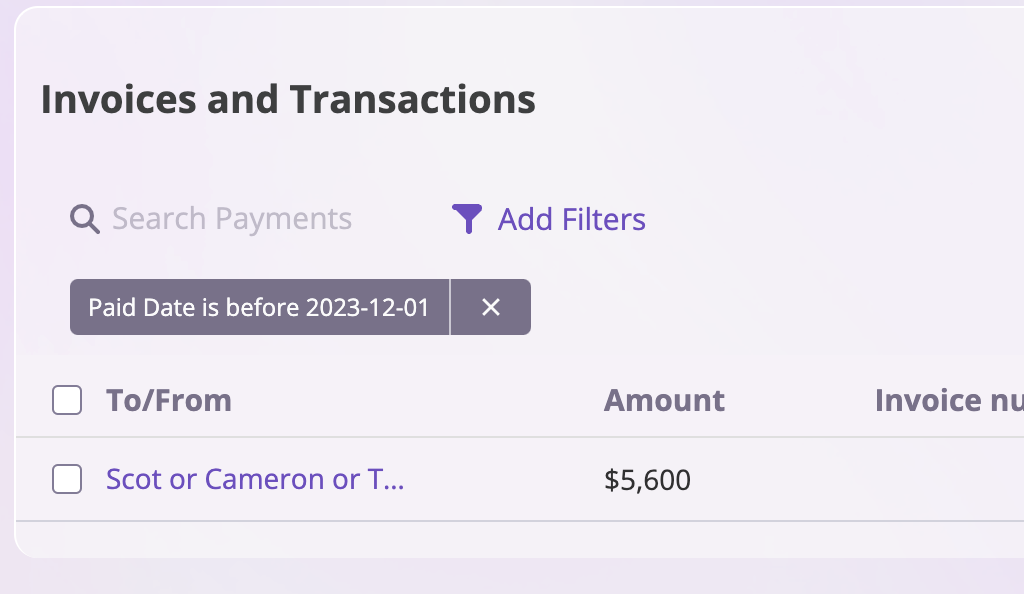 3. Select **Export** at the top right of the table.
 4. Choose your **export scope** (selected items, filter results, or all) and your **export format** (see [Transaction Export Formats](#transaction-export-formats) below), then confirm.
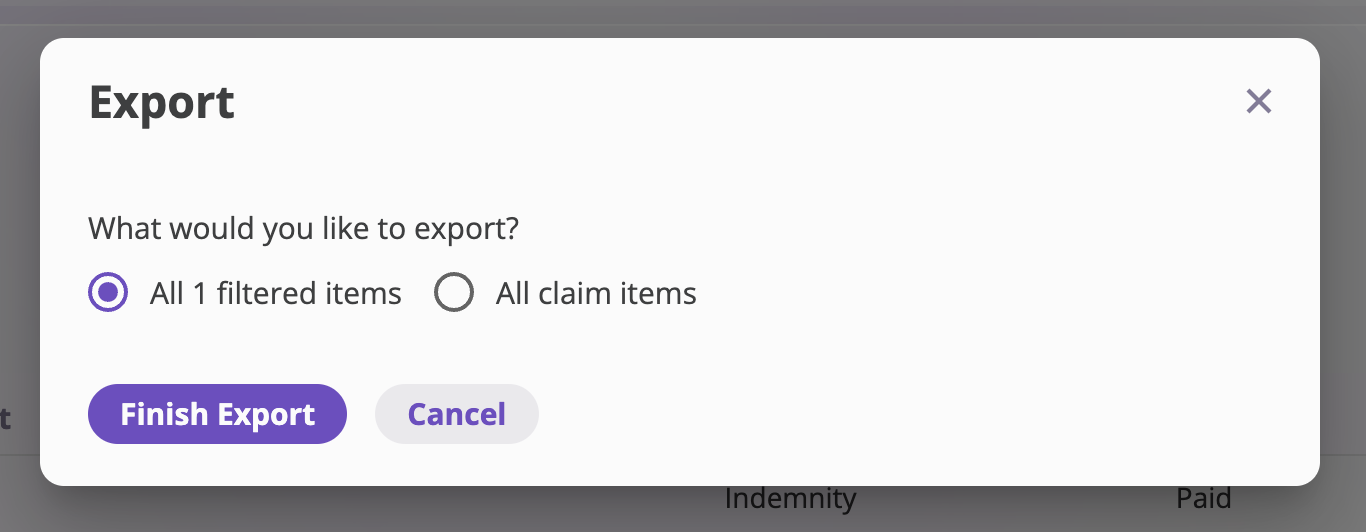 ### Transaction Export Formats
The export dialog offers two formats. Choose the one that fits your reporting need.
#### Transactions
One row per transaction. This is the standard format for reconciliation, reporting, and most accounting workflows.
Each row contains the transaction header fields — type, status, invoice date, payee, amount — along with any linked payment and entity details.
#### Transaction Line Items
One row per line item on each transaction, with the Transaction ID included on every row so you can group back to the parent transaction. This format is suited for ledger-level analysis, account reconciliation, and auditing individual debit/credit entries.
**Columns exported:**
| Column | Description |
| ---------------------- | ------------------------------------------------------------------------------------------------------------------------------------- |
| **Transaction Id** | Identifier of the parent transaction. |
| **Invoice Number** | Invoice number on the parent transaction, if assigned. |
| **Transaction Type** | Type of the parent transaction (e.g., Policy Invoice, Indemnity). |
| **Status** | Status of the parent transaction (e.g., Paid, Owed, Approved). |
| **Invoice Date** | Date the invoice was created. |
| **Payee Name** | Name of the payee on the parent transaction. |
| **Entity Type** | Type of the linked entity (e.g., event, policy). |
| **Entity Name** | Name of the linked entity. |
| **Entity Id** | Internal identifier (UUID) of the linked entity. |
| **Payout Id** | Stripe payout ID, if the transaction was settled via payout. |
| **Payment Id** | Stripe transaction ID, if linked to a payment. |
| **Line Item Category** | Category of the line item, derived from the line item's subcategory (e.g., Attorney Fees Expenses, Expert Fees Expenses, Deductible). |
| **Line Item Id** | Identifier of the individual line item. |
| **Amount** | Signed dollar amount — **positive for income, negative for expenses**. |
| **Description** | Description of the line item (e.g., "ALAE reserve", "broker commission"). |
**Signed amount convention**
Line item amounts use +/− signing to represent the direction of money flow:
* **Positive** — money coming in (e.g., a premium payment received).
* **Negative** — money going out (e.g., a commission paid, an indemnity disbursement).
### Transaction Export Formats
The export dialog offers two formats. Choose the one that fits your reporting need.
#### Transactions
One row per transaction. This is the standard format for reconciliation, reporting, and most accounting workflows.
Each row contains the transaction header fields — type, status, invoice date, payee, amount — along with any linked payment and entity details.
#### Transaction Line Items
One row per line item on each transaction, with the Transaction ID included on every row so you can group back to the parent transaction. This format is suited for ledger-level analysis, account reconciliation, and auditing individual debit/credit entries.
**Columns exported:**
| Column | Description |
| ---------------------- | ------------------------------------------------------------------------------------------------------------------------------------- |
| **Transaction Id** | Identifier of the parent transaction. |
| **Invoice Number** | Invoice number on the parent transaction, if assigned. |
| **Transaction Type** | Type of the parent transaction (e.g., Policy Invoice, Indemnity). |
| **Status** | Status of the parent transaction (e.g., Paid, Owed, Approved). |
| **Invoice Date** | Date the invoice was created. |
| **Payee Name** | Name of the payee on the parent transaction. |
| **Entity Type** | Type of the linked entity (e.g., event, policy). |
| **Entity Name** | Name of the linked entity. |
| **Entity Id** | Internal identifier (UUID) of the linked entity. |
| **Payout Id** | Stripe payout ID, if the transaction was settled via payout. |
| **Payment Id** | Stripe transaction ID, if linked to a payment. |
| **Line Item Category** | Category of the line item, derived from the line item's subcategory (e.g., Attorney Fees Expenses, Expert Fees Expenses, Deductible). |
| **Line Item Id** | Identifier of the individual line item. |
| **Amount** | Signed dollar amount — **positive for income, negative for expenses**. |
| **Description** | Description of the line item (e.g., "ALAE reserve", "broker commission"). |
**Signed amount convention**
Line item amounts use +/− signing to represent the direction of money flow:
* **Positive** — money coming in (e.g., a premium payment received).
* **Negative** — money going out (e.g., a commission paid, an indemnity disbursement).