> ## Documentation Index
> Fetch the complete documentation index at: https://docs.aiinsurance.io/llms.txt
> Use this file to discover all available pages before exploring further.
# Changing Invoice Name After Sending
## Overview
Once an invoice has been sent, it cannot be modified directly. If you need to change the name or any other details on a sent invoice, you'll need to void the existing invoice and create a new one from scratch.
## Step-by-Step Process
### Step 1: Void the Existing Invoice
1. Navigate to **Financials** in the sidebar
2. Go to the **Transactions** section
3. Find the sent invoice you need to modify
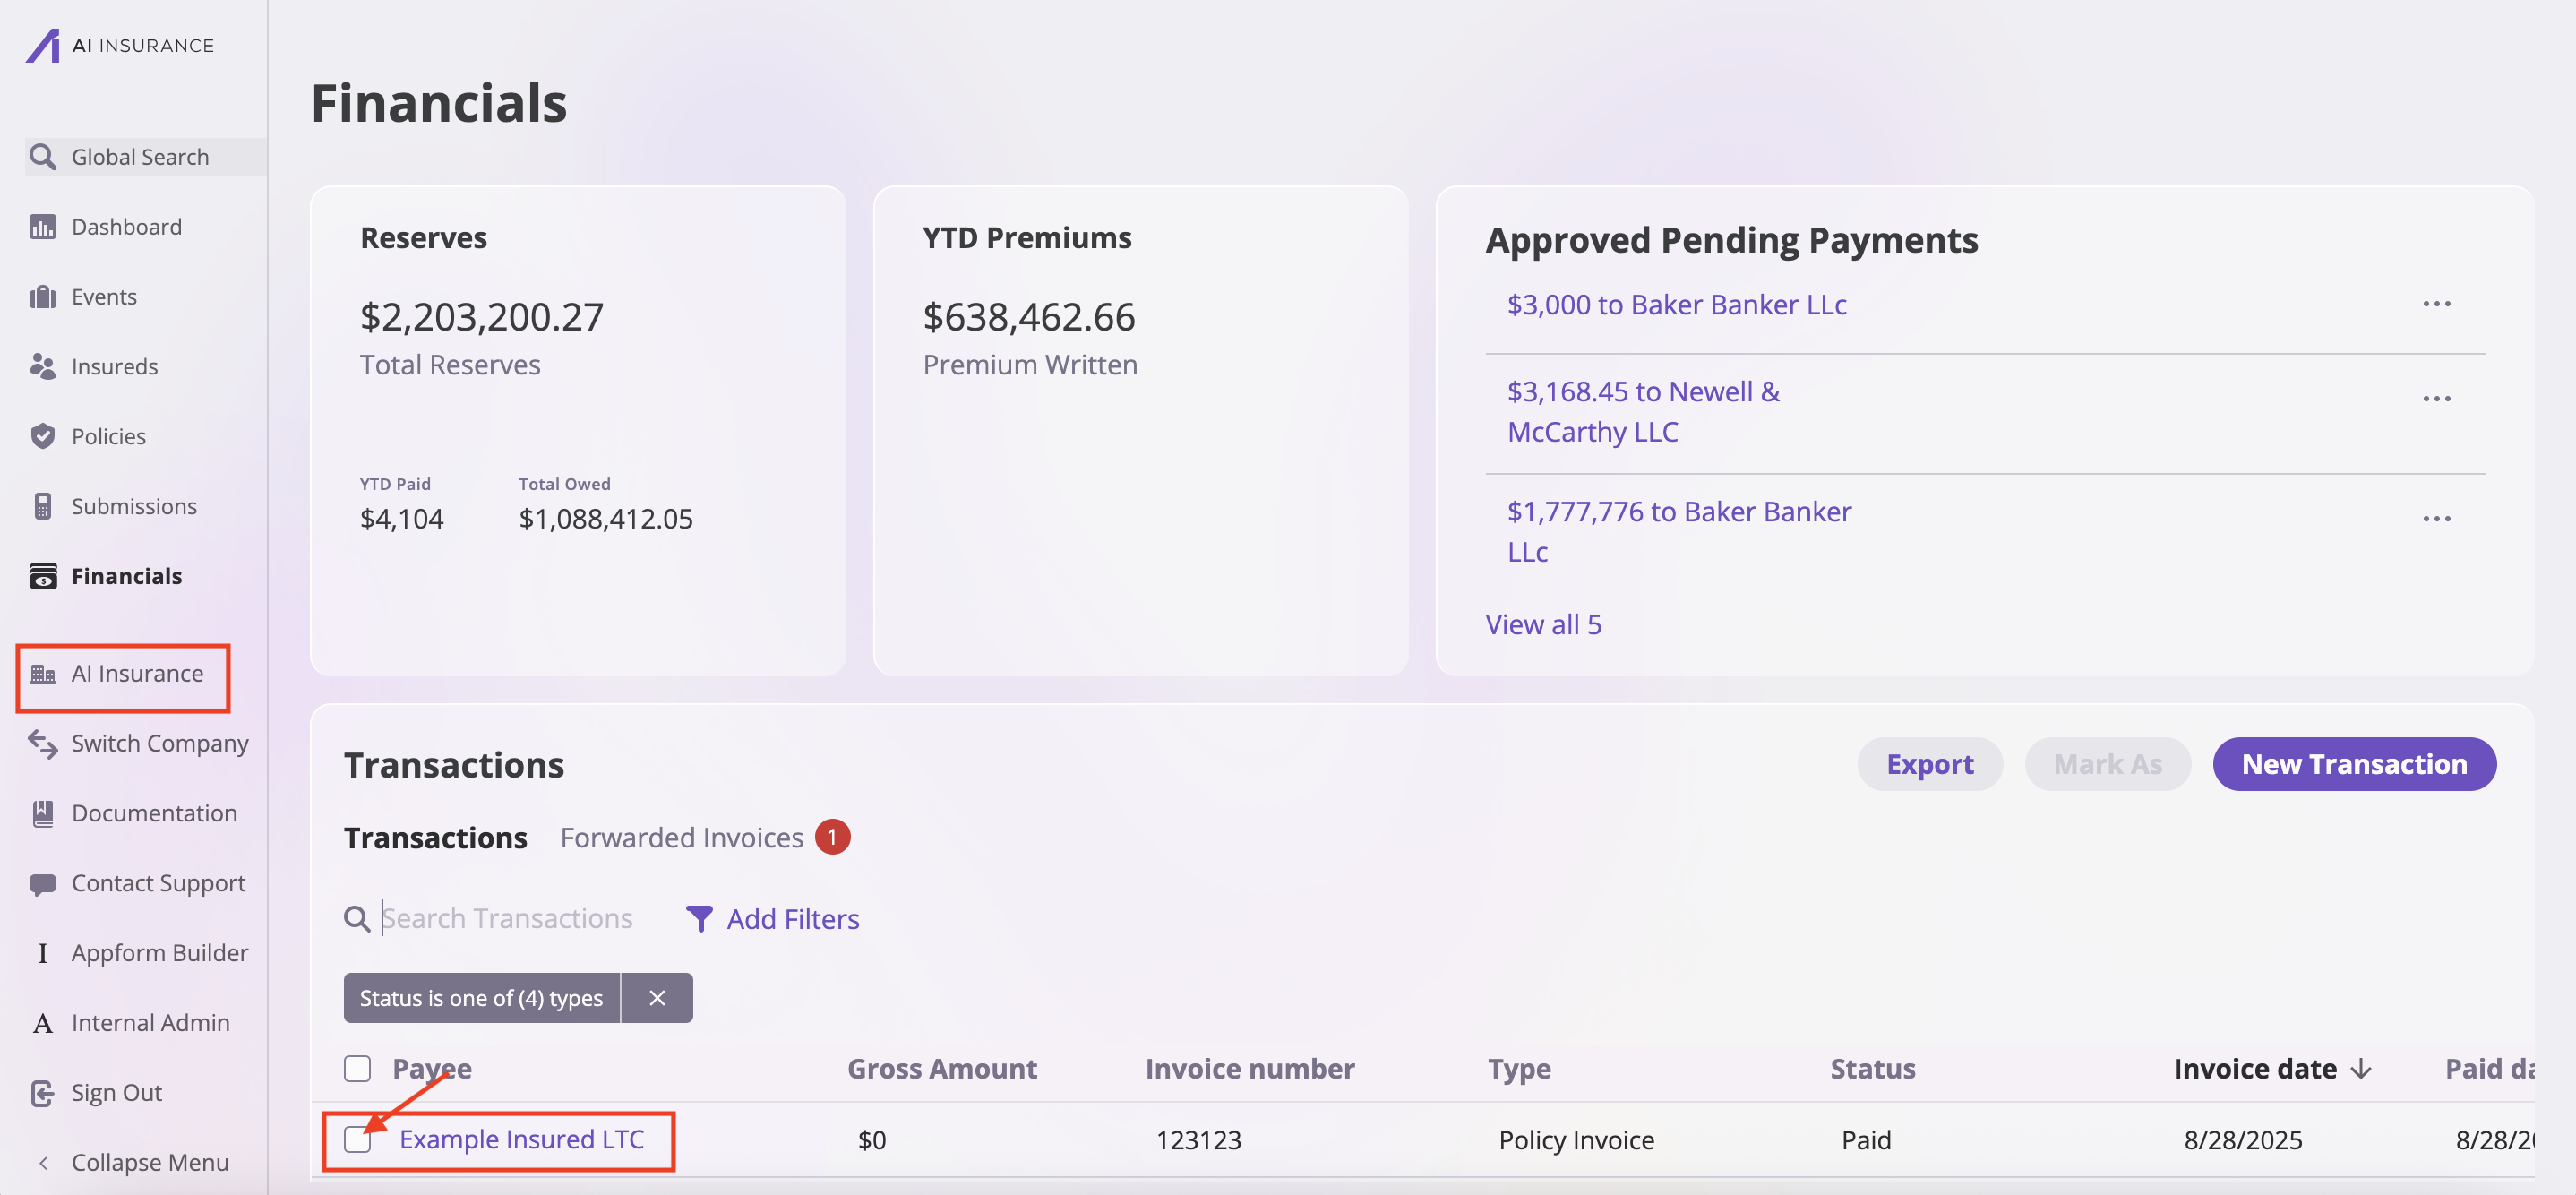 4. Select the box next to the invoice
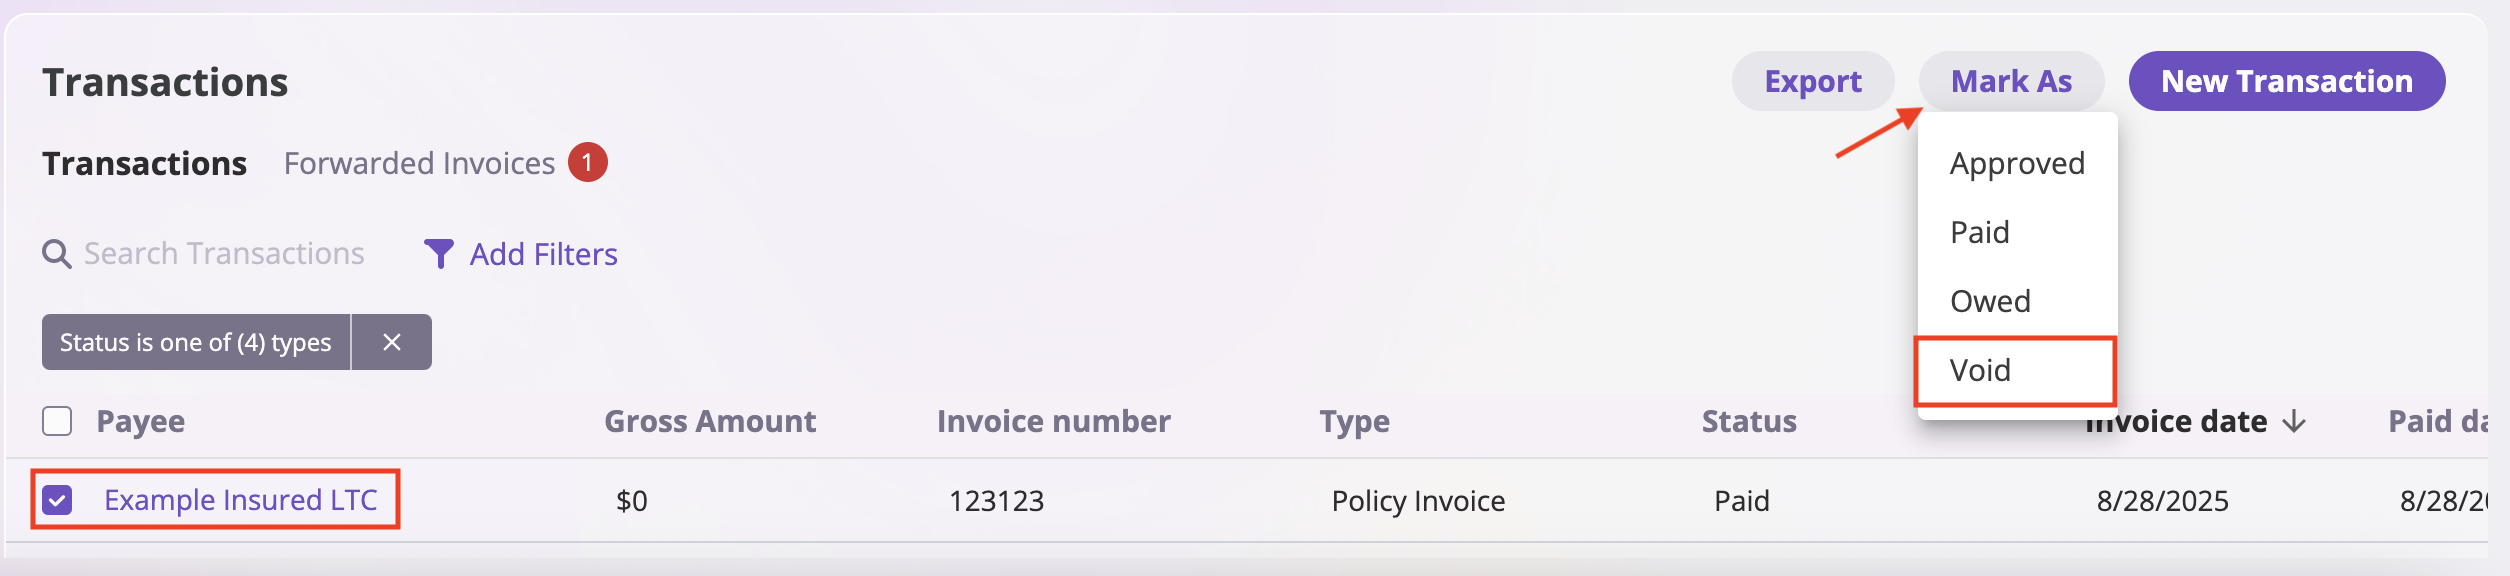
5. Click the **"Mark As"** dropdown button
6. Select **"Void"** from the options
7. Confirm the void action
4. Select the box next to the invoice
5. Click the **"Mark As"** dropdown button
6. Select **"Void"** from the options
7. Confirm the void action
 **Important**: Voiding an invoice cannot be undone. The original invoice will be marked as cancelled and will no longer be active for billing purposes.
### Step 2: Build Invoice Form and Apply to Policy
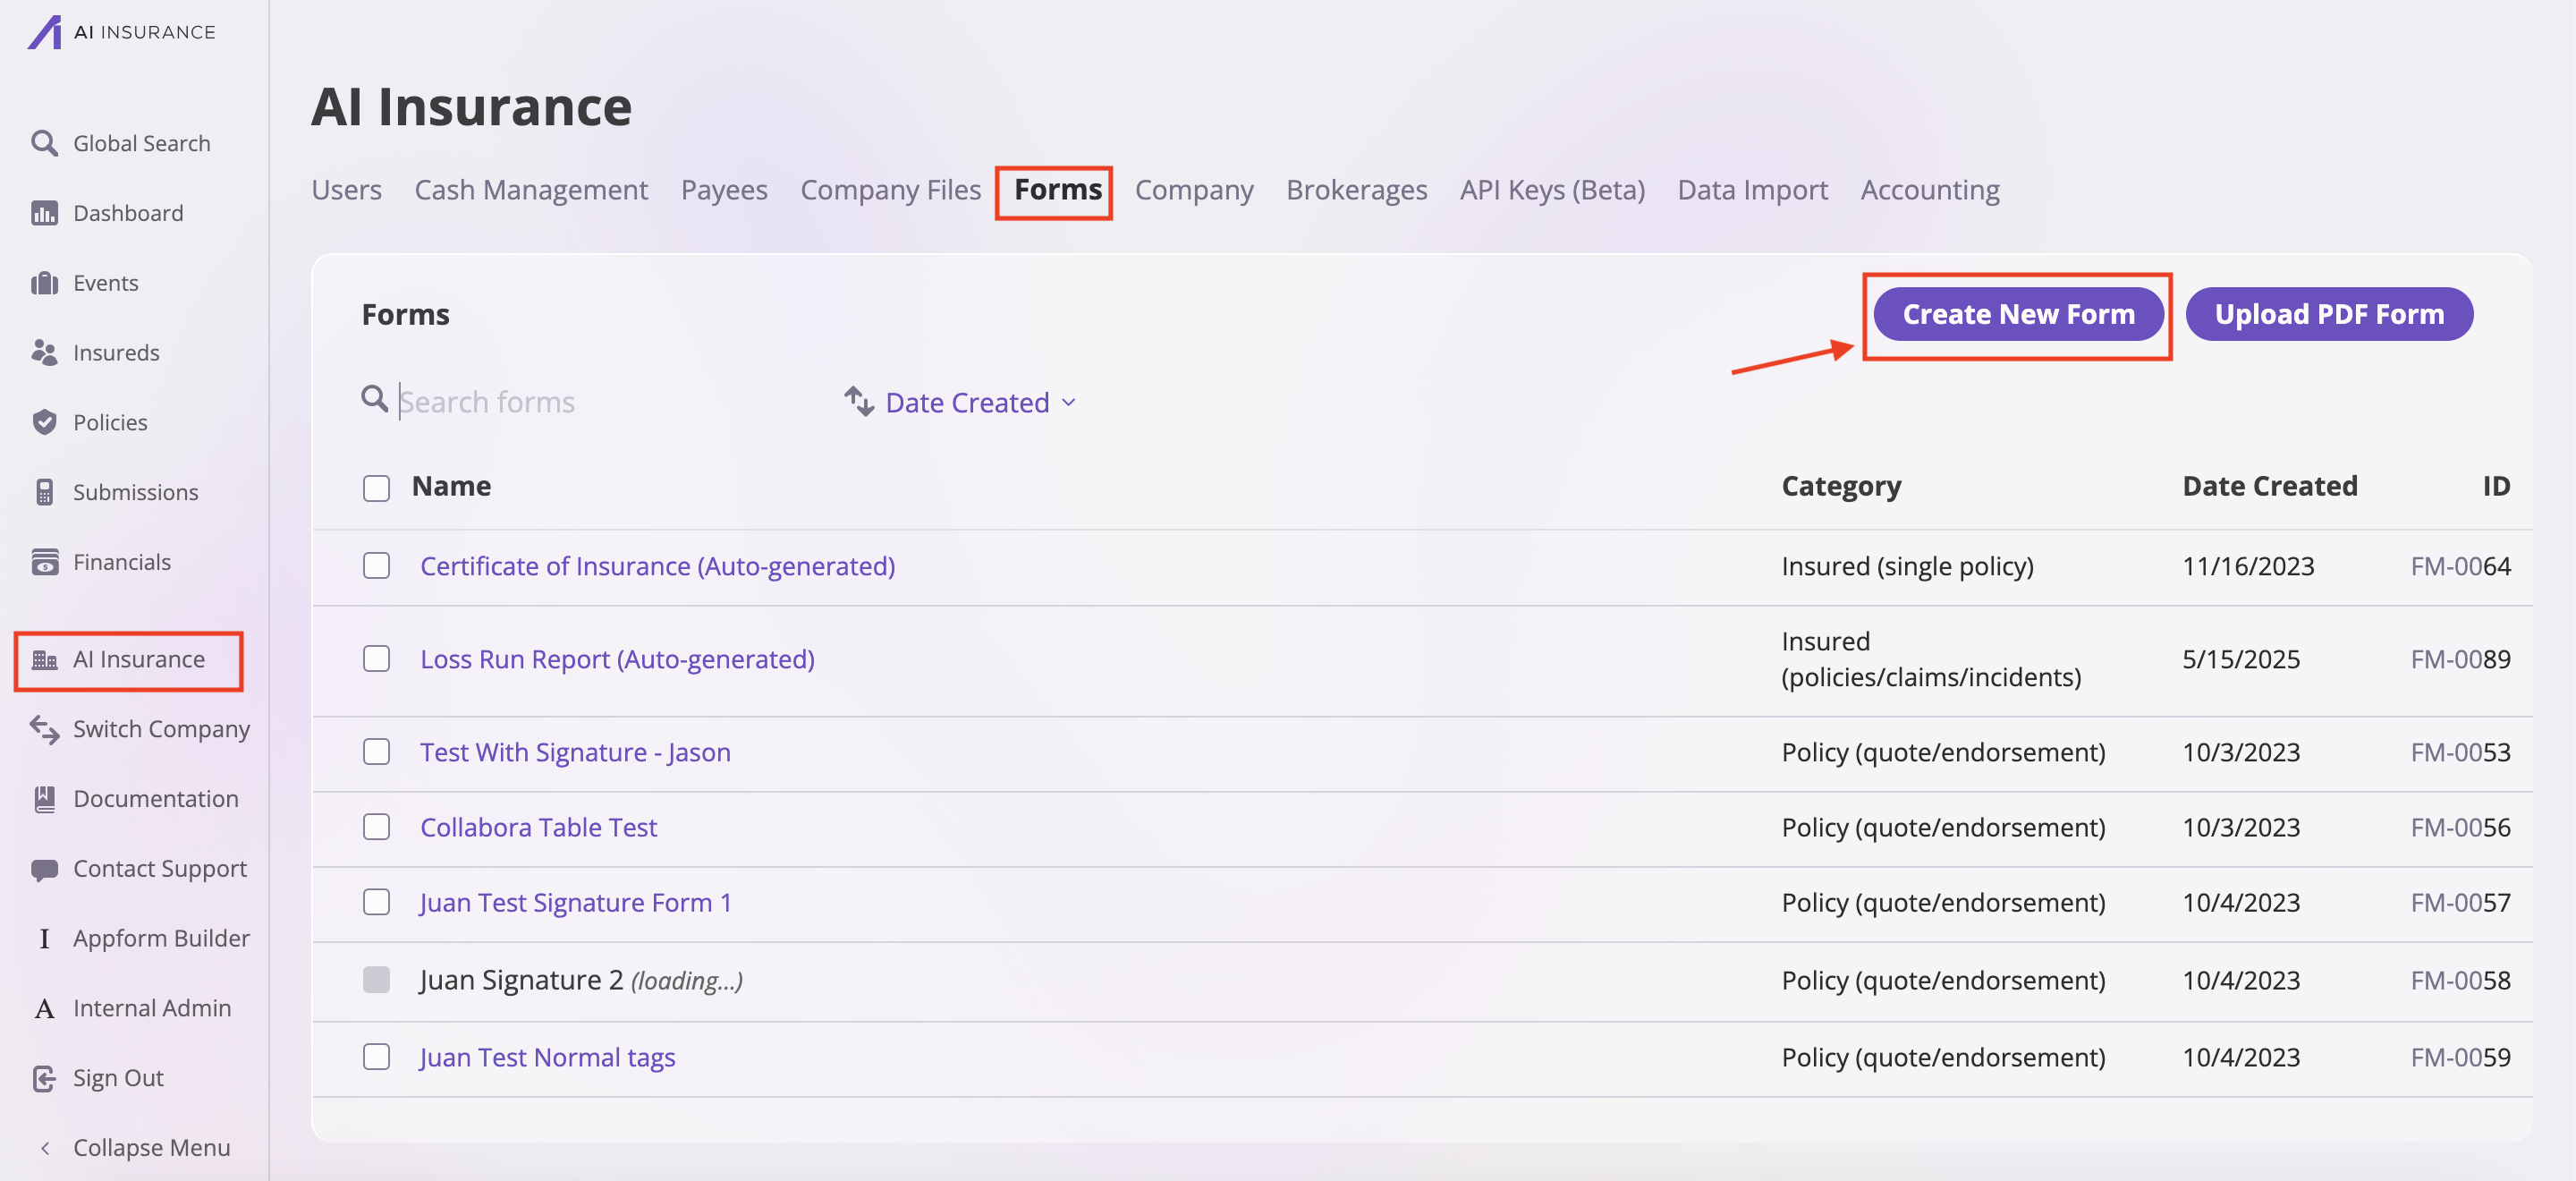
1. Navigate to your **Company** in the sidebar (click on your company name)
2. In the company settings, click on the **"Forms"** tab
3. Click **"Create New Form"** to build a new invoice form
**Important**: Voiding an invoice cannot be undone. The original invoice will be marked as cancelled and will no longer be active for billing purposes.
### Step 2: Build Invoice Form and Apply to Policy
1. Navigate to your **Company** in the sidebar (click on your company name)
2. In the company settings, click on the **"Forms"** tab
3. Click **"Create New Form"** to build a new invoice form
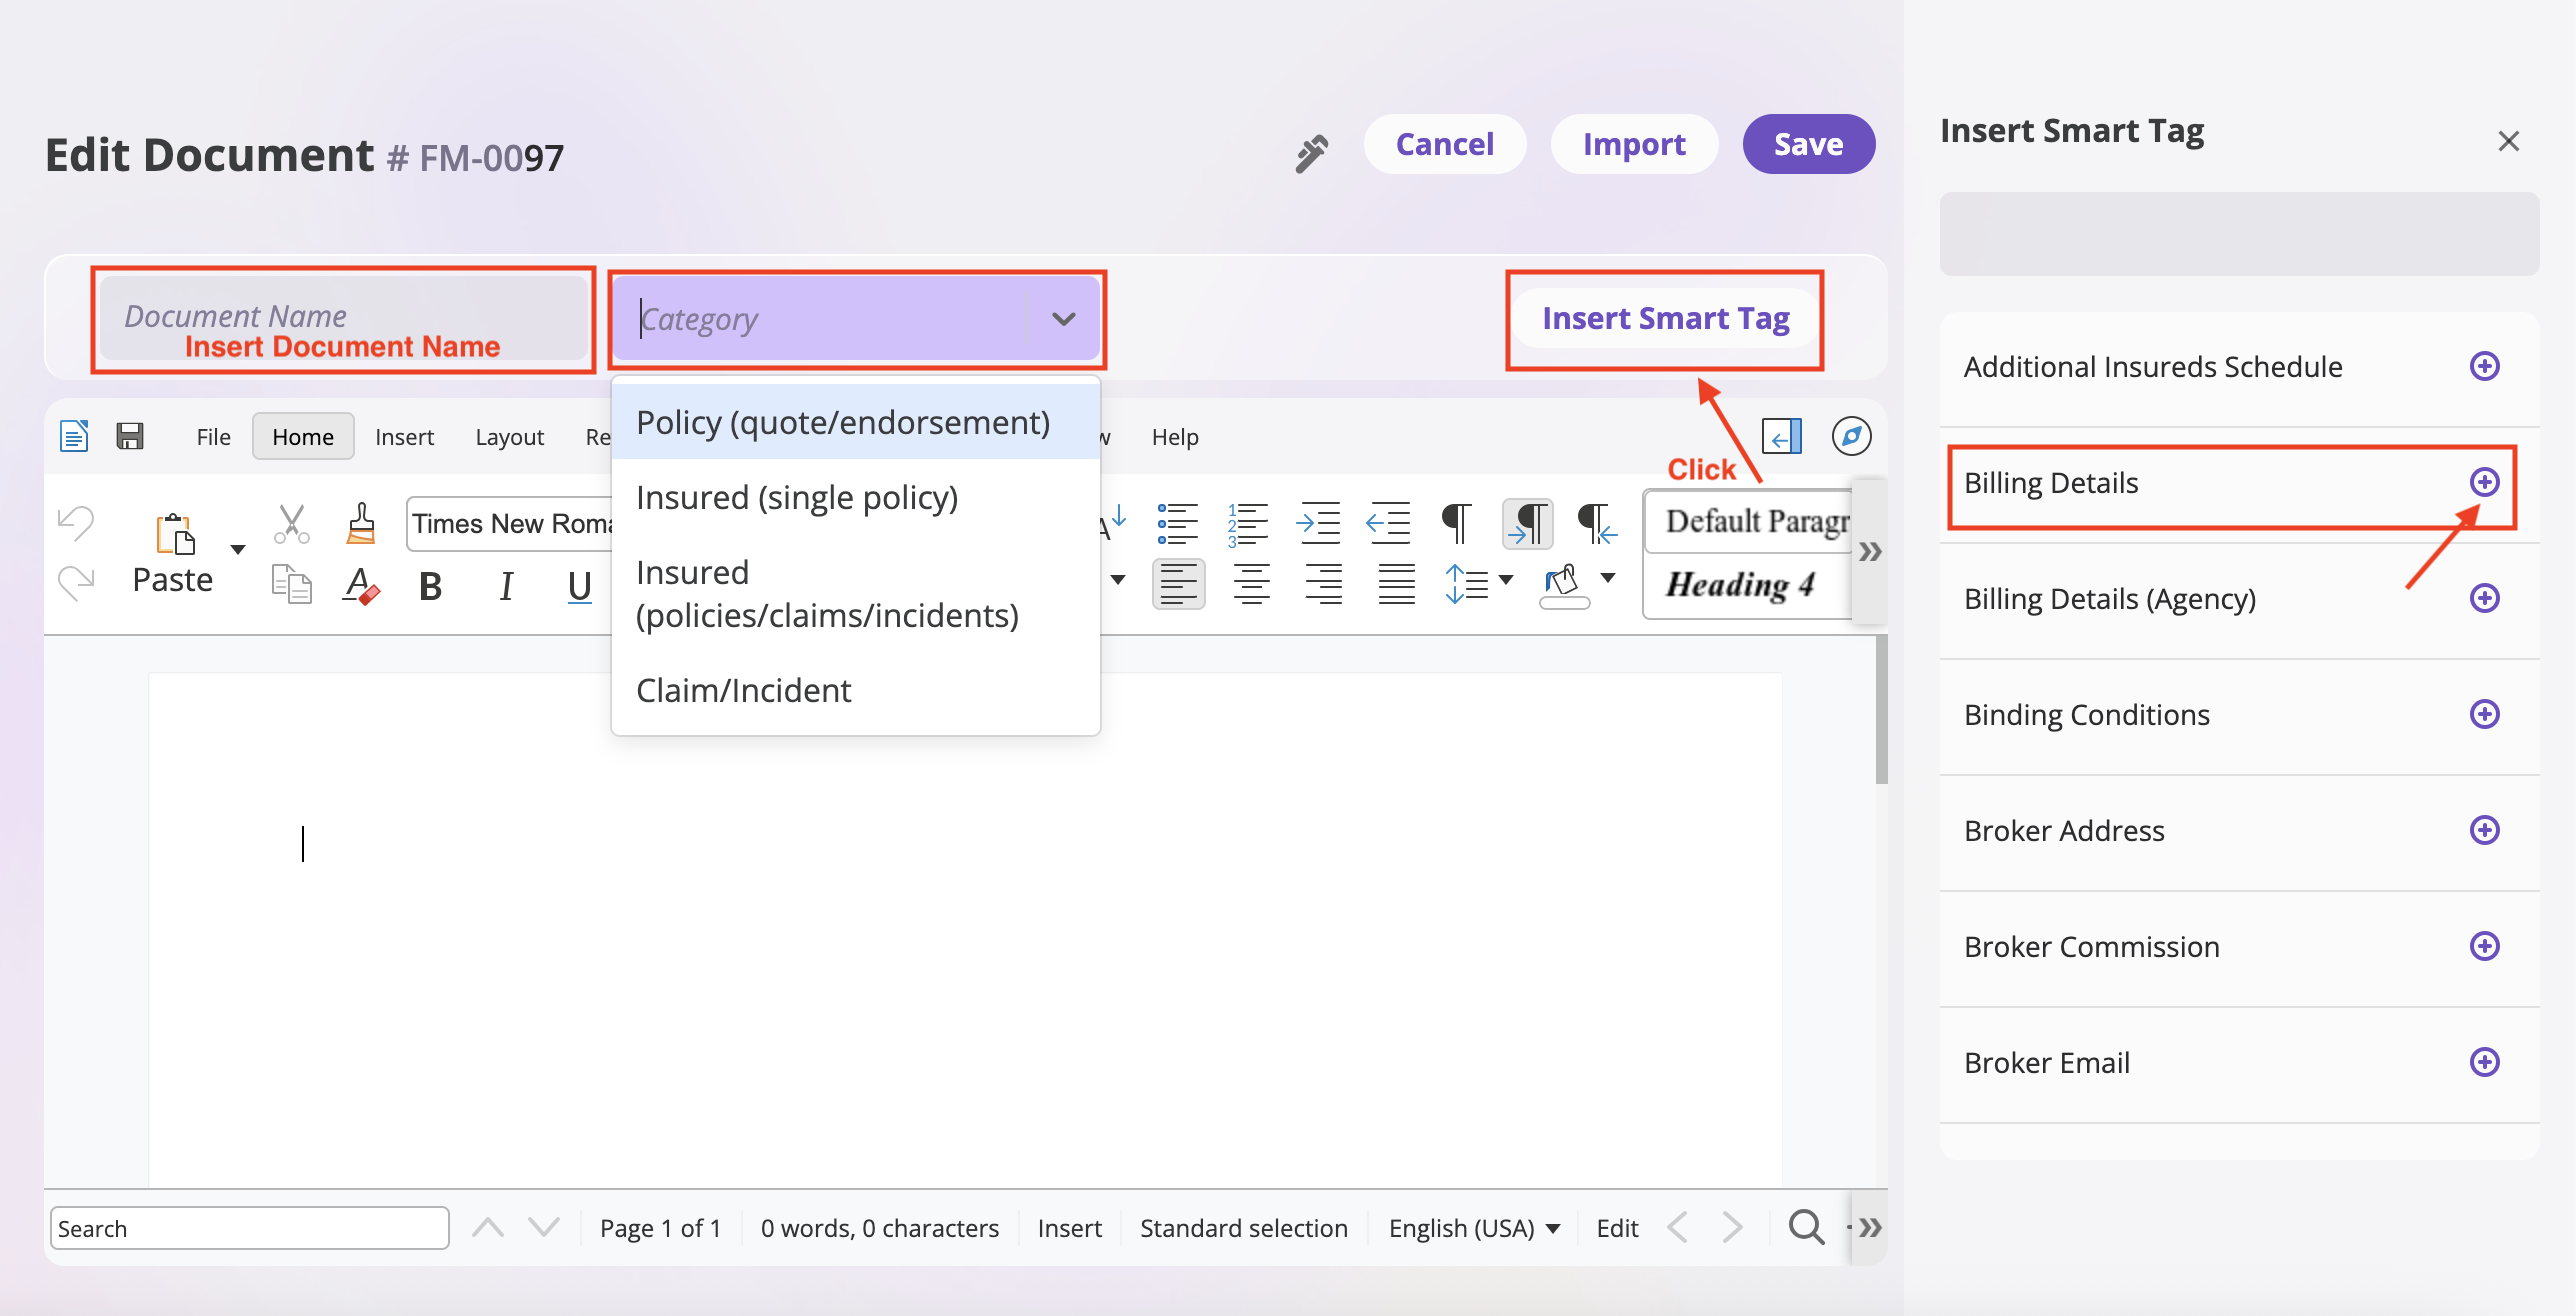
 4. In the form editor, click **"Insert Smart Tag"** button
5. Add the **Billing Details** smart tag with the correct name
6. Save the form as an "Invoice" type form
4. In the form editor, click **"Insert Smart Tag"** button
5. Add the **Billing Details** smart tag with the correct name
6. Save the form as an "Invoice" type form
 7. Navigate to **Policies** in the sidebar
8. Find and open the policy associated with the original invoice
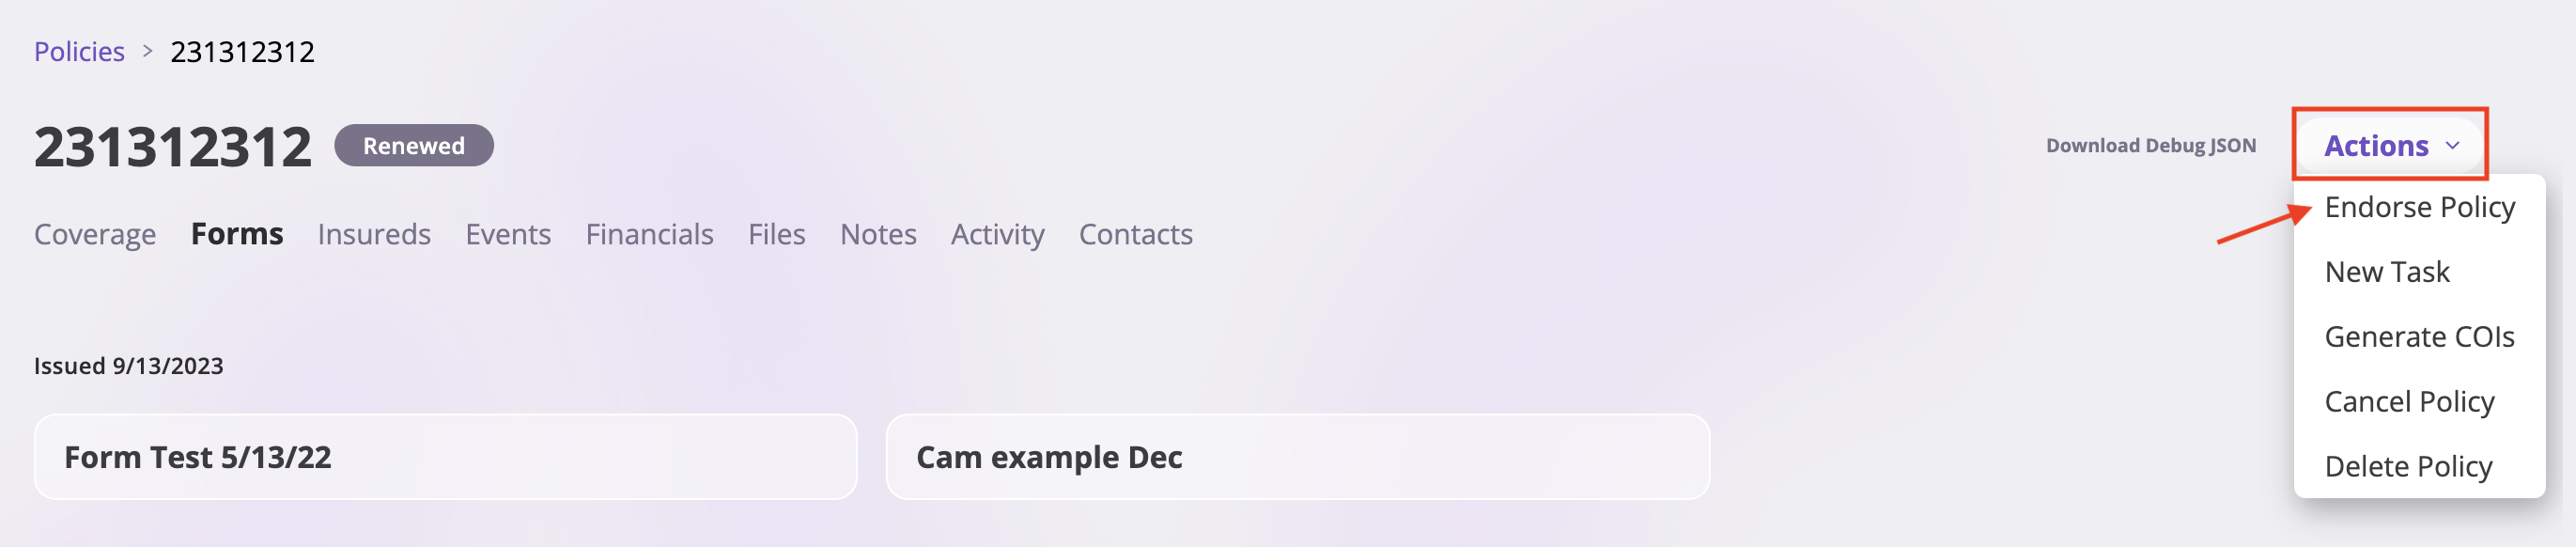
9. Click **"Endorse Policy"**
7. Navigate to **Policies** in the sidebar
8. Find and open the policy associated with the original invoice
9. Click **"Endorse Policy"**
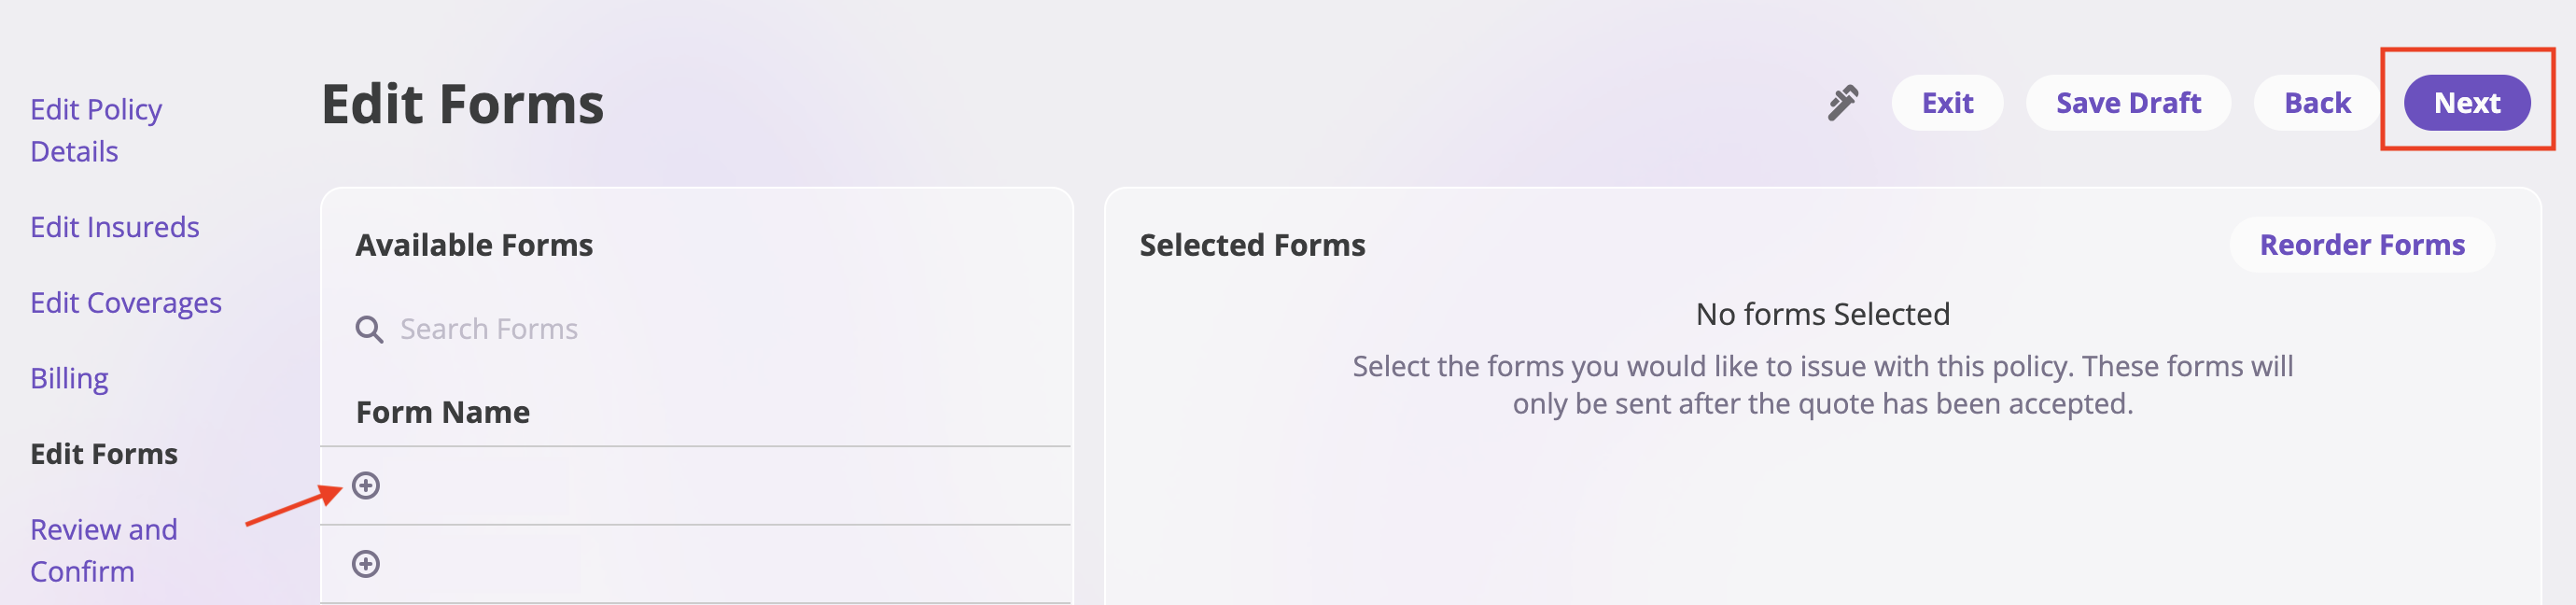
 10. Skip through the endorsement steps
11. Select the newly created invoice form when prompted
12. Complete the endorsement process
10. Skip through the endorsement steps
11. Select the newly created invoice form when prompted
12. Complete the endorsement process
 ### Step 3: Export the New Invoice
After completing the endorsement process, the new invoice will be automatically generated. You can then export it for your records or to send it to the client.
1. Navigate to **Financials** → **Transactions**
2. In the **Transactions** table, find the newly generated invoice
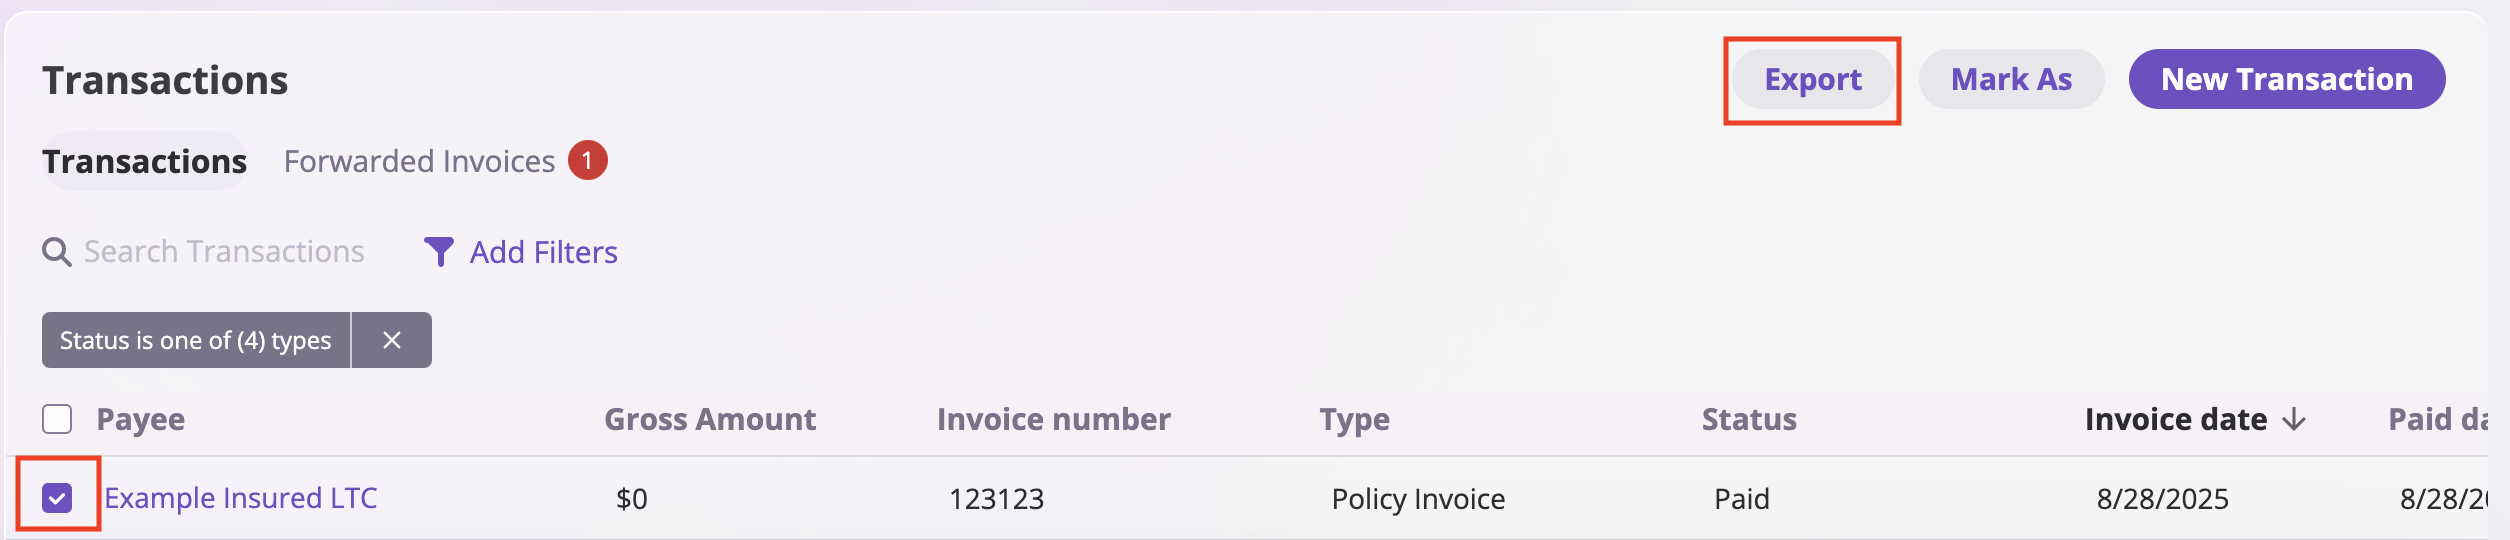
3. Select the invoice by checking its checkbox
4. Click the **"Export"** button
### Step 3: Export the New Invoice
After completing the endorsement process, the new invoice will be automatically generated. You can then export it for your records or to send it to the client.
1. Navigate to **Financials** → **Transactions**
2. In the **Transactions** table, find the newly generated invoice
3. Select the invoice by checking its checkbox
4. Click the **"Export"** button
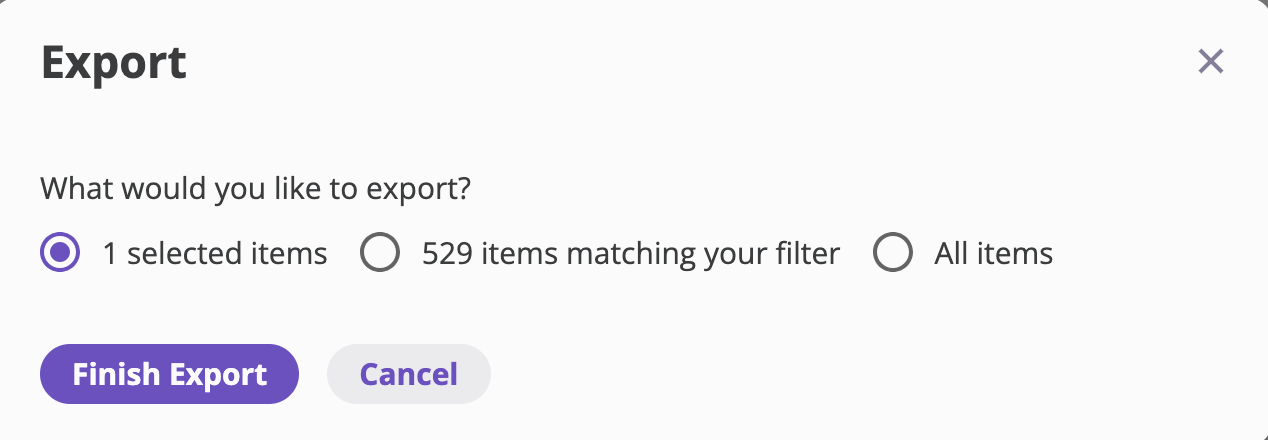
 5. An "Export" modal will appear, asking "What would you like to export?"
* Select **"1 selected items"** (this option will be pre-selected if you checked only one invoice)
* You can also choose "All items" if you wish to export more
6. Click the purple **"Finish Export"** button to download the invoice
5. An "Export" modal will appear, asking "What would you like to export?"
* Select **"1 selected items"** (this option will be pre-selected if you checked only one invoice)
* You can also choose "All items" if you wish to export more
6. Click the purple **"Finish Export"** button to download the invoice